Tag Archives: DIY

6 Ways to use Potatoes for Skin Care

6 Ways to use Potatoes for Skin Care

6 Ways to use Potatoes for Skin Care

By Aakriti

We all desire flawless skin. While some beauty products do give us temporary results , I for one tend to stay away from chemicals. I prefer to use enzymes and chemicals present in natural foods to address my skin skin care needs.

One such holy grail product in my vanity is potatoes.

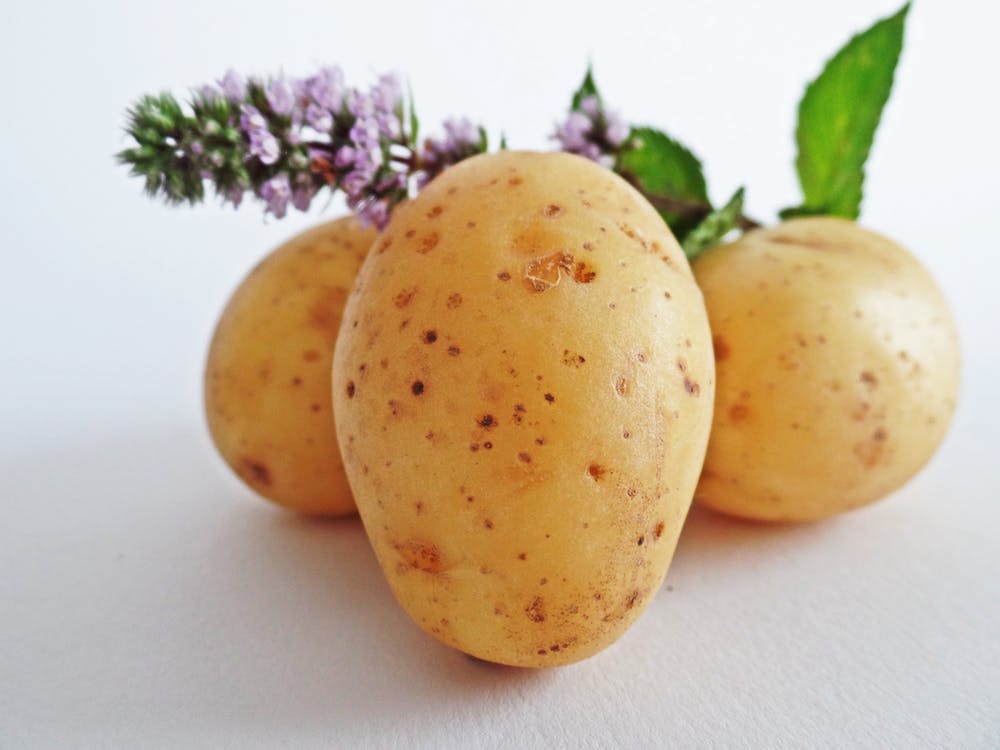
Since potatoes grow easily they are cheap as well as most likely to be organically grown. Potatoes are also packed with nourishing nutrients which can help address skin care needs if used in the proper way. Following is why potatoes are beneficial for the skin.

  • Potatoes contain potassium which helps to add moisture and hydrate the skin
  • They contain calcium which helps in healing dry skin
  • Calcium also helps to protect and renew the top layer of the skin
  • They contain an enzyme called catecholase which is responsible for reducing acne scars, blemishes and dark spots
  • They also contain magnesium which helps to fight free radicals which are responsible for causing wrinkles and fine lines
  • Topical application of potatoes provides some mild bleaching by reducing melanine production.

Below I have mentioned ways in which you can incorporate potatoes in your skin care routine-

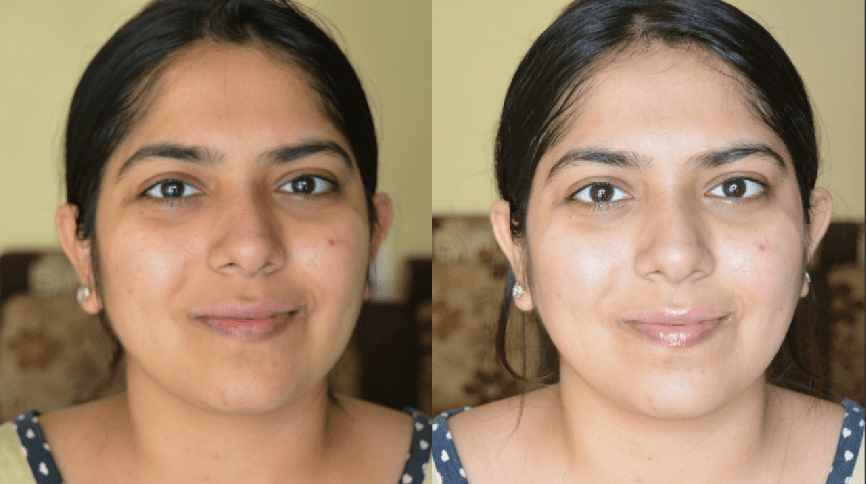
1. For removing tan and achieving an even complexion

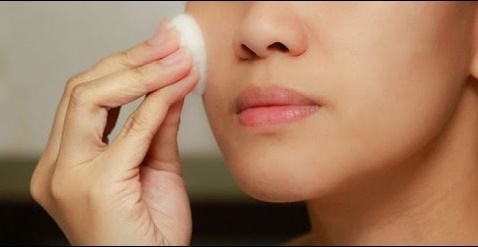
Cut a potato wedge and rub it in a circular motion all over the face. Let the juice sit for 15 minutes before rinsing it off with cold water. Alternatively, one can grate the potato and squeeze the juice. Apply this juice on the face and let it sit for 15 minutes before washing away with cold water.

The best time to do this is when using potatoes for cooking. This way you do not need to remember and prepare specially.

2. For treating dark circles

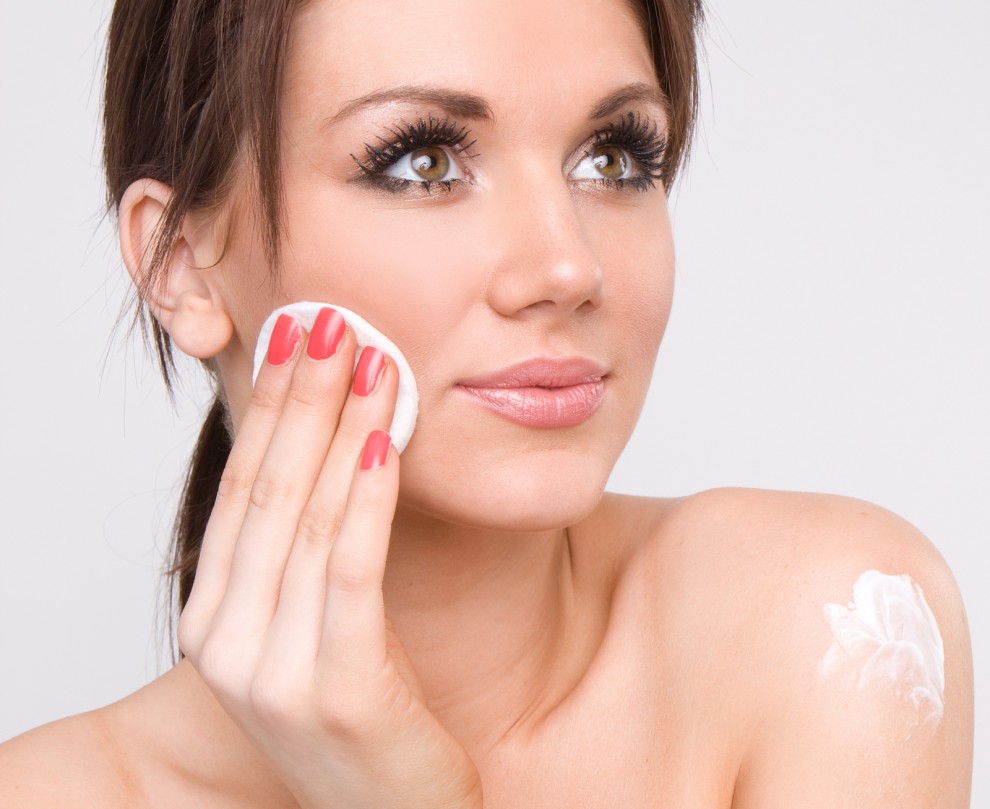
Grate about 1 tablespoon of potato. Apply the grated potato on the under eye area. Lay back and relax for 10 minutes. Wash with cold water. Regular application of this helps in lightening the dark circles significantly

3. Face mask for treating age spots and tan removal (dry skin)

Grate one potato and squeeze the juice from the grated potato. Mix one tablespoon of potato juice with two tablespoons of honey to prepare a face mask. Apply this evenly on face and neck. Sit back and relax for 20 minutes. You can combine this with the grated potato eye mask to use the entire potato at one time. Rinse away the mask after 20 minutes with cold water.

4. Face mask for treating age spots and tan removal (oily skin)

Grate one potato and squeeze the juice from the grated potato. Mix one tablespoon of potato juice with 1 tablespoon of fuller’s earth and 1 tablespoon of potato pulp to prepare a face mask. Apply this evenly on face and neck. Sit back and relax for 20 minutes. You can combine this with the grated potato eye mask to use the entire potato at one time. Rinse away the mask after 20 minutes with cold water.

5. Face mask for hyper pigmentation and tan removal

Grate one potato and squeeze the juice from the grated potato. Mix one tablespoon of potato juice with two tablespoons of tomato juice to prepare a face mask. Apply this evenly on face and neck. Sit back and relax for 20 minutes. You can combine this with the grated potato eye mask to use the entire potato at one time. Rinse away the mask after 20 minutes with cold water.

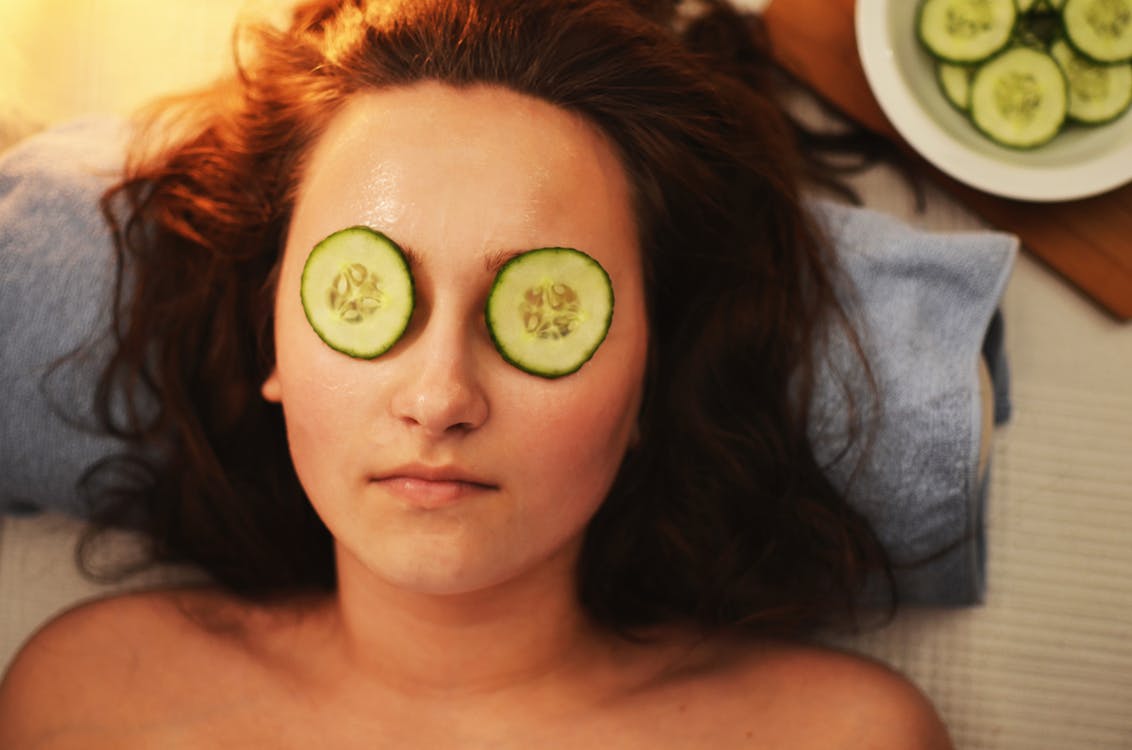
6. Face mask for glowing skin

Mix one tablespoon of potato pulp with one tablespoon of cucumber pulp. Add 1/2 a teaspoon of turmeric powder and 1/2 a teaspoon of lemon juice. Add in a few drops of rose water for toning. Apply this mask for a maximum 10 minutes before rinsing off with cold water.

One important point to keep in mind- After using any treatment with potatoes, avoid direct sun exposure for at least 3-4 hours and always apply sunscreen. ( This is because topical application of potatoes leads to mild bleaching of the skin)

Have you tried any of these?

P.S.: Images from Google. I don’t own these

4 DIY Powders For All your Skin Care Needs

4 DIY Powders For All your Skin Care Needs

By Aakriti

Hey Guys,

With all the focus on natural skin care now-a- days, natural skin care brands are cropping up everywhere. Everything from natural powdered face washes to body scrubs is being presented in fancy little jars. Our grandmas are not the only ones promoting these now!

Although these brands do feature promising deals, they do come with a hefty price tag. What if you could make the same concoctions in the comfort of your home without the ugly hole in your precious pair of denims? I am here sharing 4 do-it- yourself miracle powders which you can add to your multani mittis (fullers earth) and besan (bengal gram) and be assured of the purity of it.

I say it’ll do half the good to your skin just because of the psychology (in that being it is 100% pure without any preservatives and additives)

So here we go.

DIY Neem Powder

Grab a handful of neem leaves from a tree near you (they are easy to find, practically planted all over India). Or, if you’d rather not , than you can buy neem leaves easily. Wash them thoroughly with water and pat dry with a kitchen towel. Lay them out in a single file out in the sun for 1-2 days. They will crisp up (meaning all moisture will be soaked out). Now all you need to do is powder them in a food blender and store in an airtight jar.

This one wont get spoiled for years and years (provided you had been patient enough to let the sun do its magic)

Recipe for neem powder face mask:

You will need- 1 tsp besan (powdered bengal gram), 1 tsp neem powder, 1 tsp multani mitti (fuller’s earth) , a pinch of turmeric , 1 tbsp milk, a few drops of rose water

Mix all ingredients thoroughly for a glowing face mask

2. DIY Orange Peel Powder

Eat 3 oranges to get your dose of Vitamin C. Save the peel 😀 Lay them out in the sun to crisp up and shrink ( for all the moisture to be soaked out). Powder them in a food blender and store in an airtight jar.

This too will not get spoiled for years and years. (provided you had been patient enough to let the sun do its magic)

Recipe for orange peel face mask:

You will need- 1 tsp orange peel powder, 1 tsp neem powder, 1 tsp besan/ multani mitti, 1 tbsp
milk, a few drops of rose water

Mix all ingredients together for a weekend face mask.

3. DIY Cinnamon Powder

You will need : 4-5 cinnamon sticks, 1 pan

Warm up the pan on a medium flame. Toss in the cinnamon stick and roast them for one to two minutes. Remove pan from heat and let the cinnamon sticks cool down completely. Once cooled completely, powder them in a food blender. Store in an airtight container.

Recipe for cinnamon powder spot treatment

You will need- 1 small pinch cinnamon powder and 1-2 drops honey.

Simply mix the honey and the cinnamon and apply overnight on any upcoming pimples.

4. DIY Oats Powder

You will need a cup of quick cooking oats (I use Quakers quick cooking oats). Roughly blend the oats in a food processor and store in an airtight container.

Recipe for a skin softening and nourishing body soak/ foot soak :

Add a cup of oats to your warm your bath for a body soak. Add a couple of drops of an essential oil. For a foot soak, add 3 tablespoons to warm water and soak feet for 15 minutes. Powdered oats can also be used to replace your face wash. Simply use a tablespoon of powdered oats and work them in a circular motion on your face. Helps to keep skin clear of acne.

Hope you guys find some useful tips and use these homemade powders to create your own luxurious concoctions.

P.S: I do not own the images

5 ways to use Onions for Skin and Hair

5 ways to use Onions for Skin and Hair

By Aakriti

Hey Guys,

As odd as it may sound, onions are very beneficial for skin and hair treatments. These sweetly pungent dumplings are extremely effective for treating various skin and hair conditions if used in the right manner.

Onions are a rich source of vitamins A, C and E; sulphur and B-complex, thereby helping to improve blood circulation which in turn helps in rejuvenating a dull complexion and protects the skin from free radicals. Onions also contain a plant pigment known as quercetin which is known to be one of the most powerful antioxidants found in nature. Quercetin helps to fight free radicals which in turns protects our bodies from diseases. Onions also help fight acne since they are antiseptic and contain anti-bacterial, anti-microbial and anti-inflammatory properties. Onion juice helps in unclogging blocked pores which can help treat various skin and scalp conditions.

The best part about using onions for your beauty care is that they are a kitchen staple in most households and are easily available. They are also most likely to be organically grown unlike most other vegetables.

Below mentioned are some of the ways in which you can incorporate these pungent little beauties for your skin and hair care needs –

1. Acne Face Mask -Onion Juice + Neem Oil + Tomato Juice

Make a blend of 1 teaspoon onion juice with 1 teaspoon tomato juice and 2-3 drops of neem oil. Cleanse skin with a mild cleanser and apply this concoction directly all over the affected areas. Regular application will help to reduce inflammation as well as reduce acne scarring. Onion juice helps to kill the germs in the pimples thereby treating acne.

Also read: Benefits of Onion Juice for Hair

2. Anti-hairfall Hair root treatment- Onion juice + coconut oil or olive oil

Add 2-3 tablespoons of onion juice to 1/4th cup coconut oil or olive oil. Apply this in circular motion all over the scalp avoiding the length of the hair. Keep this mixture for 20 minutes before rinsing off with your regular shampoo followed by conditioner. This pack helps to strengthen hair follicles and stimulate healthy hair growth. Onion juice also helps to reduce and treat dandruff and promotes hair growth since it revives the hair follicles.

3. Face pack for rejuvenating dull skin- Onion juice + gram flour + milk + rose water

Mix 1 teaspoon of onion juice with 2 teaspoon of besan (gram flour). Add enough milk to make a thick paste. Optionally, you can add a few drops of rose water. Apply this pack all over the face and neck. Relax and lay back for 15- 20 minutes before rinsing away the pack with cold water. This mask works as an excellent homemade and natural skin exfoliator, thereby helping to rejuvenate dull skin.

4. Lip pack- Onion Juice + vitamin E oil

Mix a drops of freshly squeezed onion juice with a few drops of vitamin E oil. Apply this mixture on the lips and let it sit for 10 minutes. Regular application of this pack will make the lips soft and pink.

5. To treat insect stings and bites

Insect stings and bites can be very painful. Onions are very effective in treating insect bites and bug stings. In case of such an event, simply slice an onion and apply it on the affected area. This will reduce the inflammation, sting, pain swelling and itchiness caused due to insect bites or bug stings and calm the affected area.

TIP- To make onion juice, grind or mash one onion. Take this onion pulp and strain it through a tight wire
mesh to obtain onion juice.

How to Use Hydrogen Peroxide for Treating Acne

How to Use Hydrogen Peroxide for Treating Acne

By Sanchita

Acne and severe breakouts are worrisome. You have to make sure that the acne stops reoccurring time and again and also have to do something about the scars and blemishes thereafter. There are numerous home remedies, drugstore and various other products available in the market that claims to work on acne but finding that efficient one that will work on your skin is surely a gruesome task.

In today’s post, we are going to elaborate how hydrogen peroxide is used for treating acne. Also, keep in mind the side effects if you are using it in the wrong method.

WHY DO WE USE HYDROGEN PEROXIDE FOR TREATING ACNE?

Hydrogen Peroxide is mild bleach that work wonders for acne prone skin. If you are suffering from severe acne situation, this is the solution. It is anti-bacterial in nature and thus helps to kills the bacteria that cause acne and pimples. As we are all aware of the fact that acne is caused when your skin produces excess sebum, Hydrogen Peroxide works as a drying agent on the skin. It soaks up the excess oil from the skin and helps the pimples to dry out quickly.

Hydrogen peroxide loses its extra oxygen atom when applied to the skin. It takes an oxidization process which helps to create unfavourable bacterial environment, thereby stop the growth of bacteria and prevents acne. It is also helpful in peeling of the skin whereby the dead skin cells are exfoliated, revealing newer and healthier skin.

Also Read: More DIY posts HERE

THE RIGHT CONCENTRATION OF HYDROGEN PEROXIDE FOR SKIN

Hydrogen Peroxide is also found in various cosmetic products. As we have mentioned before that Hydrogen Peroxide is a chemical and it may harm the skin if you are using it wrong. The most important aspect is to but the right percentage of the product. One must never use Hydrogen Peroxide of more than 3% concentration on the skin. If you have bought more than that, make sure you add up adequate amount of water to it to bring down the concentration to 3%.

HOW TO USE HYDROGEN PEROXIDE FOR TREATING ACNE

1) To start the procedure, take off every layer of makeup or any other skin care products from the skin and wash off with a very mild cleanser. Make sure you massage the skin in circular motion with a cleanser to increase the blood circulation.

2) Next, you have to steam the face. This step is not needed for sensitive skin though. Take the steam from the boiling water (maintaining the right distance from the water container) and don’t steam the face for more than 5-6 mins. Do not pat dry the face post steaming.

3) Once the steaming is done, rub an ice cubes or splash the face with cold water to close the pores.

4) Take  hydrogen peroxide (not more than 3% concentration) and a clean and sterilized cotton swab. Dip the cotton swab in hydrogen peroxide and apply onto the affected acne areas. You may feel a slight tingling sensation. Once done, do not touch or wash the skin for some time to let the solution get absorbed naturally.

5) After 4-5 mins when the hydrogen peroxide has been absorbed by the skin, apply an oil free light moisturizer. Make sure that the light moisturizer is non-comedogenic and non-greasy.

SIDE EFFECTS AND CAUTION

  • If you have sensitive skin, consult your doctor before applying Hydrogen peroxide
  • The drying effect of hydrogen peroxide can be severe on the skin so be careful when you use and make sure you apply the right amount.
  • You cannot use this too often, it will dry out the skin.
  • The concentration should never exceed more than 3%.
  • If you experience severe itching, burning sensation, redness etc. then it is advised to stop the treatment right away.
  • Do not use hydrogen peroxide near your eyes.

Will you try using hydrogen peroxide for treating acne?

Aspirin in Skin Care, Benefits, Uses | Aspirin Face Packs for Various Skin Types

Aspirin in Skin Care, Benefits, Uses | Aspirin Face Packs for Various Skin Types

By Sanchita

When it comes to homemade face masks for acne prone, dry, oily, combination, pigmented, normal and various other skin types, we go for the kitchen ingredients like Honey, Milk, Besan, Lemon, etc. But have you ever wondered that Aspirin which is a common medicine for headache and fever can be an excellent remedy for skin problems which will work on all the skin types? Today’s post is all about Aspirin in Skin care and it’s benefits and uses. Also Aspirin Face Masks for various skin types

WHY ASPIRIN?

Aspirin contains the compound acetyl salicylic acid, a derivative of the salicin- naturally found in plants such as the willow tree. As we are all aware of the fact that Salicylic acid is an essential ingredient for treating acne and most of the acne control products has this Salicylic acid. It has antiseptic and anti-inflammatory properties which reduces acne effectively. Thus, for oily & acne prone skin and to remove the impurities from the pores, aspirin face masks work as a wonder. The various benefits of aspirin are listed down below.

  • Aspirin deep cleanses the skin when you gently scrub it, it helps to remove the whiteheads and blackheads.
  • It has antiseptic and anti-inflammatory properties that clams down the acne prone skin and prevents itchiness and redness.
  • It is also anti-aging that helps you to tighten the skin, fills in fine lines and smoothens wrinkles.
  • Aspirin helps in renewing dead skin cells & regeneration of skin, that makes it ideal for pigmentation problems such as age spots, sun tan and dark circles.

ASPIRIN FACE MASKS FOR VARIOUS SKIN TYPES

1. FOR OILY SKIN

Take a tablespoonful of aspirin powder (crush and make the powder of 5-6 aspirin tablets) and add half a tablespoon of activated charcoal powder. Add 1tbsp of rose water and form a smooth paste. Apply with the help of a brush even of the face and wash off after 20 minutes with cold water. The aspirin along with activated charcoal powder will absorb the excess oil from the skin without drying it out.

2. FOR DRY SKIN

Take two tablespoon of curd and one tablespoon of aspirin powder and form a smooth paste. Curd works excellent for dry skin and thus apply the face pack onto the skin and leave it for 10-15 mins. Wash off with normal water and pat the skin dry. Do this on alternate days to get smooth, hydrated and glowing skin.

3. FOR COMBINATION SKIN

Combination skin type can use the aspirin face pack alone. Simply crush and make the powder of 5-6 aspirin tablets or drop them into the water to form a smooth paste. Apply on face and rinse after 15-20 minutes. Do it at least twice a week for the best results.

4. FOR ACNE PRONE SKIN

Simply crush and make the powder of 5-6 aspirin tablets, add 2 drops of tea tree oil and one table spoon of water to form a smooth paste. Apply only on the affected areas. Wash off after 15-20 minutes and do it at least thrice a week for best results. Slowly the acne will fade away. Both aspirin and tea tree oil works like magic on acne prone skin.

More skincare DIY posts: Clear, Glowing Skin | Remove Tan & Dead Skin Cells | DIY Natural SkincareTry This Overnight DIY Serum For a Translucent GlowA Daily DIY Ubtan That Will Transform Your Skin Forever!

5. FOR AGING SKIN

Crush a bunch of aspirin tablets and add it to egg white to form a smooth paste. With the help of a brush, apply on the face evenly and wait for it to get dry. Once it starts to get dry it helps to firm up the skin, fill in wrinkles and smooth out fine lines on the face. Rinse off with warm water, pat dry and moisturize instantly. Do it at least twice a week for best results.

6. FOR PIGMENTED SKIN

Take 8-9 crushed aspirin tablets and add one tablespoon of apple cider vinegar. Form a smooth paste and apply evenly on the face. Leave it on for 20 mins and wash off with cold water. Pat dry and moisturize. Doing this three times a week will give you a glowing, even toned skin

7. FOR SUN BURNT SKIN

Take 8-9 crushed aspirin tablets and add one tablespoon of raw Aloe Vera Gel (use natural one preferably) and apply the paste onto the skin evenly with the help of a brush. The Aloe Vera along with the aspirin will soothe the sun burnt skin. Rinse off with cold water after 15-20 mins and apply any serum or gel on the face.

These are the amazing and easiest aspirin face packs for various skin types. I hope you try them out.

Have you tried Aspirin Face Masks before? Your experience?

Clear, Glowing Skin for Diwali | Remove Tan & Dead Skin Cells | DIY Natural Skincare

Clear, Glowing Skin for Diwali | Remove Tan & Dead Skin Cells | DIY Natural Skincare

Hi guys,

This is how I prepped my skin today for Diwali, using all natural skincare available at home. So read on to know how to get clear, glowing skin for Diwali

Step 1: Gramflour + Turmeric + Rose Water

For step 1, I take a mix of 1 tbsp gram flour, 1/4 tsp turmeric and 2 tsp rose water. Do not add too much of turmeric as that would stain your skin yellow. Add more rose water if needed.

Gramflour (Besan):
– Absorbs Oil
– Removes Sun tan
– Gently exfoliates
– Removes dead skin cells

Rose Water:
– Calms and soothes skin
– Reduces irritation & redness

Turmeric (Haldi):
– Anti Bacterial & Anti Fungal
– Prevents acne
– shrinks existing acne

The mix of these three is amazing, and is also the ubtan we use for Haldi ceremony in Indian weddings. Apply the mix all over face and neck and keep it for 10-15 minutes till it completely dries. Then damp/wet your hands and scrub the pack. Keep adding water to hands and scrubbing, this will exfoliate the dead skin cells.

Step 2: Shaving https://www.youtube.com/watch?v=flYn8iL5X5w

I have done a detailed video on how and why I shave my face, linked above. Watch the video for more information, you can obviously skip this step if you don’t shave. You can pluck some stray hairs with a tweezer, if you wish to.

Step 3: Yogurt + Honey

For the final step, I take a mix of 1tbsp yogurt and 1tsp honey and mix it well to form a smooth paste. Apply evenly on face and neck and keep it for 10 minutes before washing off.

Yogurt:
– Lactic acid gently exfoliates, natural  AHA
– Softens the skin
– Moisturises & Hydrates
– Removes tan & dead skin cells

Honey:
– Anti Bacterial
– Softens & hydrates skin
– Humectant & excellent moisturizer

If you can find raw organic honey, that is even better! If not, honey that is available will do.

That’s it! Easy and quick, with all natural and easily available ingredients. I loved the results and my skin was instantly softer, smoother and hydrated. I could definitely see a visible glow, do try this out and let me know how it works for you.

A Daily DIY Ubtan That Will Transform Your Skin Forever!

A DAILY DIY UBTAN THAT WILL TRANSFORM YOUR SKIN FOREVER!!!

By Ankita

Hello Mi Amigas

Today, I will spare you all my usual ramblings and get straight to the point. Reason? Can’t just wait to share it with you people. This really works!!!!! Ok, let me give you a brief analogy of my skin. I have a combination skin that tends to get oily in summers (and for some reason during "those" days of the month). Though I never had a serious case of acne, I used to get recurring pimples, every now and then. And those would leave nasty marks that just REFUSED to fade.

I tried a lot of DIYs, over the counter products and dermats. But in vain. Either it would dry my skin or make it even worse. Almost a month ago my skin started behaving extra naughty with pimples and eruptions on my forehead, chin, and some around the cheek bone. This is when I came across this awesome DIY daily face mask/ubtan recommended by my mother, which brought about a complete 180 degree change to my facial skin.

Results:

-My skin doesn’t AT ALL breakout

-It balances the oil on my skin

-I do not experience any dry patches

-Can definitely see a glow

-No more tans!!!

If you want to know more this recipe from my Mom’s kitchen please stay tune till the end 🙂

DIY DAILY UBTAN

You Will Need:

– 1 tablespoon neem powder

– A pinch of Wild Turmeric

– 1/3rd teaspoon Red Sandalwood Powder

– Enough raw milk to make a paste

How to make it:

1. Take a clean bowl and add the neem powder and red sandalwood powder to it

2. Measure and add about a pinch of wild turmeric.

3. Add in required amount of raw milk to make a paste

Application

1. Wash your face with a gentle cleanser

2. Run your washcloth under warm water and place it on your face till it cools down. Repeat this for 2-3 minutes.

3. Apply an even layer of the mask/ubtan on face and neck.

4. Leave it on till its semi-dry.

5. Wet your face with normal water and wash it off using very gentle circular scrubbing motions.

6. Pat dry your face with a clean towel and follow up with a gentle moisturizer or serum.

IS IT EFFECTIVE?

You can expect results such as

– instant glow on face

– brightening of dull skin

– removes tan effectively

– a subtle smoothness to skin.

-reduction in skin inflammation, pimple, and irritation if used on a regular basis

WHY THESE INGREDIENTS??


1. Neem: This humble plant has anti-fungal and antibacterial properties. Being a natural astringent it fades scars and keeps skin taught and smooth. Neem also contains salicylic acid that fights acne. Not to mention the carotenoids that give the skin a healthy and beautiful glow.

Available HERE

Priced at: 249 INR for 200g


2. Wild Turmeric: Also known as Kasturi Manjal, this has been a part of every ayurvedic skin remedy. It has anti-oxidants, anti-inflammatory, anti-septic and anti-bacterial properties. This is a champion when it comes to skin brightening and even fades away dark spots very effectively. On regular use, it is known to remove facial hair and render a smoothness to skin.

Available HERE

Priced at: 330 INR for 250g


3. Red Sandalwood Powder: Referred to as Rakt Chandan, it is a must in everyone’s ‘Puja Ghar’ Unlike its white cousin, it doesn;t have any aroma and comes with a reddish tinge. But do not be afraid, it doesn’t stain your skin. With its many medicinal properties, it nourishes the skin and gives it a more radiant, even, and age-defying complexion. It also helps to remove acne, scars and other signs of premature aging.

Available HERE

Priced at: 199 INR for 100g

4. Raw Milk: Raw milk works wonder for skin. Packed with B-vitamins, alpha hydroxy acids, calcium and other potent antioxidants, it nourishes skin cells from deep within and provides ample amount of moisture to the skin. The lactic acid present in skin, removes tan, fights free radicals and helps in maintaining an ageless look.

HOW OFTEN AND WHEN DO I USE IT

Using it before bath time would be a great idea, however, you can use it at any time of the day. Use this once daily to see great results in two weeks.

IS IT SAFE FOR SENSITIVE SKIN

It is 100% safe for any skin type, however, it is always wise to go for a patch test first. The reason I call this face pack an Ubtan is, it gives you that bright glow from within, making the skin look a 100 times healthier. I would HIGHLY recommend all my readers to try it once and see the magic.

Trust me, ladies, you are going to thank me for this. I would love to hear your experiences and comments regarding this ubtan. Stay hydrated and stay gorgeous 🙂

Editor’s Note: This sounds really good Ankita, I will definitely try this!

Have you tried DIY Ubtans at home?

Try This Overnight DIY Serum For a Translucent Glow

TRY THIS OVERNIGHT DIY SERUM FOR A TRANSLUCENT GLOW

By Ankita

With the changing environment and lifestyle, there is no escaping from skin issues. The good old CTM works, no doubt. However is it good enough? I won't agree to that. Hence, serums came into being. The usual cleansing-toning- moisturizing regime is now better replaced by cleansing-toning- TREATing-moisturizing. This is where the serums come into action. You can pretty much say in an Army of soldiers, they are the marines, employed for specific target oriented operations. Let’s have a look at them,

WHAT IS A SERUM

Face serums are lightweight moisturizers with a gel or light lotion consistency and have a higher concentration of ingredients meant to provide more effective and focused results.

HOW TO USE

These are used after cleaning and toning then face. Pat on the serum on with the help of your finger, gently dabbing and pushing it into the skin

SO…I CAN SKIP MY MOISTURIZER RIGHT?

Absolutely not. Serums are an addition to your CTM (Cleansing-Toning- Moisturizing) and no way substitute a moisturizer. They have targeted action and address a specific skin issue such as acne, hyper-pigmentation, aging etc.

There are tons and thousands of serum available in the market, and I won’t deny they don’t work. They definitely do. But, wait for it!!!What if I told you, you can make one in a jiffy, that won’t cost you gazillion bucks and works just as fine as any other serum? Actually more than fine. Shall I say….works BRILLIANT.

Ready? Ladies and Ladies, I give you my magic potion

DIY OVERNIGHT GLOW SERUM

YOU WILL NEED:

-4 drops of Virgin Coconut Oil

-4 drops of pure rose water

-a pea sized amount of pure aloe vera gel

PROCEDURE:

1. You do not need a bowl for this as it is better to use it fresh every day. Take 4 drops of Virgin Coconut Oil on your palm.

2. Add in a pea sized amount of aloe vera gel

3. Now finally add in 4 drops of rose water and mix all the ingredients with your fingers till they become an emulsion.

HOW TO APPLY

1. Dot it all over your face and neck and massage with very light hands in upward-outward motions, till you are satisfied that the skin has completely soaked in the product.

2. Follow up with a very light weight moisturizer and have off you go to bed Sleeping Beauty.

IS IT EFFECTIVE?

1. This serum works greatly towards brightening the skin and especially fading away dark spots.

2. Gives you healthy illuminating glow.

WHY THESE INGREDIENTS??

Virgin Coconut Oil: Cold pressed Virgin Coconut is a boon for the skin as it helps to improve certain skin conditions by healing wounds and reducing rashes. Its anti-inflammatory effect works wonders for soothing skin ailments. VCO contains Lauric Acid that helps to combat acne and even is a great whitening agent.

Priced at: 350 INR for 500ml (Buy HERE)

Rose Water: With its anti-inflammatory and skin soothing properties, rose water is the life saver for irritated skin. Apart from being an excellent skin toner, it also brightens up the complexion and makes the skin more radiant and even.

Priced at: 150 INR (Buy HERE)

Aloe Vera: Aloe Vera contains vitamins, minerals, amino acids and antioxidants that work wonders for the skin. Application of aloe vera speeds up the process of healing of burns, lightens blemishes, reduces acne and also prevents wrinkles. It even acts as a great natural moisturizer.

Priced at: 250 INR for 100ml (Buy HERE)

HOW OFTEN AND WHEN DO I USE IT

Use it once a day, before you go to bed. You have to be consistent with the use to see great results, in less than a month.

IS IT SAFE FOR SENSITIVE SKIN

It is 100% safe for any skin type, however, it is always wise to go for a patch test first. In case you experience any irritation (which most probably you won’t), do not use it further.

Here is a little after picture of me. Unfortunately, I don’t have any before picture as I had never planned to write this piece. After a month of usage, it has reduced my marks and scars to a good extent.

In this image, I have washed my face with cold water, put on some lip gloss and tight-lined my upper lash line.

Why spend a portion of your kidney, if you can have it done at the comfort of your kitchen? Without a question of doubt, I honestly ask my dear readers to give this DIY serum a try and see the results for yourself.

However, you must not forget these few pointers:

1. Cut out processed food as much as possible from your diet.

2. Stay hydrated and stay away from aerated drinks

3. Nothing!!!!!can substitute a good beauty sleep of 6-7 hours.

Please come back and let me know your experience with this serum. Any suggestions, comments, and ideas are always welcome 🙂

Editor’s Note: You have amazing and flawless skin Ankita. I love DIY’s and would be surely trying this too.

Do you love trying DIY’s? Will you try this?

Fenugreek (Methi) for All your Skin Issues

Fenugreek (Methi) for All your Skin Issues

By Nidhal

Mortified of those pesky pimples making a peek-a- boo every time you have to get ready and paint the town red or when you have an indispensable event and you just can’t miss it? Exhausted with trying every over-the –counter trick or product on those acne scars of yours that have sworn never to leave your skin? Dissatisfied with every spot/blemish removal cream in the market which promises you flawless skin within minutes but ends up burning a hole in your pocket in a minute instead of doing what it actually promised to?

To tackle all these woes, let us simply turn back to Nature. The wonder ingredient that we would be relying upon today to preen ourselves is none other than the 5 lettered word whose benefits would surpass your imagination- METHI.

1. METHI POWDER, CURD & ROSE WATER MASK

Apart from reducing cholesterol, preventing diabetes and increasing breast milk, fenugreek aka Methi seeds and leaves are widely used in Indian households. Curd works well to remove dryness, tan and dullness off your skin. Rose water works wonders as a toner. And do I need to say more on its heavenly aroma? Naah! You guys might already by picturing it being sprayed on your skin while you unwind during your weekend spa (or at-home spa session) by now, right?

PROCEDURE- In a clean and dry blender, grind 4-5 tbsp of methi seeds till a fine powder is obtained. In one heaped tbsp. of methi powder, add a tbsp. of curd and adequate rose water to liquefy the concoction slightly. Do not add rose water in excess because curd too has whey which being a liquid will make the process of application arduous if rose water is added with abandon.

Mix well, apply on your face and neck. Avoid eye area. Wash off after 15 minutes with ample cold water. This pack will give you instantly brightened skin.

2. METHI POWDER & NEEM DECOCTION MASK

Vitamin A housed in fenugreek (methi) and incorporated in cosmetic products can treat a variety of skin disorders like acne, eczema, psoriasis and blackheads. Neem, by the virtue of having antimicrobial, anti-fungal and anti-bacterial properties helps you bid adieu to pimples and acne. Guess what a combo of the two can do to your skin?

PROCEDURE- In a heaped tbsp. of methi powder, add sufficient neem water and mix well to form a smooth paste. Preparing neem water is a piece of cake. How? Just boil 8-9 Neem leaves in half a litre of water on the stove. When the colour of the water changes to dark green, switch off the stove. Let the water cool. Strain the water and discard the leaves. You water is ready! Told you it was a cakewalk.

Apply the mask on your face and neck. Let it dry. Wash off with cold water. Repeat once daily. This mask is a Holy Grail mask for those with oily skin.

3. METHI POWDER, BESAN FLOUR, HALDI & MILK MASK

The antioxidant properties of vitamin C in methi can help you from UV rays and prevent aging wrinkles. Fenugreek is rich source of vitamin K. Assorted properties in vitamin K help to treat stretch marks, spider veins, fade scars and reduce dark circles. Besan works to sort sallow complexion and Haldi (I recommend Amba Haldi and Kasthoori Manjal for both of them are specifically meant for skin care and not for cooking). Milk is enriched with lactic acid hence, helps in lightening one’s scars, spots and marks.

PROCEDURE- In a heaped tbsp. of methi powder, besan and a pinch of haldi, add adequate amount of milk to forma consistent paste. Mix well. Apply on your skin. Let it dry and then wash off with cold water.

Editor’s Note: These are some really good DIY masks, would surely try some.

Do you use methi for your skin?

DIY Vegan Hair Mask for Soft & Healthy Hair

DIY Vegan Hair Mask for Soft & Healthy Hair

Guest Post by Louisa

We all know that eating foods which are rich in vitamins and minerals is essential to achieve healthy looking hair. But you can also give your strands a boost by applying natural fruits and oils on your hair. See how easy it is with my simple vegan hair mask.

As traditional shampoos contain harsh detergents and chemicals, I only use the best organic shampoos and conditioners to make sure I’m using gentle cleansing agents made with natural ingredients. This way I’m not undoing any of the goodness delivered by my hair mask treatment.

Avocado

Using avocado in a hair mask is a great way of infusing your hair and scalp with moisture. It has so many beneficial properties they are difficult to count, and include potassium, amino acids, vitamins and minerals.

If you’ve noticed any new hair takes a long time to grow, it could be due to a nutritional deficiency. Avocado is the perfect way to nourish hair cells, strengthen roots and encourage new hair growth.

Banana

Adding banana to a hair mask is a great way to rejuvenate your hair. They are as good for your hair as they are for you to eat, and can help soften hair and protect its natural elasticity.

Bananas deliver Vitamin A, B, C, E, potassium, zinc, iron and magnesium. These nutrients can help repair and condition hair, making it softer and more manageable, as well as helping to protect from damage caused by heat styling or harsh weather.

Coconut Milk

Coconut milk has excellent moisturising properties, and acts as a natural detangler. It contains healthy fats which can be beneficial for stimulating hair growth, as well as repairing hair that feels dull or damaged.

Massaging coconut milk into your scalp can help improve blood circulation and promote healthier roots. It also has natural antifungal properties which can fight Malassezia, one of the main causes of dandruff.  

Coconut Oil

Coconut oil is one of the best multitasking hair care products around. It can help strengthen hair, condition your scalp and even stimulate new hair growth. It is rich in antioxidants, vitamins, minerals and lauric acid, and effectively penetrates the hair shaft to deliver these nutrients.

Applying coconut oil before exposing your hair to heat or chemical treatments can help protect it from drying out, and also acts as a natural sunscreen. It’s the perfect ingredient to use in a moisturising hair mask, and will make it easier to brush out any tangles and control frizz.

Olive Oil

Olive oil contains oleic acid, palmitic acid and squalene, which are natural emollients with softening qualities. Many products contain synthetic versions of emollients, but they aren’t as effective in penetrating the hair shaft to help retain natural moisture.

Undernourished hair can be hard to style, and often breaks when you’re trying to work through tangles. Olive oil can smooth cuticles and split ends, which helps to reduce frizz and makes hair more manageable.

Ingredients

– 1/2 Avocado

– 1/2 Banana

– 50 ml Coconut Milk

– 2 tbsp Coconut Oil

– 1 tbsp Olive Oil

Method

Blend all the ingredients together until you have a very smooth mixture. This will make it easier to spread throughout your hair, and won’t leave any annoying clumps behind when you wash it out later.

Apply the mixture all over your hair and scalp, making sure your skin is saturated so it can benefit from all the essential nutrients. As the ends of your hair are driest, you can start at the tips and work your way up.

Leave the hair mask on for 15 to 20 minutes. You can put a towel over your shoulders to avoid getting messy, and then use a shower cap to avoid any dripping.

Wash your hair with a natural shampoo, making sure you thoroughly rinse out the mixture. It’s best to use lukewarm water to protect your skin’s natural oils, and seal in its moisture.

You can use your usual conditioner as well, and your strands should feel soft and easy to detangle. By infusing it with protein, vitamins, minerals and fatty acids, you should have noticeably healthier looking hair.

About The Author: Louisa Rose is from Cologne, Germany. She runs Body Health Love, where she blogs about health and beauty advice for young women.