Tag Archives: tips and tricks

10 Ways To Get Soft, Pink Lips Naturally | Lighten Dark Lips, Beauty Tips, Home Remedies

10 Ways To Get Soft, Pink Lips Naturally | Lighten Dark Lips

10 Ways To Get Soft, Pink Lips Naturally | Lighten Dark Lips

Guest Post by Disha

Who doesn’t want soft, supple, pink lips? We all do! But instead most of us have to suffer with their dryness and pigmentation. This happens because we fail to take care of them. When your lips are dark and dry, they get itchy and you cannot even apply lipstick properly! No one is a fan of that I am sure. To get naturally pink lips one needs to take care of their lips and there are a lot of ways to that. And believe me they are all very easy and can blend into your skin care regime effortlessly. Apart from being doable they are so effective that you wouldn’t even need to use your MAC lipstick in the shade Please Me to give you the appearance of naturally soft and pink lips. So, here are 10 ways in which you can do so.

1. Exfoliate

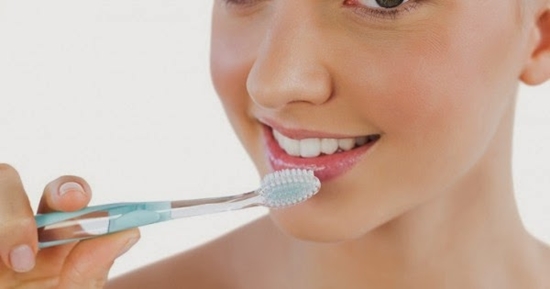
Exfoliation is the key ladies! It helps get rid of dead skin and dirt. All you need is a toothbrush. Yes a toothbrush has more uses than just brushing your teeth. Just be careful that the one you choose has soft brittles so that it doesn’t hurt your lips. So wet your toothbrush a little and then gently rub it on your lips in circular motions.

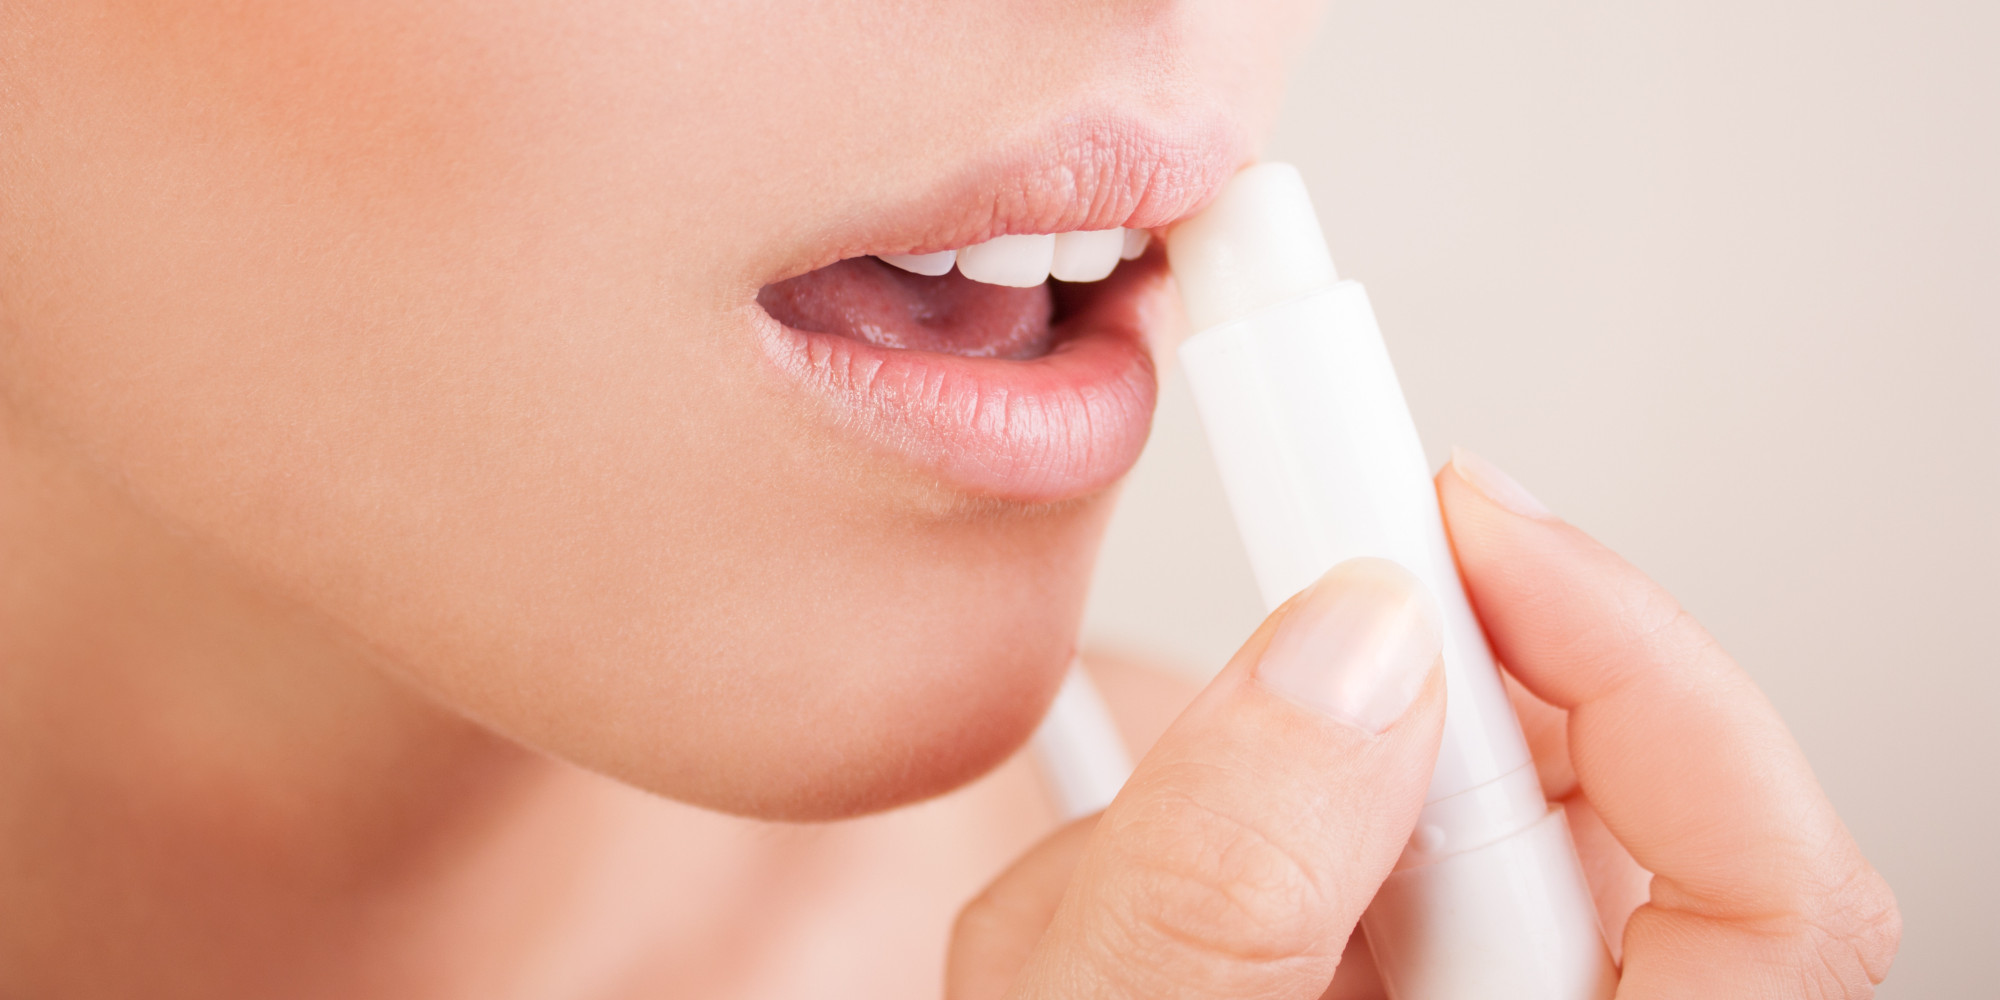
2. Choose Lip Balm With SPF

As we all know the UV rays from the sun do harm our skin and for that we apply a sunscreen lotion but do we do something for our lips? No we don’t. Hence, always choose a lip balm that has a decent amount of SPF in it. This way your lips will be hydrated and at the same time protected.

3. Drink Water

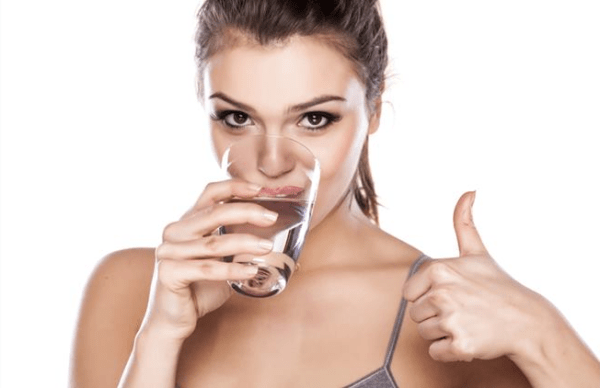
I feel drinking water can solve most of your health problems. You need to keep your body hydrated. So drinking 6-8 glasses of water everyday is beneficial for your whole body. But when it comes to your lips, keeping yourself hydrated will moisturize them and make them supple.

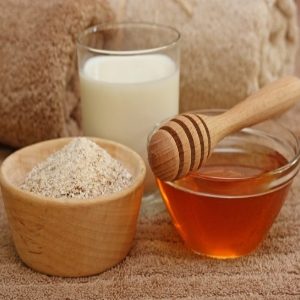
4. Milk and Pomegranate

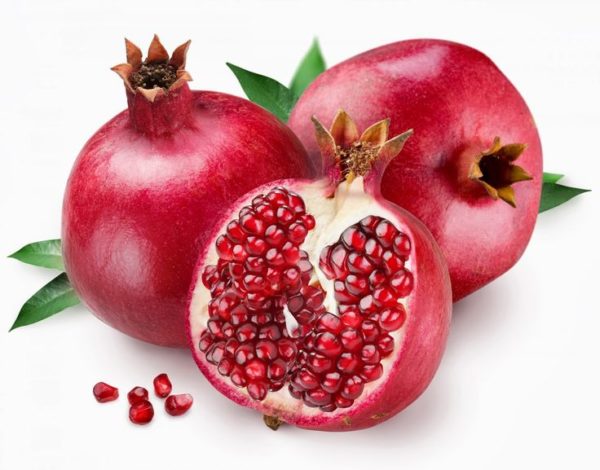
You know how pomegranates have a lot of pigment in them. So why not use them for your lips? This following method with lighten dark lips and give them a natural pink tone. Crush pomegranate seeds and add some cold milk in such a way that when mixed together, a paste like consistency is achieved. Then apply it to your lips. Let it stay and after around 10-15 minutes wash it off.

5. Removing Makeup

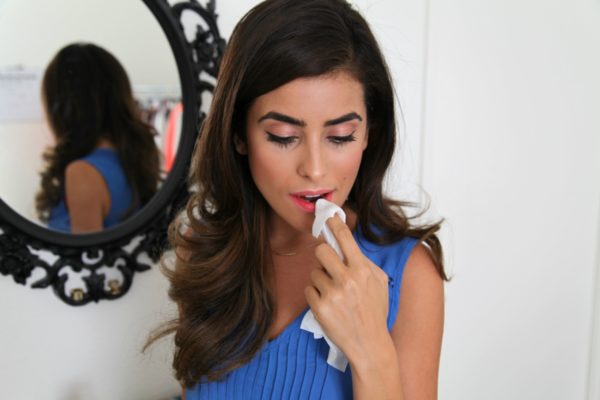
Yes we have all heard that never sleep with makeup on but how many of us really follow it? Before going to bed make sure that you have completely taken off the lip liner and lipstick and applied a lip balm. This will hydrate your lips throughout the night. Whereas keeping on lipstick all night long can darken your lips.

6. Lemon and Sugar

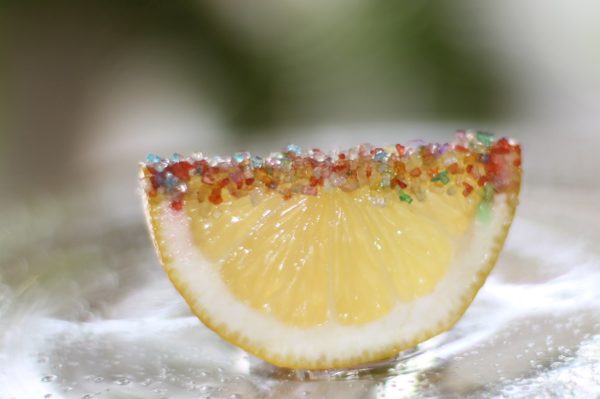
This one acts as a scrub as well lip-lightening agent. Take a lemon slice and put sugar on it. Then gently rub this on your lips. Lemon is a good bleaching agent hence it will lighten your lips whereas sugar will exfoliate it. So this combination is enough to make your lips pink.

7. Cucumber Slice

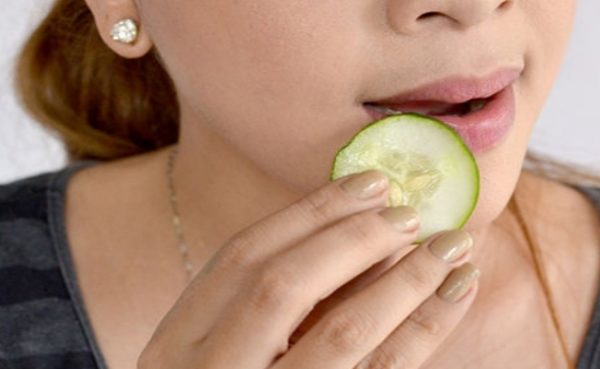
We all know cucumber is very cooling and has a soothing effect. So rub a cucumber slice on your lips which will instantly refresh them and make them pink on doing this frequently.

8. Aloe Vera Gel

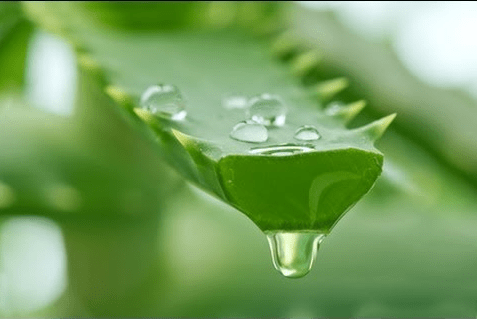
This can act as a great lip balm. Take some aloe vera gel and store it in the refrigerator. It helps in soothing your lips, generating new cells and protects from harmful rays of the sun. You can just directly use it as a lip balm everyday.

9. Glycerin and Lemon Juice

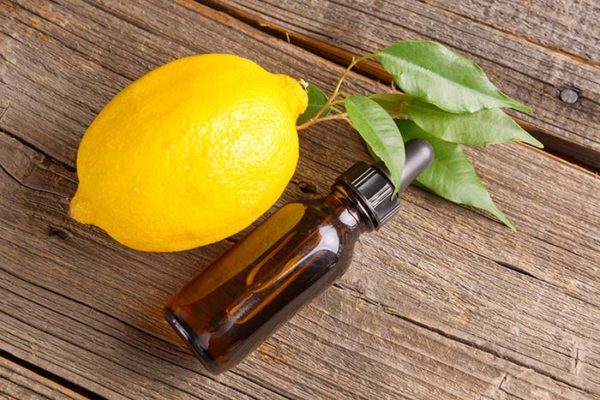
Take 2-3 drops of lemon juice and glycerin and mix them together. Use this mixture as an overnight lip mask. While glycerin will hydrate your lips, lemon will lighten it.

10. Coriander Leaves

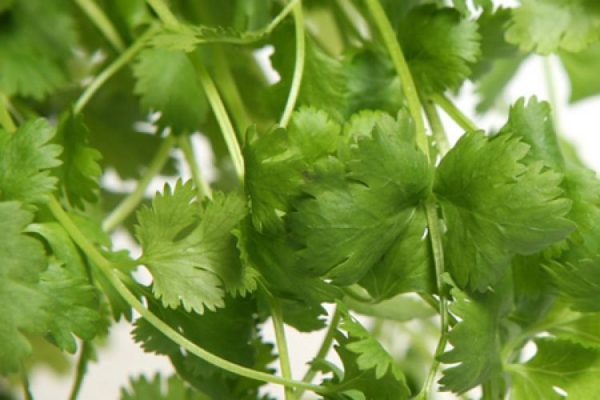
Take a few coriander leaves and crush them. You can also put in little water/milk if you like. Then apply it on your lips and let it stay for a while. After about 20-30 minutes, wash it off. Coriander leaves help in lightening your lips.

I told you all of them were easy ways! Weren’t they? They are very doable. Choose any method or methods and stick to them. Make sure whichever ones you choose, you follow them regularly for best results. Voila! You got yourself soft and pink lips.

Author Bio: Disha is a passionate health, fashion & beauty enthusiast. She is the founder and editor- in-chief of DivasWorld. Her blog, DivasWorld covers beauty, makeup, fashion and lots more!

Himalaya Herbals Fairness Kesar Face Pack Review

Himalaya Herbals Fairness Kesar Face Pack Review

Hi guys,

So as I mentioned in my previous post that I wanted to try this pack, I went ahead and bought it from my local chemist. This is something new for me because I haven’t tried this face pack from Himalaya Herbals yet. I have used the Purifying Neem a lot and have also tried the Refreshing Fruit Pack before.

What the Company claims: Himalaya’s Fairness Kesar Face Pack is a unique natural formulation that evens out skin tone for a fairer you! Turmeric, Walnut, Indian Aloe and Kesar rejuvenate and cleanse your skin of impurities, to reveal a natural glow. Walnut and Indian Aloe heal the skin and remove blackheads. Turmeric and Kesar enhance your skin’s complexion and elasticity. CINNABLOC™, our patented, herbal sunscreen agent, protects your skin from the sun’s harmful UV rays.

Key ingredients:

Turmeric has strong anti-inflammatory properties, which soothe your skin gently. The herb helps to even out your skin tone and complexion. It also helps to retain the skin’s elasticity and makes it supple.

Walnut has slightly acidic properties. It is particularly effective in treating acne and in soothing sunburned skin and eczema. Walnut helps in skin cell regeneration and in toning the skin because of its astringent properties.

Indian Aloe acts as an antibacterial and an astringent, which accelerates the healing of injured skin. Indian Aloe also softens and hydrates skin.

Kesar lightens skin, clears spots, enhances the complexion and gives skin an even tone.

Directions: Apply Fairness Kesar Face Pack evenly over cleansed face and neck, avoiding the area around the eyes and mouth. Let the pack dry for 10-15 minutes, and remove with a wet sponge or towel. Rinse with cool water. For best results, use twice a week.

MRP: Rs.70/- for 50g, Rs.130/- for 100g

It comes in the same white and green Himalaya Herbals flip cap tube packaging. It’s a thick, creamy mask and light yellow in colour. It has this soft powdery smell, but doesn’t smell of kesar or turmeric.

I wash my face and towel dry it lightly, keeping it a little damp for the mask to glide on well. Apply it all over the face avoiding eyes and lips and keep it on for 20 minutes before washing off, massaging it with circular motions with wet hands while taking it off.

I have used it 3-4 times till now, like twice a week, and I can say that this does not make your skin fairer, I think what they mean is detan. It definitely removes tan and lightens the acne scars a bit, to make the skin even. But it does require regular and continuous use to show results.

Kesar and turmeric are very good to even out skin while turmeric is also anti-bacterial. Indian Aloe soothes the skin.

Skin feels soft, supple and fresh post usage. I do need a moisturizer post washing the mask though.

I would recommend this face pack in summers, especially if you have tanned after your holidays, this does remove your tan with regular use. I would keep my use once a week now.

You can check out Himalaya Herbals on Facebook HERE and on twitter HERE and also more from their Face Care Range HERE

Have you tried the #HimalayaHerbals #FairnessKesarFacePack yet? What do you think of it?

Summer Skin Care Tips & Home Remedies

Summer Skin Care Tips & Home Remedies

By Rashmi

Hello lovelies,

Summers are back and with a bang. Nobody likes summers as they bring with them innumerable skin woes. But don’t you people worry. I have got it all covered for you people with easy solutions to keep your skin fresh and glowing. Thank me later

1. SUNSCREEN –

Use sunscreen whenever you are going out and make sure it is at least SPF 30 or choose from what suits you. Sunscreens protect your skin from harmful UV rays and prevent it from getting damaged.

2. CLEANSER –

The cleanser helps to unclog pores and it should be used as a part of a skincare regimen. During summers it becomes even more important to use a cleanser as the skin becomes lifeless and the pores get clogged. Make your own cleanser by mixing yogurt and honey. Apply it on your face and let it stay for 20 minutes and then wash it off to get clear skin.

3. EXFOLIATE –

Exfoliation is a must for the skin. Dead skin needs to be removed as they make the face look dull. Make your own exfoliator by mixing oatmeal, honey, and milk. Apply it on the face and let it sit for 10 mins then start scrubbing the face gently with wet hands. Scrub slowly for 5 minutes and then wash it off with water.

4. TONER-

Toners make you feel refreshed instantly. Make a refreshing toner by simply mixing cucumber juice with rosewater. Store it in the refrigerator to give it a longer life. Though use it only for a week and then make a new one. Carry it with yourself when going out. Spray it on your face to give your face instant relaxation.

5. MOISTURISE –

This step is what many people avoid during summers. Change your moisturiser to an oil-free one. Moisturisers are required by the skin in every season. It becomes even more important to use a moisturiser after exfoliation to lock the nourishment back into the skin. Mix your night serum with your moisturiser and apply it to your face to give the skin all the goodness that it needs.

6. KEEP YOURSELF HYDRATED –

Drink as much water as you can. During summers this is certainly the most important thing. Drink a minimum of 8 glasses of water a day. And do not wait for your mouth to get dry. Try drinking refreshing juices like watermelon juice or lemon water.

RANDOM SKIN CARE TIPS-

1. Rub ice all over your face to instantly soothe your skin. But make sure you cover it with a muslin cloth, never apply ice directly to your skin.

2. Apply calamine lotion to soothe skin rashes.

3. If you are out of toner, simply apply cold rosewater on your face to calm and soothe the skin.

4. Avoid oily and fried food. Include lots of fruits and veggies in your diet.

Editor’s Note: These are such basic things Rashmi, but we always tend to take them for granted. Articles like these remind me to follow things sincerely. One thing I would like to add and which I also follow is carrying a thermal spring water and spritzing it time and again, be it Avene, Vichy, La Roche Posay,etc.

Image Source: 1,2,Getty

Do you follow all these summer skin care tips?

Step By Step Description of How to Do Hair Spa At Home

Step By Step Description of How to Do Hair Spa At Home

By Sanchita

The idea behind the hair spa is to rejuvenate and protect the hair. Yes, the good old warm oil massage and mild shampoo followed by conditioner is the regular or weekly routine carried on by us to protect and condition the hair. But, apart from that the hair needs specific care and rejuvenation by the process of hair spa. Now, hair spa is not necessarily done in parlors or hair care institutions and can be easily carried on at home with specific and easy available ingredients at your own volition. So you need not spend valuable money or time at the spa session every time. Let us see the step by step description of how to do hair spa at home.

1. Hair Oil

When you are going to devote yourself to the self-spa session, avoid using the readymade oils from the market which are nothing but merely mineral oils. So it will do no good to the hair. Use a concoction of hair oils like coconut oil, castor oil, almond oil and olive oil. The mixture should be 4parts coconut oil, 1 part castor oil, 2 parts almond oil and 3 parts olive oil. You can add other essential oils like argan, rose, ylang ylang or lavender as per your choice. Warm up the oil in a double boiler (no direct heat) and you can also add various herbs as well. For e.g. dried amla, methi seeds, neem leaves, hibiscus leaves paste, etc. can also be added in the warm oil which will further strengthen the hair. The hair oil is the vital step and best if it is done for.

2. Through massage

While the oil is the most important ingredient, the massage is the process which completes the procedure partly. Simply applying the oil won’t do so make sure you dedicate a good amount of time to massage the scalp well. Do not vigorously rub the scalp but merely run the fingers in a circular motion covering the whole area of the scalp. Massaging is essential as it improves blood circulation in your scalp area. You should massage your hair for 10 to 15 minutes. It helps relax the scalp and increase softness. It further aids in strengthening the roots of the hair and nourishes the hair-shafts, promoting new hair growth and strengthening current hair.

3. Warm Towel

If you have applied the oil a night before, then apply the warm towel in the morning and if you have applied the hair oil in the morning, do this at least an hour or two post oil massage. Dip a towel in warm water (just make sure not to burn the hand) and wrap it around the hair. In general, salons use a stream machine but the warm towel will surely do the trick. Warmth open up the pores on the scalp and thus it gets all the benefits of the oil. Also, it cleanses the scalp thoroughly, thereby promoting healthy hair growth.

4. Henna Mask

There are several hair masks available for hair and you can include the ingredients like ripe banana, eggs, curd, mayonnaise, etc. but I would suggest henna. Personally I have benefited a lot from the henna hair packs and it works like wonder. Henna is an age old method widely used in Ayurveda for treating hair and scalp problems. It is one of the best natural remedies for hair growth, helps to prevent dandruff and scalp itching. It acts as a good conditioner for your hair and helps to grow your hair. Mix the henna powder in the form of a paste with the help of curd or lemon and simply apply on the hair.

5. Shampoo

Once the hair mask is dried or after 40-50mins, wash off the mask with plain water. The rinsing will be easy as the hair as already well-nourished with oils. Next, move on to the main process of shampooing the hair. Try and use a SLS and PARABEN free shampoo which is mild and easy on the hair. Using a harsh chemically enriched shampoo means whatever effort you gave would go down the drain and the hair will be frizzy, rough and unmanageable. Shampoo will cleanses off every layer of dirt, grime, dandruff or any other residual substances on the hair, including the hair oil and hair pack. Although, the hair would retain the benefits for sure. One of the most important thing is that, rinsing off the shampoo is very important. A lot of people do apply it correctly and massage onto the scalp but forgets to rinse it out.

6. Conditioner

After the shampoo, apply the conditioner to the length of hair and keep it for around 2-3mins and no longer than that. Make sure the conditioner doesn’t slips onto the scalp and gets rinsed out properly after the shampoo.

7. Leave in Serum

This is the last step but I would call it optional. Since I have curly and dry hair, I always apply a leave in serum to make it manageable and frizz free but it is completely up to you. Also, I would not advise this step if you have thin and flat hair because it may weigh the hair down as the hair has already been conditioned since step 1.

These are the ways you can easily carry on the hair spa at home without shelling big bucks and also at our own convenience.

Editor’s Note: Absolutely loved this post Sanchita. This is the ideal procedure, wish I was not that lazy and time crunched :/ But even once a week or once in 2 weeks, following this routine would be amazing.

Image Sources: 1,2,3,4,5,6,7,8

Do you do hair spa at home?

Decoding the Makeup Secrets of Adele

Decoding the Makeup Secrets of Adele

By Sanchita

When I think of Adele the only two things that crosses my mind are the deepest ballads and feline eyeliner. I mean, that is the thickest, precise and deepest eyeliner I have seen. No matter what product I have used so far, I simply couldn’t get that look. Thankfully, a couple of months back Adele’s Makeup artist Michael Ashton, who has been working on the singer’s hair and makeup for nine years shown in a YouTube channel of MUA Lisa Eldridge. There was so much to learn from him and I loved the way he had shown the makeup tutorial. So, gathering the most important points from there, I have decoded the makeup secrets of Adele and here’s what you need to know.

Preparing the Skin

Makeup artist Michael Ashton starts prepping the skin with a damp facial tissue soaked in Bioderma Sensibio H2O to wipe off any layer of residual makeup, dirt, grime etc. He advises to use a facial gel or oil kind of product to plump up the skin and hydrate it well enough for the foundation to look flawless. He used a rose facial oil I believe to plump up the skin and which also gives a natural strobing effect without looking greasy, sticky or oily. His favorite product is Aromessence Rose d’Orient Oil Serum for pre foundation technique.

Eye Makeup

He started with a base product which act as a base for eyeshadow as well as primer. He used the MAC Paint Pot Groundwork all over the lid and then soften the crease using a blending brush. He also applied the same pain pot in the lower lash line to give a shadow sort of. Then used the two lightest shade (a golden bronzy light color) from the Tom Ford Nude Dip Eye Color Quad all over the lid and smoothened the line as well. This gave a nice reflective kind of pale look to the eyes, you can also call it neutral.

Infamous Feline Eyeliner

The secret behind that gorgeous feline liner are the gel liner, eye liner and fine liner brush. He uses the Bobbi Brown Long Wear Gel Eyeliner in Black Ink on the back of your hand and then start drawing a line (as close as you can to your lash line) from the middle of your eyes working it outwards, using a very fine liner brush. Then, he makes the feline stroke giving a cat liner effect. He repeated the lines at least 6-7 times which thickened and deepen the color even more. Ashton states that you can use a cotton bud dipped in Bioderma Sensibio H2O to wipe off any mistakes. After the mascara, he goes back to the eyes, this time with liquid eyeliner, that is, MAC Liquidlast Liner Point Black. He said that he uses a liquid liner with a tar consistency and a fine brush to do a final eyeliner swipe. This builds up intensity and gives a nice depth to the eyes as well.

Dramatic Eyelashes

For the lashes, he used a falsies using Duo lash black glue which gives a well-defined matte charcoal finish. He used a gentle upward lifting motion with the fingers to blend in with the natural lashes. Next, he applied the Diorshow Mascara for the upper lashes. For the lower lashes, he used a small fan brush and started from the roots which would give a better smudged kohl effect. He stated that it won’t matter if the mascara goes a little bit onto the waterline as long as it doesn’t sting.

Strong Brow Game

Before stating the eye makeup, he used a spoolie to brush the eye brows. Then used a soft brow pencil to shape and define them. Clean up the top of your brow using a moisturizer on a small concealer brush and swipe it across the brow. To set the pencil he used a light mix of four brown shades – MAC Concrete, Coquette, Corduroy and Wedge and applied as the brow powder.

Foundation

For the foundation he used Estee Lauder – Double Wear Light and mixed the shades 1.0 and 0.5. He used the lighter shade on the T-zone and inner portion of the face while the darker one in the outer perimeter. He specifically stated that the foundation must be applied on the jaw line and below i.e. towards the neck. This will surely give a nice, smooth and even look. He sets everything with a fine milled compact powder. For the under eyes, he uses the Tom Ford Illuminating Highlight Pen and blends it with a brush.

Contour

For the contour also, he uses a powder palette which is the Smashbox Step by Step Contour Kit and mixes the first two colors for the cheek bones. He basically says that a fish face helps to make the contour precise and smooth. He uses an angled blush brush for the contour and applied for the forehead, sides of the nose and jawline. For the blush, he loves the Maybelline cream blush which works really great for blending.

Lip Trick

For the lips, prep and prime the lips with a nourishing lip balm to hydrate the lips well. Then, he used a neutral lip liner to outline and fill the lips slightly. Use a finger to pat and blend the lip liner with the lip balm to give a nice and even neutral look to the lips. Use a shimmery gloss to apply on the centre of the lower and upper lips and blend well. This would give a nice plump effect to the lips naturally.

These are the secrets of Adele’s flawless feline makeup look and I really hope this would help you guys to recreate her looks easily.

Image Sources: 1,2

Editor’s Note: I love Adele’s makeup, especially her winged liner. Nice post Sanchita

Did you always want to know Adele’s makeup secrets? Well they are not a secret anymore 😀

10 Lipstick Hacks Every Woman Needs To Know!

10 Lipstick Hacks Every Woman Needs To Know!

By Shelja

I’ve been a loyal lipstick user over years, it all started when I was 5 and I started applying my mother’s lipstick however back then I use to paint my entire face with lipstick and it was a ugly messy sight but I officially had my hands on lipsticks when I was in college, there are many things which are hidden and I’m going to reveal it for my lovely readers! These ideas and tricks are from my personal experience which will make your life so much easier. I feel every woman deserves to know these simple useful tricks!

1. New shade : Once your addicted to lipstick there is a constant urge to buy new shades, no matter how many lipsticks you own it’s still less! But here’s a simple trick, merge lipsticks! Use a darker shade lipstick as a base coat then apply a lighter shade you will end up with a different shade each time! You need to use a couple of lipsticks and find the right pair.

2. Matte lipsticks : Matte lipsticks are the new trend but do you know you can get matte look with any lipstick you have? Apply 2-3 generous coats of your regular lipstick now stick a thin layer of tissue on your lips dust some baby powder on a make up brush and rub over the tissue. After removing your tissue you’ll end up with matte looking lips.

3. Get a lighter shade : Love your lipstick but sometimes you wished it was a bit lighter? Apply your lipstick then apply a nude coloured lipstick, mix the colour well on your lips. If you don’t have a nude lipstick go ahead and use a foundation!

4. Avoid teeth stains : Imagine, you’re with your guy and he tells you there’s lipstick on your teeth!!! This would be such an embarrassing situation. Here’s a trick, This may sound kind of yuck but it’s  worth it! Pout your lips then Insert a clean finger in your mouth slowly remove it out, the excess lipstick which is inside the mouth will be removed by the finger.

5. Use lipstick as blush : Running out of blush? Use your favourite pink lipstick apply some on your fingers and blend it over your cheeks, secure it with a compact powder.

6. Pop your red lips :Ever wondered how stars get that perfect red lips? Apply foundation over your lips and surrounding areas, to get perfect red lips you need to apply a lip liner, merge the lipliner on your lips then apply your red lips, this way your lips will pop on your face, when you go loud on lips apply light makeup on eyes and cheeks.

7. Fix Broken lipstick : Accidents happen! If your lipstick is broken, use a lighter to melt it then stick it back seal it with lighter again. be carful to melt it just as required or else you’ll end up melting the entire lipstick.

8. Avoid melting : Refrigerate your lipsticks to avoid it from summer time melting.

9. Long lasting colour : Blot your lips with tissue paper in between your lipstick application, doing so will remove excess oil from your lips, when you apply the second coat the colour grip will be stronger and it will stay longer. You can blot twice in between application.

10. Go larger : Larger lips always look sexy, the best way to achieve it at home is to use a concealer on your lips and surrounding area now reshape your lips by applying lip liner just slightly outside your natural lip line. Merge the colour with a brush or your fingers then apply your lipstick this way you’ll have bigger looking lips instantly.

Image Sources: 1,2,3,4,5,6

Editor’s Note: Absolutely loved these tips and hacks Shelja, I do the make lipstick matte with powder sometimes.

Do you like these hacks? Do you guys use them often?

How to Get Rid of Back Acne?

How to Get Rid of Back Acne?

By Shelja

Summers are full of adventure, beaches and sweat. Sure we all love summer holidays and other stuff but there is something which I hate about summers, The back acne! As summers are sweaty I end up with these crazy acne all over my back and forearms, Thank God I am not the only one facing it, the good news is, it can vanished! Every year in forced to keep a check on the tips given below to keep my back free from acne. Keep reading to know more!

1. Salicylic wash : Salicylic acid is popularly advised by dermatologist for acne and pimple prone skin, it is also know for its deep cleansing and rejuvenation properties, it also provides exfoliation and reduces dark spots caused by acne. Using salicylic acid on your back twice daily can have visible effects.

2. Benzoyl peroxide : This is a another strong ingredient to use on your back acne, as it dries off the skin it’s not recommended to use on your face without your dermatologist advice. If your using a benzoyl peroxide wash let it stay for atleast a minute befor you wash it off. Using a lotion of benzoyl peroxide over your back after the shower will get you faster results.

3. Keep it clean : if you notice back acne mostly occur during summers, sweat is also one of the many reasons for your back acne, shower right after you sweat, after gym or before bed.

4. Retino A : Retino A cream is used for acne and pimple treatment, it is also used for further prevention, you may notice some skin shedding within few days but that’s a normal process as it sheds off the old skin at the same time promotes growth of new skin cells. It also works good for wrinkles, age spots and skin lightening.

5. Don’t re-use worn clothes : Dirty clothes can cause clogged pores and thus causing acne, the best way is to wash your bra and tops after one use, especially during summers when you sweat the most.

6. Apply sunscreen : If your skin has acne scars sun can be your biggest enemy. As sun can make your acne marks last longer. The best way is to wear clothes which covers your acne area. use a oil free suncreen lotion over your back 20min prior of sun exposure. Sunscreen also helps to save your skin from unwanted tan and early signs of ageing.

Editor’s Note: Agree with all these points Shelja, well written. I do get it in summers sometimes.

Image sources : 1,2,3

Do you have back acne? How do you deal with it?

DIY Homemade Hair Mask for Strengthening Hair

DIY Homemade Hair Mask for Strengthening Hair

By Nidhal

One can never run short of ways or ideas to pamper their crowning glory. There is a hairstyle or hair cut that you’d been thinking of getting at any point of time. There’d be those accessories that you’d be dying to experiment with. There would be hair products that you would have played with to give your tresses that bounce of life. But amidst all this, being Indians, we cannot never turn a blind eye to our Good Ol’ home remedies, can we?

So, why not treat our hair to the bountifulness of natural ingredients today and drool over them all over again? March straight to the pantry for there lies your paraphernalia for this DIY recipe.

INGREDIENTS NEEDED-

1. CURD- Enriched with the bountifulness of lactic acid, curd/yoghurt (called Dahi in Hindi) helps to eliminate dandruff, foul smell and dullness. It adds unprecedented gloss and softness that you just can’t get over.

2. TULSI POWDER- Being a plant that has been revered in Hinduism for centuries, Tulsi has benefits galore for your mane. It treats lice, dandruff, itchiness and scalp infections. Yes, your granny was right when she said that Tulsi is a miraculous plant. No questions asked anymore!

3. ALMOND OIL- Being a storehouse of Vitamin E, almond oil helps in locking moisture and adding that enviable sheen to your locks. Prefer organic/cold-pressed almond oil and not the ones that are laden with mineral oil. In my opinion, Almendrop 100% pure almond oil is a wise choice.

4. METHI/FENUGREEK POWDER- Now comes the wonder ingredient which cannot be done without. Methi helps to add shine in addition to imparting softness. It also accelerates the rate of growth of hair which spells cheer for those ladies waiting anxiously to flaunt long luscious locks. Opt for methi powder for grinding is a tad cumbersome and finely grinding takes patience (which sadly, today is a lost virtue).

PROCEDURE-

1. In a clean and dry bowl, add 5-6 tbsp of curd. This is the amount for shoulder length hair. Increase if you have longer hair.

2. Add 3 tbsp each of methi and tulsi powder.

3. Add half a tbsp. of almond oil

4. Mix well thoroughly to form a smooth and consistent paste.

5. Apply generously all over your scalp as well as length (of hair).

6. Wash off after 45 minutes with a mild herbal/organic shampoo. Condition if you feel the need to do so.

7. Repeat twice a week to expedite the results and acclimatise your scalp to these natural ingredients.

That is all for now, folks. Feel free to post your queries and results with me through the ‘comments section’ and try this DIY recipe to get locks which you cannot stop drooling over.

Pssst… It compels you to keep stroking your fingers down your mane intermittently!

Editor’s Note: This sounds really good Nidhal and methi and tulsi are very good for dandruff too. I am definitely trying this, have to get methi and tulsi powder now.

Have you tried this DIY before? If not, do so and let us know how you find it.

Home Remedies For Glowing Skin

HOME REMEDIES FOR GLOWING SKIN

By Rashmi

Hello peeps,

I am back with another DIY solution for your skin. Glowing skin is what everybody desires. People spend so much money by going to parlours. Though the effect of parlour treatment is almost immediate,is it long lasting? I don’t think so. I prefer using ingredients from the kitchen which are readily available.These are absolutely natural ingredients and are safe. And these things give a glow to your face like no other parlour treatment can give. And guess what? The results are permanent. When at first my mother asked me to use homemade face masks instead of going to the parlour i laughed at that but now after using all these homemade masks I am sure I am not going to the parlour for facials.

And I am sure these home remedies for glowing skin are going to work for you guys as well.

Happy reading ☺

1. Honey and lemon juice –

In a bowl take 2tbsp honey and mix in it 1tbsp lemon. Mix it well. Apply it on your face and leave it for 20 minutes.Wash it off with cold water. Lemon works as a natural bleach and honey gives instant radiance. One could also try applying just honey on the face. Honey and Lemon is perfect for removing your tan too.

2. Banana face mask-

In a bowl take half a banana(ripe),mix 1tbsp yogurt to it along with 1tbsp honey. Mix it well until the banana is mashed completely. You could add 2-3 drops of rosewater too. Now apply this face mask and leave it for 20-25 minutes before washing it off with water.Banana is best for getting glowing skin.

3. Tomato juice –

Simply mix tomato juice along with lemon and apply it on your face. Let it sit for 20minutes and then wash it off with plain water.Follow up with a good oil free moisturiser.

4. Olive oil or coconut oil-

People have this misconception that if they apply oil on their face, they will get pimples .This isn’t true. In fact either olive oil or coconut oil should be applied on the face for at least 10minutes before taking a shower. This is a really effective method to get that glow that you have always longed for.I follow this routine daily and this has worked effectively for me.

5. Potato and lemon juice-

Take the juice of half potato and mix in it about 1tbsp lemon juice. Apply this on your face daily for a week and you will be able to notice a beautiful glow on your face. Rub this mixture on your elbows too to get rid of dark elbows. This mix when used continuously for a week, will help get rid of all that stubborn tan.

6. Papaya face mask-

In a bowl take papaya and mash it well. Mix in it about 1tbsp honey, 1/2 tsp turmeric (you don’t want to be left with a yellow face instead of a glowing one) and 1tsp honey. Mix all the ingredients well and apply this on your face for 20 minutes and then wash it off. Apply rosewater on your face after that.

7. Milk and lemon-

Mix milk and lemon together. The milk should be unboiled. Apply this and you would get a radiant skin within a week. Milk helps to moisturise your skin and lemon helps in bleaching the skin naturally thus causing no side effect.

Additional tips-

1. For people with dry skin mix glycerine and rosewater and apply it on your face daily.

2. For people with oily skin mix gram flour(besan) with rosewater and apply daily. Alternatively fuller’s earth could also be used.

3. Apply aloe vera on your face daily .

4. Exfoliate your skin at least twice a week to get rid off the dead skin cells.

5. Always keep your skin hydrated and moisturised.

6. Always remove your makeup before going to sleep and apply your night cream.

7. Rub an ice cube on your face for an instant glow.

See more skincare tips/DIY HERE

Editor’s Note: These are easy and perfect everyday tips Rashmi. Glycerine and Rose water, I swear by. Even Fuller’s Earth, especially for summers.

Do you use these quick home remedies for that glowing skin? If not, do so now.

P.S: Images from Google.

How To Unclog Facial Pores Naturally

How To Unclog Facial Pores Naturally

By Somreeta

If you wish to keep pimples, blackheads and acne at bay, it is important for you to clear the clogged pores in your skin. Deep cleansing and exfoliation at regular intervals help in doing away with the dead skin cells, oil, dirt and impurities that clog the pores. Keep reading for the best tips and tricks to unclog facial skin pores naturally.

How To Unclog Facial Pores Naturally: Top 3 Tips

1. STEAMING: Steaming is one of the cheapest yet most effective natural treatments that help remove the dirt and grease that have accumulated in the pores of the skin. Heat water in a pot and cover it with a lid. As soon as the water starts producing steam, remove it from the source of heat and lean over the pot of steaming water, while covering your head with a towel. Make sure that the steam touches your face. For added benefits, add a few drops of tea tree essential oil to the water. Steam your face for about 5 to 7 minutes. Whenever you feel that the steam is too hot for you to put up with, take a short break. After you are done with steaming your face, pat your skin dry and follow up with a toner and a mild non-comedogenic moisturizer. Steaming your face once a week is indeed a great practice.

2. EXFOLIATION: Exfoliate your skin to chuck out the impurities off the pores of your facial skin. Mix baking soda (2 tablespoons) with cinnamon powder (1 tablespoon) and honey (4 tablespoons). Add the juice of half-a-lemon to the mixture and apply the concoction on your face. Rinse with water after 5 minutes. Baking soda is an excellent exfoliating agent that is gentle on the skin and helps unplug clogged pores. If you are not comfortable using baking soda and lemon juice on skin, you can try out the honey-sugar scrub recipe. Mix 4 tablespoons of green tea with honey and sugar, a tablespoon each. Scrub your face with this homemade scrub and wash off with water. Follow up with a mild moisturizer.

3. APPLICATION OF CLAY MASKS: Clay masks are known to draw out the oil and grease from the skin pores efficiently. Mix bentonite clay, oatmeal powder and water, one tablespoon each. Apply this clay mask on your face. Once it dries up, rinse thoroughly with water. Follow up with a good quality moisturizer to prevent dryness.

A weekly skincare regimen, consisting of steaming, cleansing, scrubbing, toning and moisturizing could go a long way in preventing clogged pores. Unclog your facial pores naturally and keep your skin smooth and glowing, always!

Editor’s Note: Totally believe in all three, while steaming doesn’t happen always. Even a warm muslin cloth works at times. And clay masks are so amazing to pull out the dirt and perfect for oily skin to keep oil at bay.

Do you follow these tips regularly?

Image Source: 1,2,3