Trending Beauty Hacks That All Lazy Girls Should Know
Sadly girls today don’t find much time to indulge in relaxed beauty services at home due to demanding work-life balance. With these simple yet quick beauty hacks, it’s possible to look your best without feeling guilty and out-of-date.
So here you go lazy girls, incorporate these effective beauty hacks, without all the time and effort in the world!
Brighten up your tired eyes
A little bottle of mascara cab does the trick. If you are suffering from puffy/swollen or sleepy eyes? Mascara application can immediately brighten your face.
Define your bushy eyebrows
If your busy schedule as well laziness has resulted in bushy and unkempt eyebrows than simply swipe two coats of clear mascara. It will automatically hold and define your eyebrows.
Facial Bliss
If you are suffering from tired and dull skin and have no time for facials than simply get facial sheets. It’s easily available in the market, are super effective as well as easy to use. However, if you have time over the weekends and are looking for a relaxed and professional service, try UrbanClap app for salon services at home. It is a one-stop destination for all urban lifestyle services.
Dry and rough toes
No time for pedicure? While taking a shower simply use pumice stone and say goodbye to dry and uneven skin. Do it regularly for a prolonged effect.
Fight disobedient hair
When your hair seems super messy and as usual you are running late for office, then making a top knot is the safest bet.
Perfume that stays effective for long
If you want your perfume to last longer, simply rub Vaseline on your pulse points before applying the perfume i.e. behind the ears, on the wrists and behind the knees. It will save you from having to re-apply.
Say no to dry hands and feet
Dry hands and feet can leave you embarrassed. Keep your moisturizer next to your bed and religiously apply it before bedtime. Every morning you will wake up to soft and supple skin.
For effortless waves
If you have washed your hair but have no time for a blow dry then simply tie up your hair into a bun and let it stay like that. Once it’s dry just shake it and voila you achieve soft curls instantly.
Quickly dry nails
Painted nails can instantly make your hands look beautiful. However, on the other hand messy nail paint can be a big turn-off. To quickly dry nail paint, dip your freshly painted nails into ice-cold water.
Use in a shower gel combined with moisturizer
Applying body lotion can take a lot of time. In order to save on time, purchase a shower gel with moisturizer.
Fast and easy blow dry session
Blow dry your hair upside down, not only it saves time but also adds volume to your hair.
Cover those roots
In order to get thicker mane as well to hide those incoming roots, it’s best to brush a little black eye-shadow onto your parting.
Concealer for dark under eye circles
Nothing looks worse on your face as compared to deep and dark under eye circles. A concealer can come handy to quickly achieve a flawless look.
Credit card usage
Applying eye-liner or mascara can easily turn into a messy affair especially when you are running late. Worry not, simply hold your credit card underneath your lashes, excess of product will stick to the card instead of your face and within no time you will get bright and beautiful eyes.
Achieve squeaky clean scalp
Baking soda has multiple uses. Apart from being used in kitchen, baking soda can also help you get rid of hair buildup. Just sprinkle a little amount into your shampoo and get light, clean and fresh strands.
Have fun while using these simple yet effective beauty hacks!
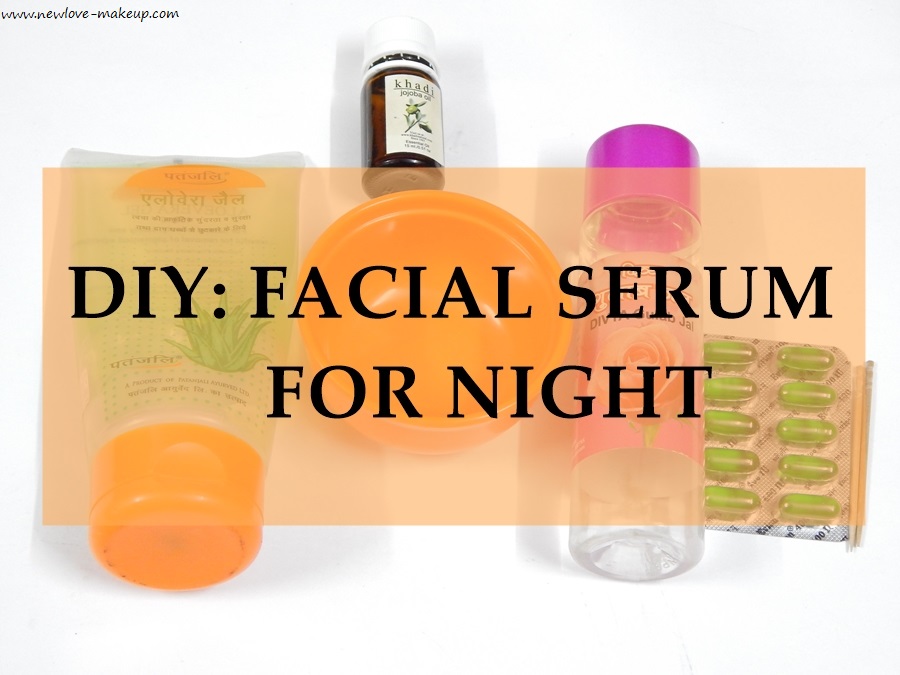
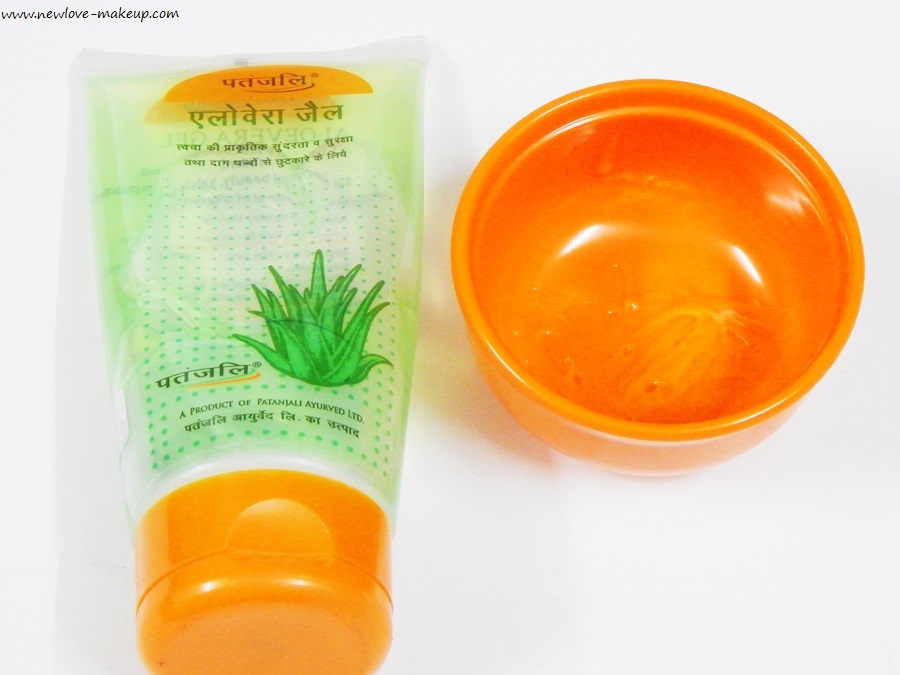
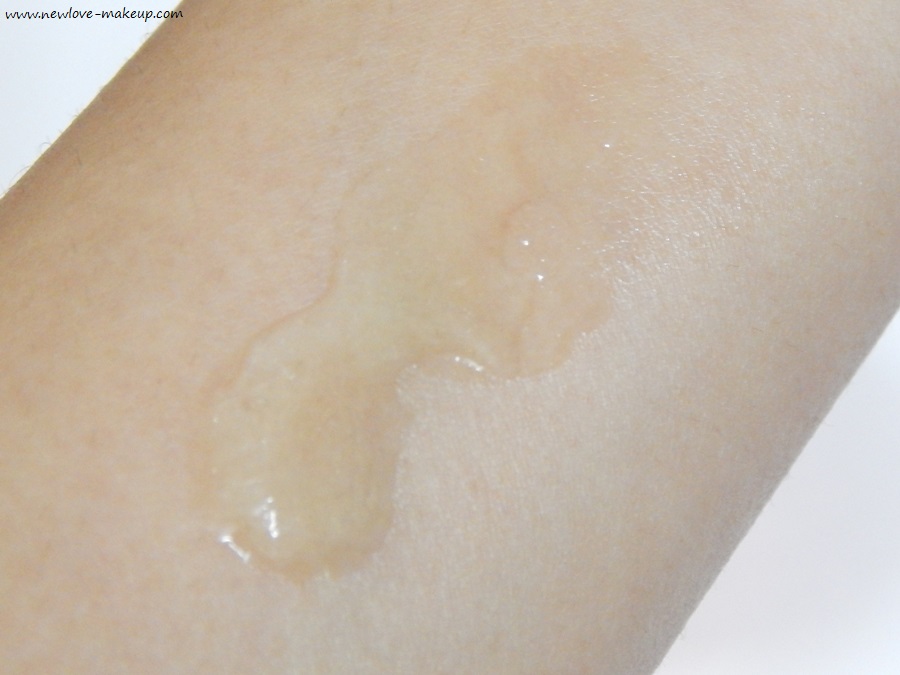
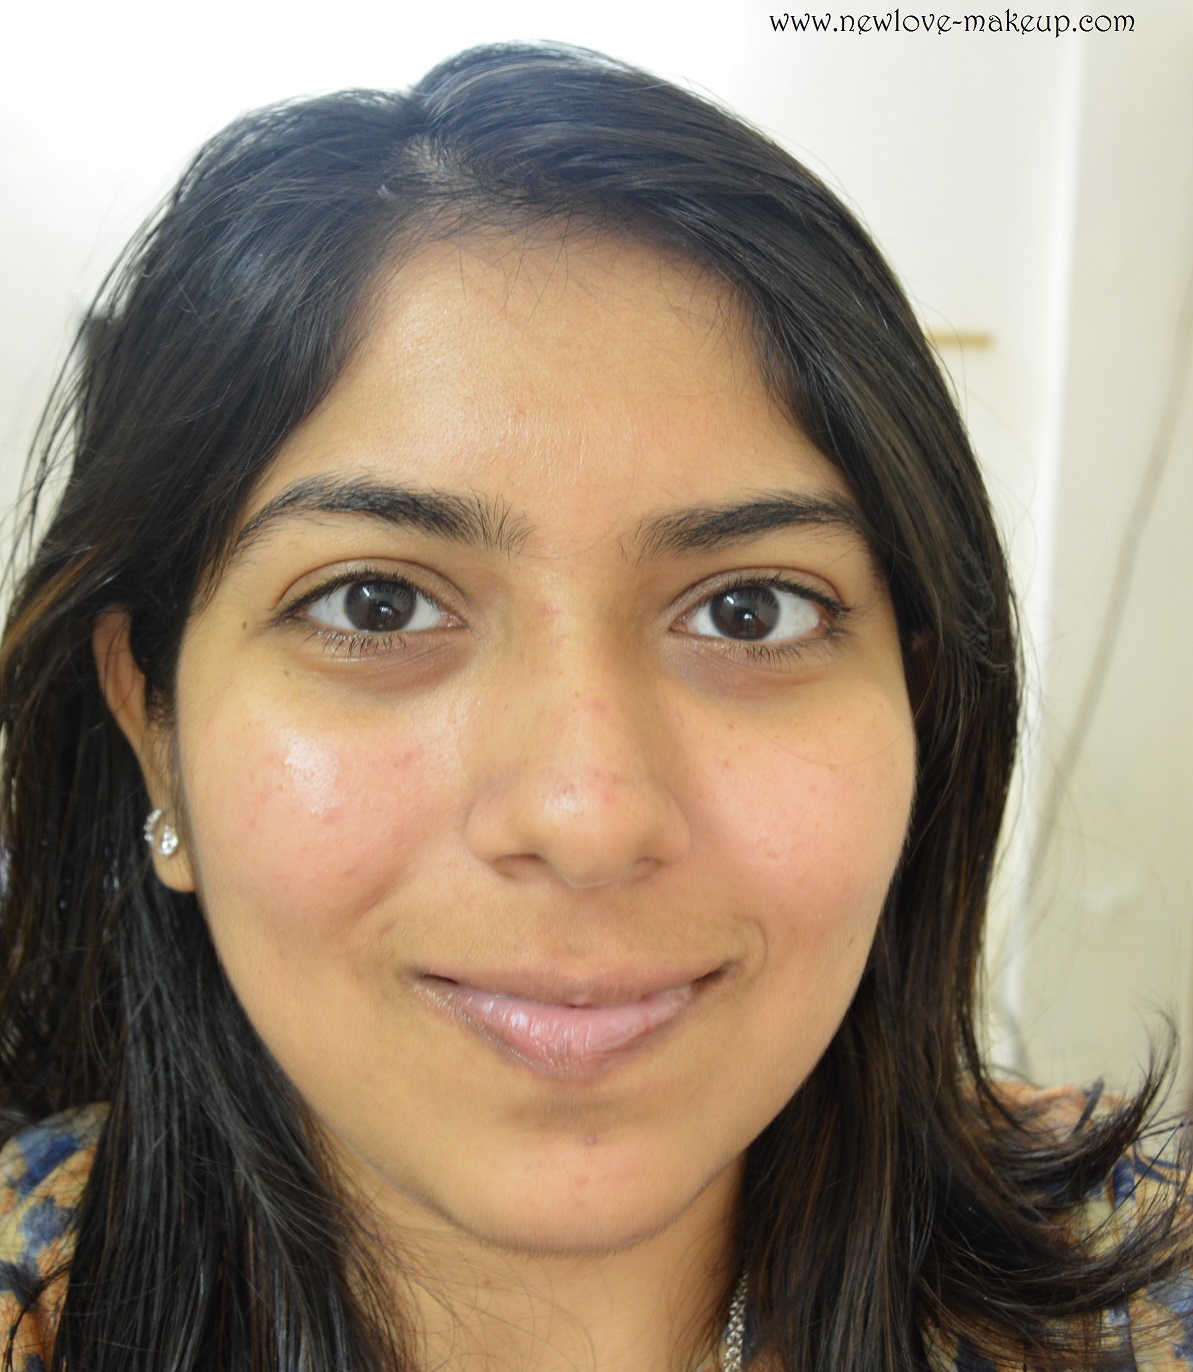
To begin with, I have extremely sensitive, acne prone, oily skin that is always on the verge of breakouts. Due to this reason, I avoid moisturizers (except for aloe vera gel) all my life. However, as I am approaching towards late 20s, I have been noticing that the texture of the skin looks very unhealthy and that natural glow is missing somewhere. Hence, I wanted something to rejuvenate and nourish the skin. After searching high and low for all the ingredients that works on acne prone skin without giving much trouble, I made this night serum for myself and to my surprise, I did work! I have been using it past a month and thankfully I observed some good changes in my skin. Firstly, it never broke me out and also nourished the skin. Secondly, it hydrates the skin throughout the night with getting oily or greasy. So, here goes the night elixir for acne prone skin.
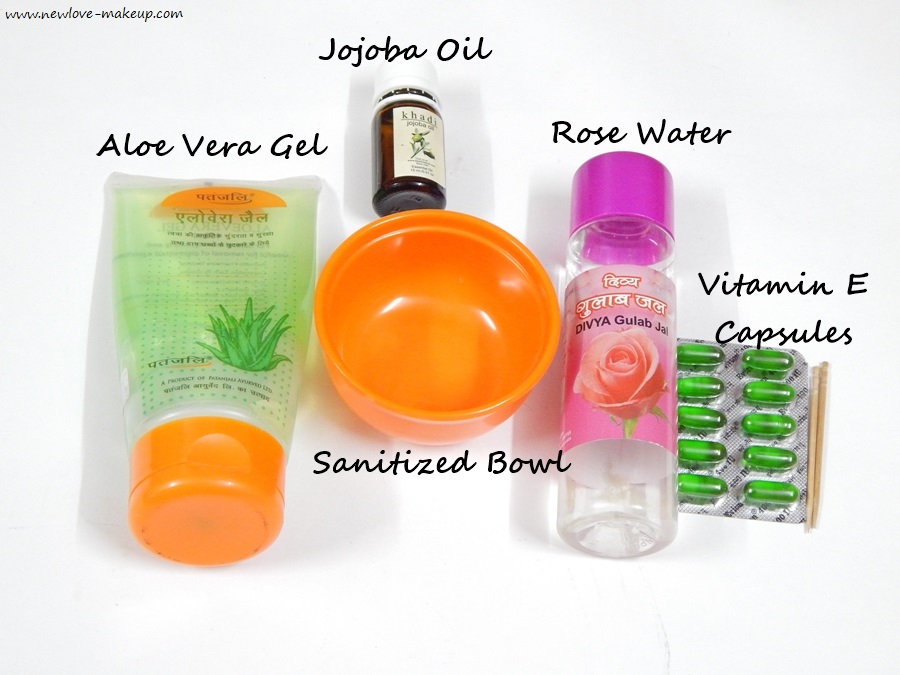
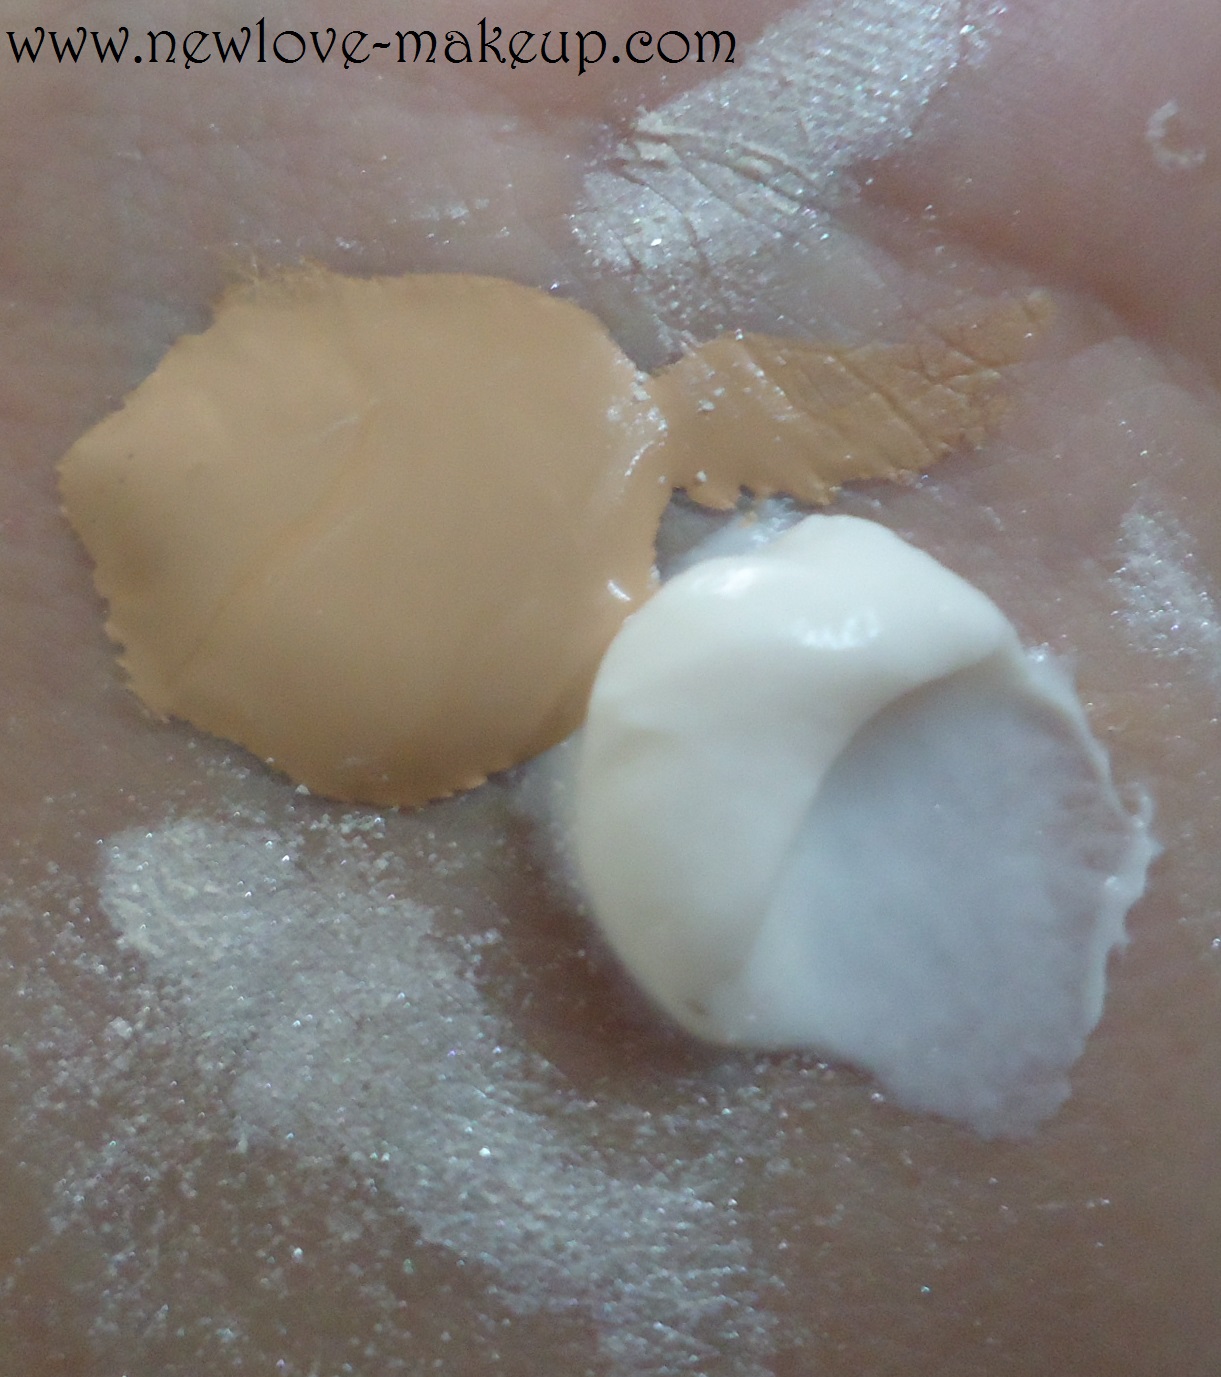
INGREDIENTS:
Aloe Vera Gel – you can either take it directly from the plants and blend it smooth to have the gel consistency or simple buy one!
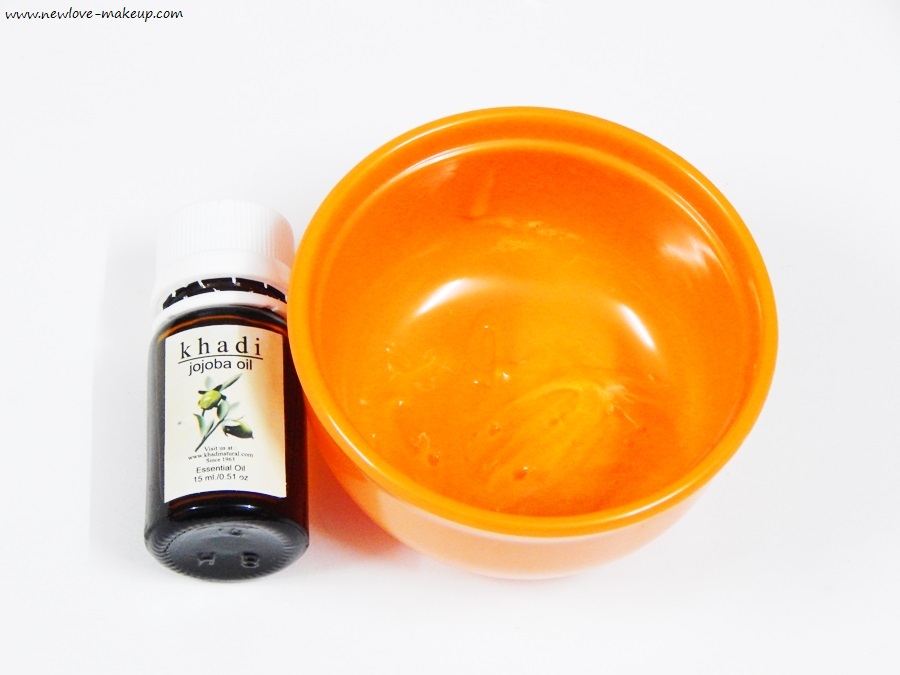
Jojoba Oil – Works wonder for oily acne prone skin. You can also substitute it for Avocado OR Almond Oil for preference.
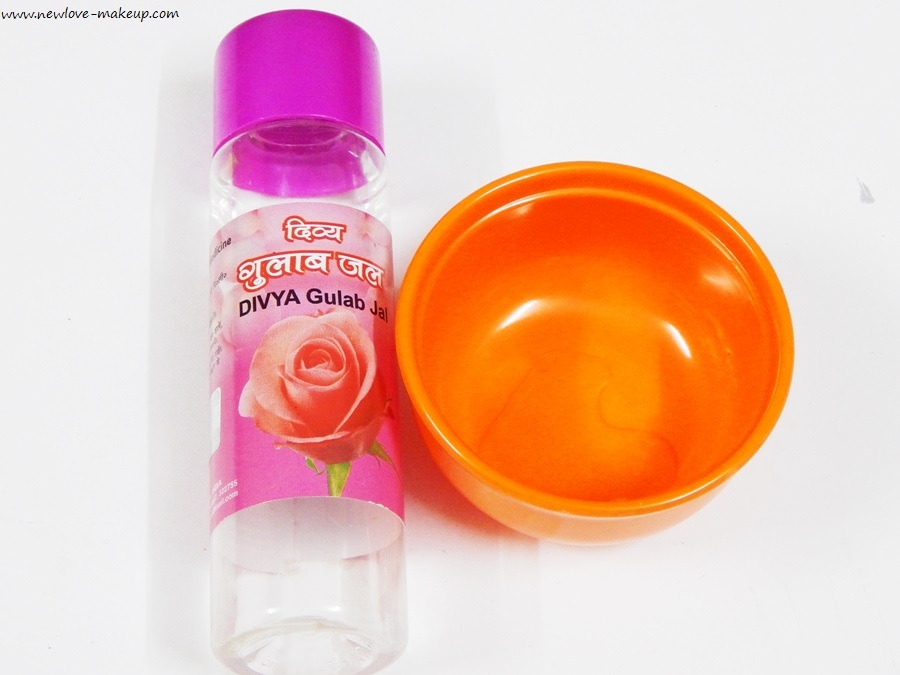
Rose Water – either homemade or store-bought will work.
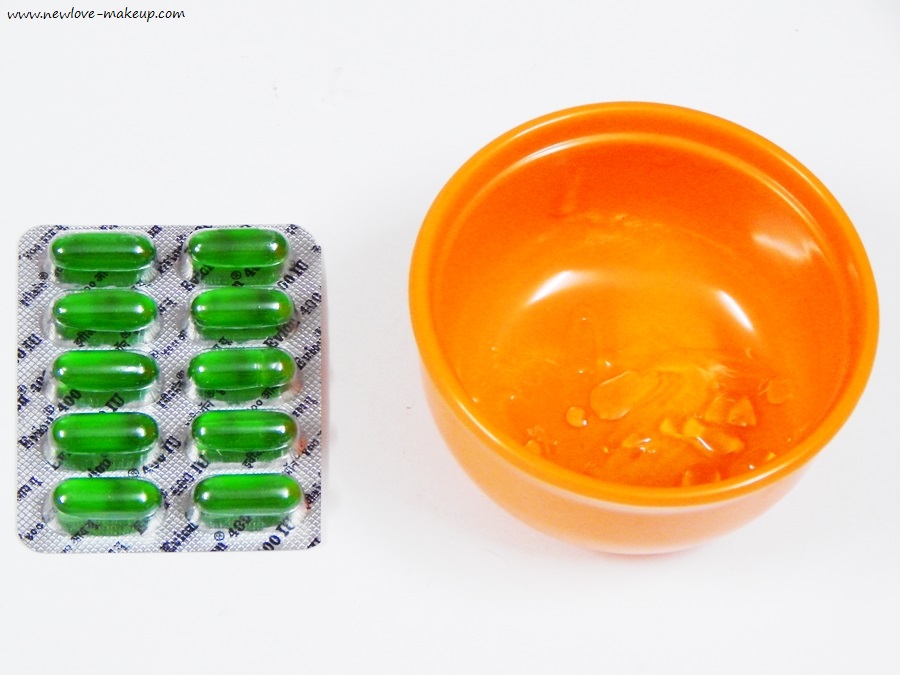
Vitamin E Capsule – easily available across the counter otherwise you can also opt for Vitamin E oil.
Sanitized Bowl – since it is a face product, it is better to have a sanitized place to start with and then transfer it to a dropper bottle or any container.
STEPS
Step 1
Add 1 tbsp. of rose water in the bowl.
Step 2
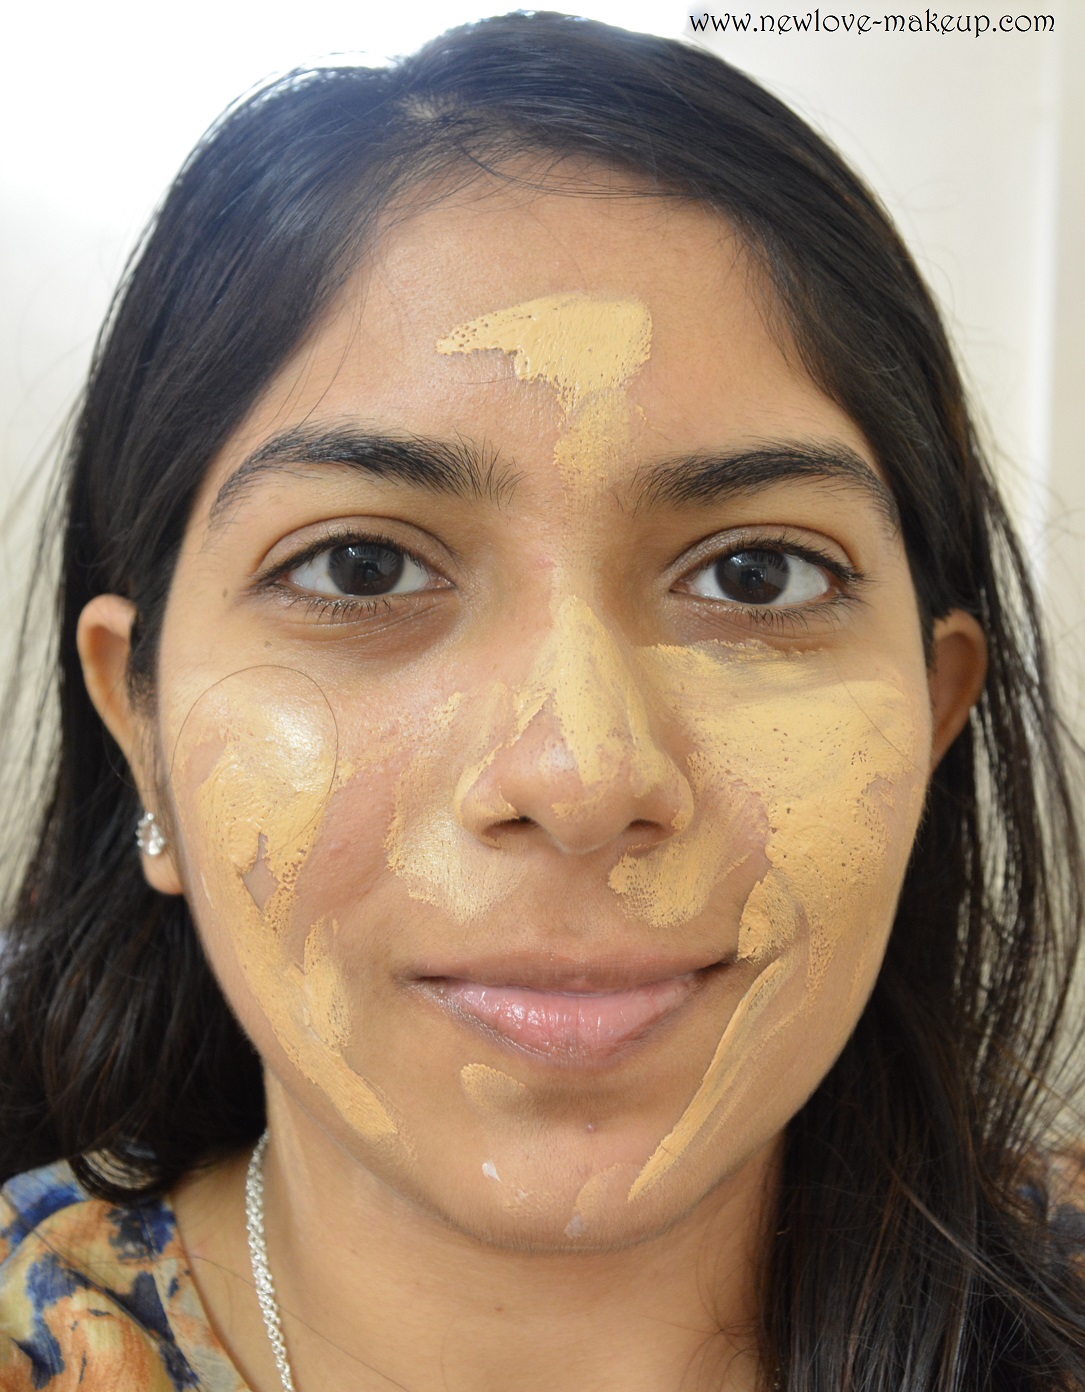
Next, add 2 tbsp. of aloe vera gel. Mix it thoroughly as both the ingredients have different consistencies and takes effort to blend well. You can also add 1 tbsp. if you want a runny consistency but I wanted sort of a slightly thicker one, so I added 2 tbsp.
Step 3
Add 2-3 drops of Jojoba Oil and again blend it in.
Step 4
Lastly, take out 1-2 Vitamin E Capsules and poke them to take out the oil. Add the mixture very comprehensively unless you see a uniform consistency without any lumps.
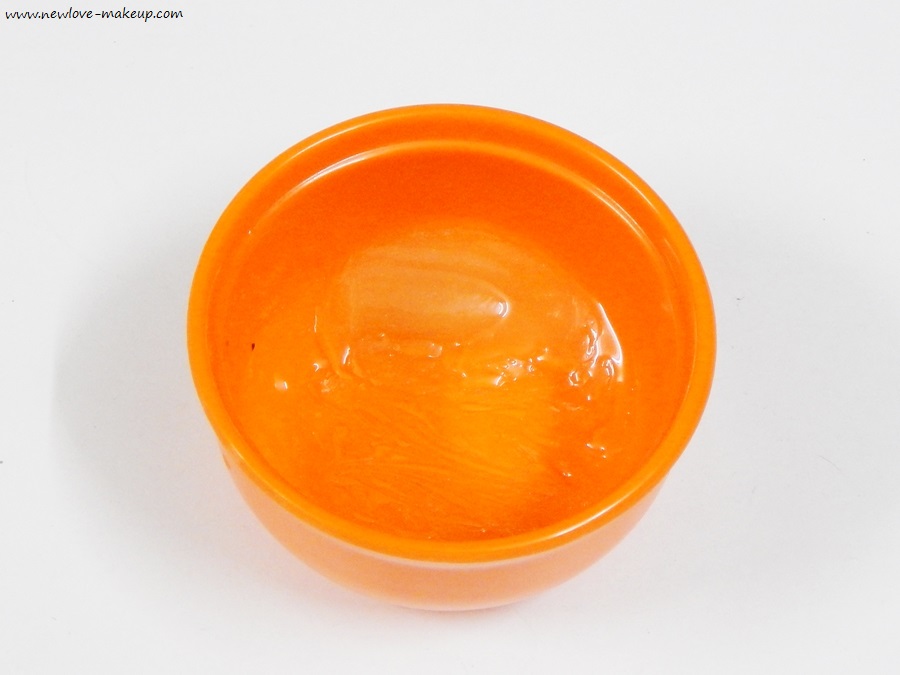
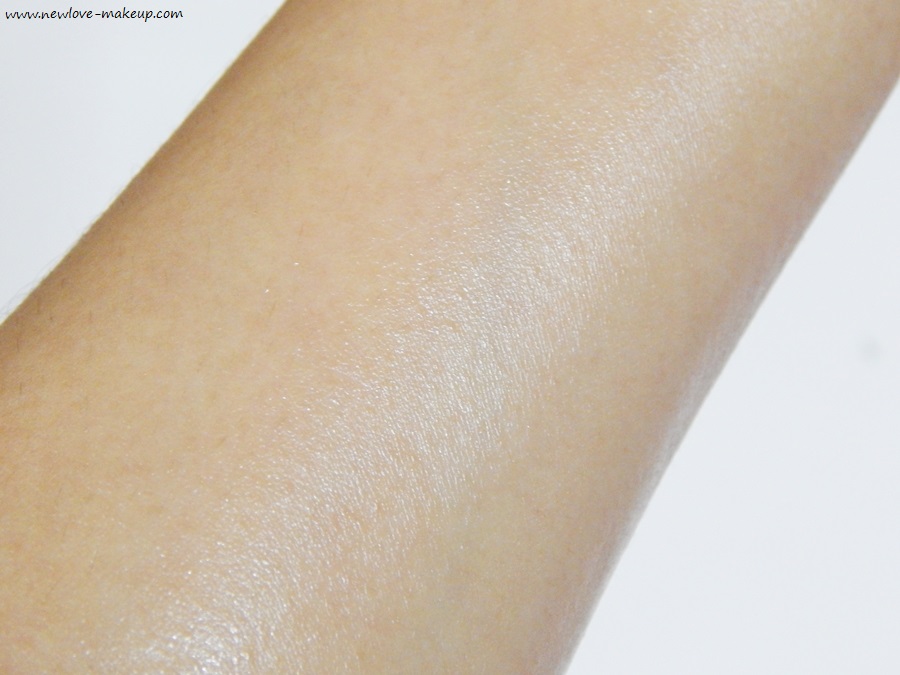
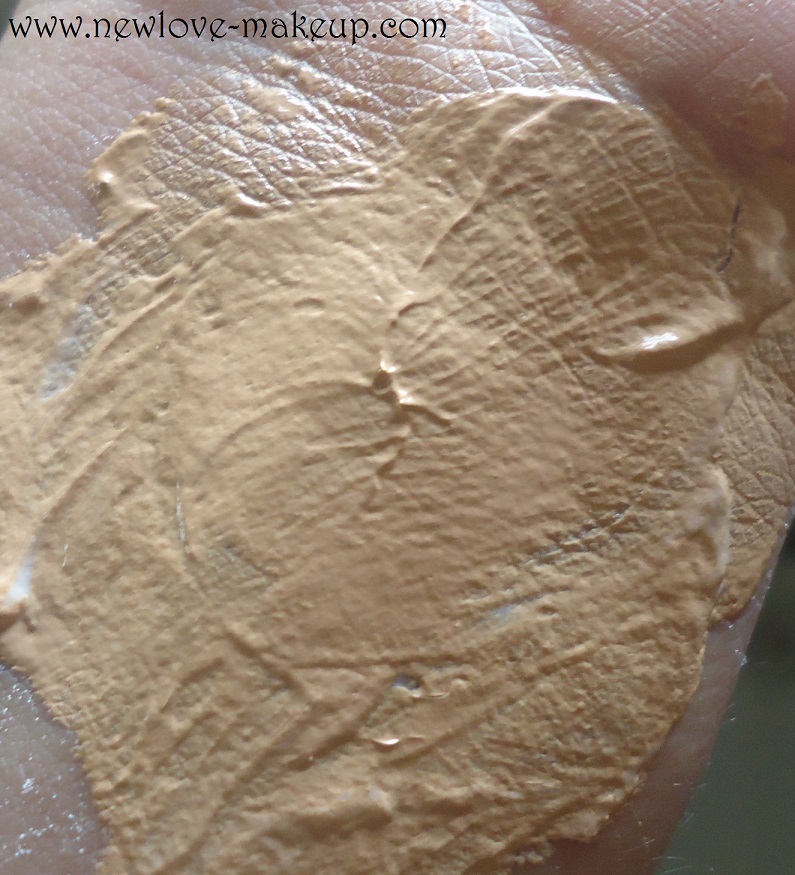
Final outcome
And Voila! You night serum is ready!
TIP: Do not make it in a large quantity because it is handmade and hence, the preservatives are missing. Make it enough for a week or two at the most.
FOR DRY SKIN – Since dry skin or mature skin needs more than just aloe vera gel, they can use shea butter or cocoa butter instead of aloe vera gel. They can also incorporate the essential oils like Almond, Rosehip, Grapeseed, etc. as per their own preference.
BENEFITS OF THE INGREDIENTS –
Vitamin E – Vitamin E is the main ingredient I would vouch for. It has excellent properties to revive and renew the skin cells at night. It treats the scars and marks on the skin due to ageing or acne. Being a great moisturizer, it nourishes the skin well without making it greasy or clog the pores when applied. It soothes and treats the sun burns and regular tanning of the skin. Most prominently, it make collagen that decreases the rate of aging signs like wrinkles, fine lines, etc.
Aloe Vera Gel – this is the HG for every oily skin. Seldom moisturizers suit us and we always find our way back to this. Aloe Vera, known as “plant of immortality”, it has numerous benefits for skin. It moisturizes the skin, heals the scars and soothes the skin from acne and nourishes without any greasy layer which gets absorbed in a jiffy. It also lightens skin pigmentation and slows down the ageing sign.
Jojoba Oil – it is known to fight wrinkles, stretch marks and cellulite. With high amount of ceramides which cover skin cells, it hydrates and nourishes the skin like no other. Oily skin doesn’t go well with other oils but this is an exception. It is so light weight and gets blended very easily. It also has anti-bacterial properties that treats acne and allergies.
Rose Water – the beauty of rose water in indefinite. From toner to face packs, makeup setting spray to hydration – it can do everything. It treats acne, soothes the skin from sun burns, refreshes and invigorates and has many anti-inflammatory and anti-oxidant properties for sensitive skin.
Do let me know how you liked the DIY.
Editor’s Note: I swear by Vitamin E capsules, but they are so sticky and messy while applying. I guess the mix of rose water and aloe vera gel will make applying Vitamin E easier. Also I am all for essential oils, I love using them. Definitely trying this Sanchita.
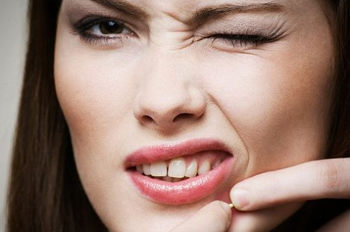
Acne Scars – Causes, Prevention Measures and Home Remedies
By Archana
Hi all,
After many product reviews, I am back with an informative post today. Acne is one common skin condition that many people suffer from. Though it mostly occurs in teenagers, many adults too face it. In today’s post, I will explain the common causes for acne, prevention measures and some home remedies to cure acne scars.
What causes acne?
The four main reasons for acne are:
* Excessive oil production
* Dead skin cells
* Clogged pores
* Bacteria
When our body secretes excess sebum/oil, they build up in the hair follicles and form a soft plug, creating an environment where bacteria can thrive in. This bacterial infection causes inflammation eventually leading to pimples. Whiteheads and blackheads too are actually clogged pores with bacteria and oil.
Some factors like hormonal imbalance, certain foods, stress, etc can trigger or aggravate the acne conditions.
How to prevent the occurrence of acne?
It’s always better to prevent the occurrence of acne in the first place with some good skin care routine.
* Keep your face clean by washing your face atleast twice a day to remove impurities, dead skin cells and extra oil.
* Use a separate towel for your face.
* Change your pillow covers and bedsheets weekly.
* Avoid or limit the intake of deep-fried foods, dairy products, sugar, salty snacks and junk food.
* Avoid using oils, gels and fragrances on your hair.
* Wash your hair often as oily hair can add to the oil on your face.
Home remedies for acne scars:
When a pimple occurs, it can leave behind marks and scars. Though there are many pigmentation creams and anti-acne gels available in the market, home remedies are always more effective and with no side effects. Only thing, they need to be followed diligently for atleast two weeks to see improvement. Here is a list of easy remedies at home to cure acne scars:
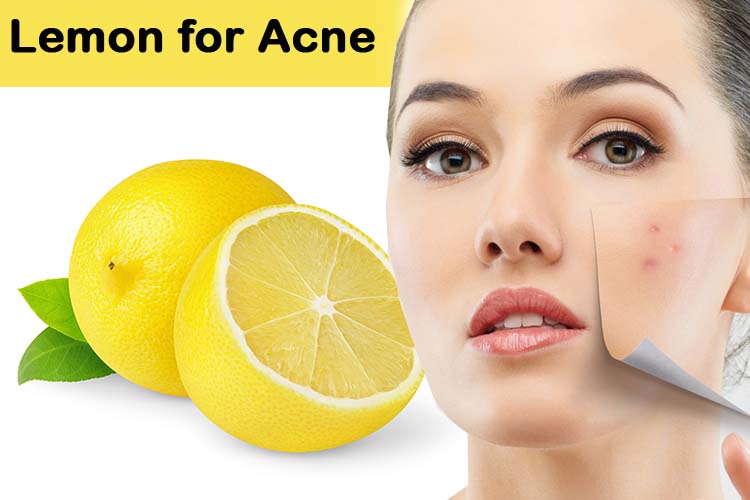
Lemon mask for acne scars:
* Lemon juice – 1 tbsp
* Honey – 1tbsp
* Milk – 2 tbsp
* Rose water – 1 tbsp
Mix all the above together and using a cotton wool apply on the acne scars. Leave on for 15 minutes and wash off. Lemon juice is a natural bleaching agent which helps lighten the scars. The rose water helps to soothe the tingling sensation caused due to lemon.
Aloe vera gel for acne scars:
Extract fresh aloe vera gel from the plant and apply on face. You can leave it overnight. Do it regularly for two weeks for the acne scars to fade. Aloe vera not only soothes inflammation but also helps in regenerating damaged tissues and speeds up the healing process.
Blend the cucumber into a smooth paste. Add the gram flour and turmeric powder and apply as a face pack. Leave for 20-25 minutes and then wash off. This treatment is good for sensitive skin also to get rid of acne scars.
Potato and tomato mask for acne scars:
* Half a potato
* Half a tomato
* Honey – 1 tbsp
Grate the potato and extract the juice from it. Blend the tomato into a fine paste. Add the potato juice and a teaspoon of honey. Apply this mix all over your face and wash off after 15 minutes. Tomatoes contain the enzyme lycopene which help to lighten pimple marks. Potatoes also have skin lightening and bleaching properties.
Cinnamon and honey mask for acne scars:
Add half a teaspoon of cinnamon powder to one teaspoon of honey and apply on your acne scars. Leave it for an hour and then wash off. This mixture has anti-bacterial and anti-inflammatory properties which is effective in treating the acne.
Tea tree oil for acne scars:
This is a proven remedy for reducing acne scars. Tea tree oil is an excellent antiseptic, antibacterial, antifungal and antiviral essential oil. Just dilute some tea tree essential oil in water and apply this solution on your acne scars everyday. Leave it overnight. Follow it regularly to see visible reduction in scars and blemishes.
Apple cider vinegar for acne scars:
ACV is a natural astringent and balances the pH level of your skin. It is effective in the treatment of acne too. Mix 1 part of apple cider vinegar with 1 part of water and 1 teaspoon of honey. Dip a cotton ball in the mixture and apply on scars. Leave it for 15 minutes and wash off. Do this once daily.
Sandalwood and orange face pack for acne scars:
* Sandalwood powder – 2 tbsp
* Orange peel powder – 2 tbsp
* Rose water – 2 tbsp
Mix all the above into a fine paste and apply as a face pack. Leave it for 30 minutes and wash off. According to Ayurveda, sandalwood is a effective soothing and cooling agent to treat skin inflammations. Orange peel powder helps to lighten the marks.
So these are some of the home remedies you can follow to cure acne scars, pimple marks and blemishes.
Editor’s Note: This was a really well written post Archana and the remedies are fab. I think I always stick to Aloe Vera Gel and the fuller’s earth, sandalwood mix. I will surely try the other home remedies mentioned by you.
Which ones have you tried? Share your experiences below.
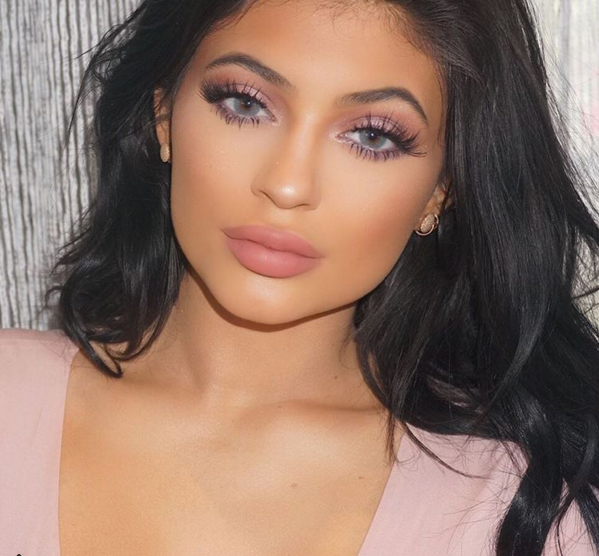
Decoding Makeup Hacks Of Kylie Jenner to Get the No-Filter Look
By Sanchita
The beauty world has been blown away with the makeup looks of Kylie Jenner. Kylie is a sensation in the makeup world, from the pretty eye lashes to the sensuous pout – we adore her makeup techniques like anything. The Time Magazine has names her one of the “30 Most Influential Teens of 2015” and we know why! She has every flair to make any nude makeup look glamorous. We couldn’t be pleased when she revealed her makeup secrets and launched her own app named “Kylie” where she shares her life, makeup tutorials, etc. and revealing her endless passion for beauty and makeup. Very recently when she shared her makeup tutorial and the various tips and tricks, I was amazed how easy and fabulous they were! No wonder her skin looks flawless and refined in every flash photograph, photoshoot or even a simple selfie. I tried most of the tips and tricks she shared and I thought of penning down for my readers as well. Scroll down to know how Kylie does her makeup to look that extraordinary!
New Way to Apply Moisturizer
How do you use a moisturizer before makeup? Applying it with fingers and blending onto the skin, right? No! Kylie does it the other way. She applies the moisturizer with a brush (preferably, a duo fiber or stippling one) and blends in. she doesn’t let a single patch of area, no matter how small or insignificant, gets away without moisturizer. In this way, you can ensure that the skin is thoroughly moisturized and there is no room for dry patches when we would apply the foundation. It is also easier to blend and set well on skin.
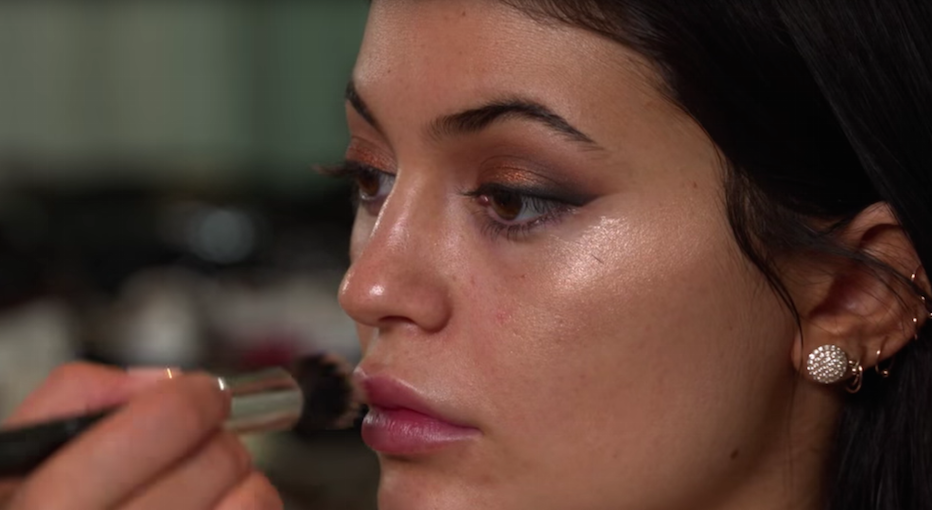
Eye Makeup before Base
Okay, so we have been doing this all wrong. Every time I try to get all decked up, I finish off the base and move to eye makeup. Well, Kylie and her makeup artist explains why the eye makeup has to be done first. This is because there is a lot of things that can go wrong while doing eye makeup. For example, fall out issues, too much product on the lower lash line, smeared gel liner, mascara smudging, etc. hence, when the eye makeup is done, we can easily move forward with the base, concealing or correcting anything that went wrong. Also, never apply foundation underneath the eye area. It is sensitive to creasing and when loaded with corrector, concealer, foundation and powder, it is more likely to crease. Simply use a concealer (or corrector, if need be) and set with a translucent powder or bake.
Eye Cream is a Must
Although she is extremely young and has very nice eye skin underneath, she swears by using an eye cream to hydrate the area. She has stated in numerous videos, write-ups and interviews that the beauty behind her makeup is moisturization. She believes that using an eye cream will prevent dark circles (sometimes caused by pigmentation from dryness), puffy bags, fine lines and wrinkles. Her favorite eye cream is Kiehl’s Creamy Eye Treatment with Avocado which works great for under eyes.
Contour Powder for Eyeshadow
Wow! That’s really a multi-purpose tip! I mean, imagine yourself splurging on a very expensive contour and also brown eye shadow for crease. Both the colors would be same and thus, we can easily to contour powder for eyes as well. We love her neutral soft brown eye makeup and soft brown cut crease eye makeup and no wonder, they look impeccable! I believe The Balm Bahama Mama Bronzer and NARS Laguna Bronzing Powder would be perfect for Indian skin tones.
Use a Scotch Tape
Yeah, you might think this is a beginner’s trick but when I saw that Kylie’s Makeup artist also uses this, I couldn’t believe! After applying the scotch tape (linking the end of lower lash and end point of brow), she used a brown contour powder for the crease and deepen it slightly with layering. Next, she applied a matte black eye shadow on the inner corner in the “V” shape a smudged it pretty well. After then, she took out the tape and voila! The edgy smoky eye is ready! This also creates a line for the winged eye liner to apply with ease.
Clumpy Lower Lash with Mascara
While we always hunt for mascaras that are least clumpy and use separate spoolie or cotton buds to prevent clumps, Kylie Jenner’s makeup artist explains that clumping on the lower lashes is good. It gives a natural smoky illusion to the lower lash by providing the little shadow underneath. Thus, you won’t have go again and again with the pencil brush or smudger to gives the smoky look which can be easily achieved through the mascara.
Illuminator before Foundation
Why haven’t anyone thought of that before! We love the dewy natural glow and that is the only reason we use the highlighter. Now, applying highlighter (powder or liquid) and blending it on the skin with the foundation on can be slightly tricky. It might also mess up the foundation and high chances are that, you would look like a disco ball if the strobing is done in excess. So, to get the natural (yet made up) dewy glow, apply the highlighter on bare skin and blend well. Now, apply the foundation and see the natural glow from within.
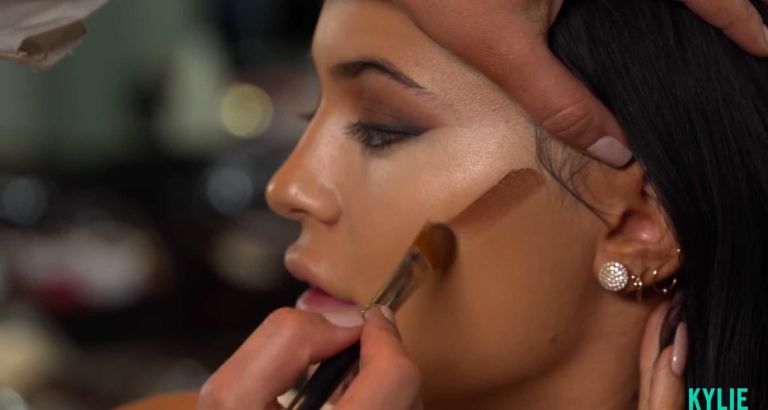
Contour with Darker Stick Foundation
We have seen that sometimes blending the contour power or cream is the toughest job on earth. Too much blending leads to a muddy look and messes up the base makeup as well. Therefore, instead of contour power or stick, use a foundation stick which is two shades darker than your skin and blend it in. In this way, the darker foundation will blend easily with the already blended foundation on the skin. There won’t be any patchy and uneven look and you won’t have to try too much as well.
Use an Orange Blush for Blush-Base
Have you ever heard that even your blush needs a base? Well, Kylie say so. Her MUA uses an orange blush before she applies a soft pink blush on her cheeks. Results? Warm and gorgeous! The orange color gives a basic warmth to the pink which will surely work like a wonder for Indian skin as well. It will help the blush to stay longer and smoother as well.
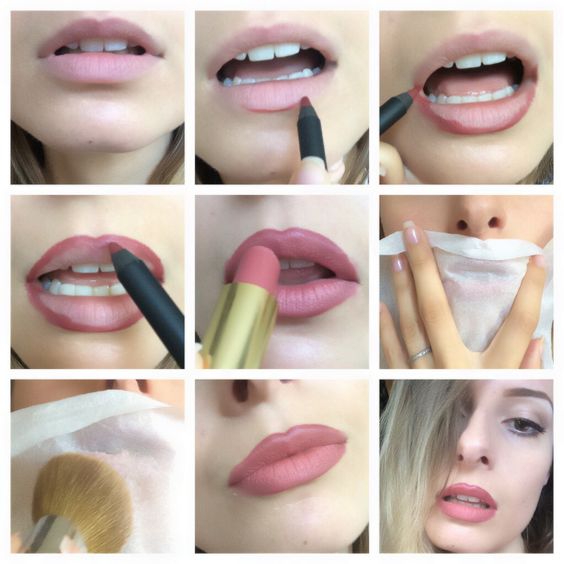
Always Use a Lip Liner
Her lips are as gorgeous as it can be. It is rumored that she spends around 40minutes to do her lip makeup and we can surely see what difference it makes. She suggests making the lip liner a Holy Grail for every lip makeup. Whether you are using a glossy, velvet matte, matte or liquid lipstick – never ever forget to line the lips first either with a neutral color or the similar color of the lipstick. Also, line the lips slightly above the natural lip line (don’t overboard it at all) and this will give an illusion of fuller lips. You can also add a dab of concealer of pale highlighter on the centre of the lip for the illusion.
Editor’s Note: Oo..that was a fabulous and much needed post Sanchita. I knew and followed 1-2 things but never knew all these tips, super helpful! Thanks a lot 🙂
So, let us know – which is your favorite Kylie Jenner makeup look?
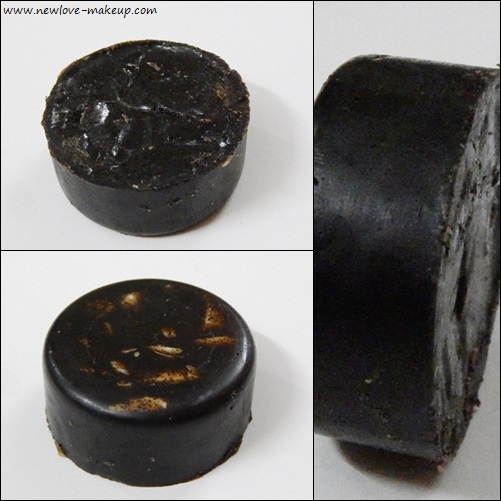
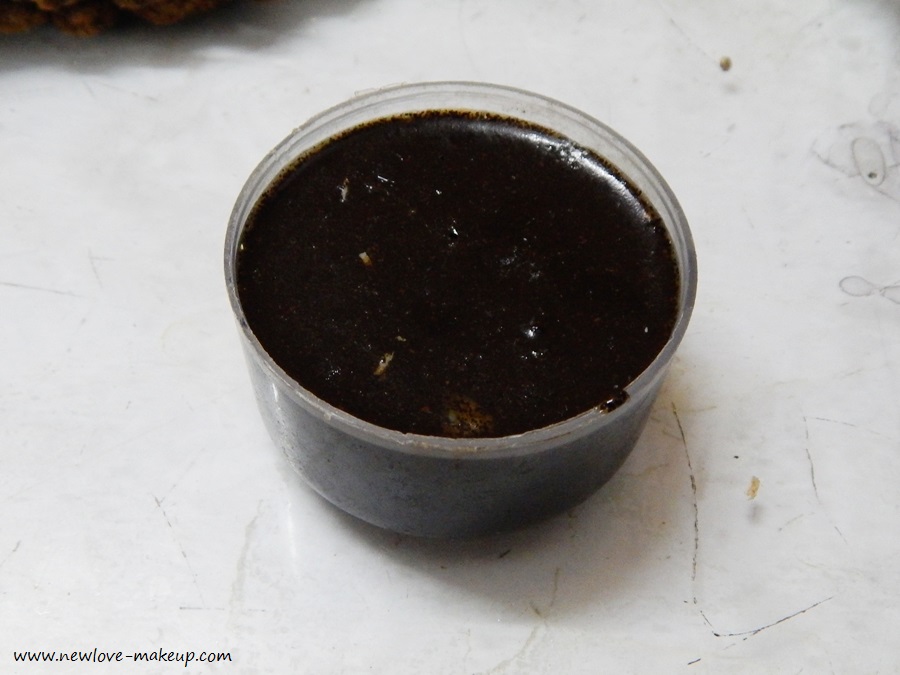
Scrubbing is extremely essential in winters as the development of dry skin needs to exfoliate to preserve then natural radiance of the skin itself. Honestly speaking, I prefer my winters with oversized sweatshirt, hot chocolate, a warm bed to snuggle in and reading a soul touching book. Yes, I am one of those lazy girls who like to keep the skin well-scrubbed of dead cells and yet do nothing about it. This is when a dear friend of mine told me to make a ‘scrub bar’ that would clean and exfoliate at the same time. My heart leaped with just with the thought of such multipurpose body care product and I immediately thought of making it. So it’s time, my dear readers of NLM, to let you know how to DIY this amazing thing!
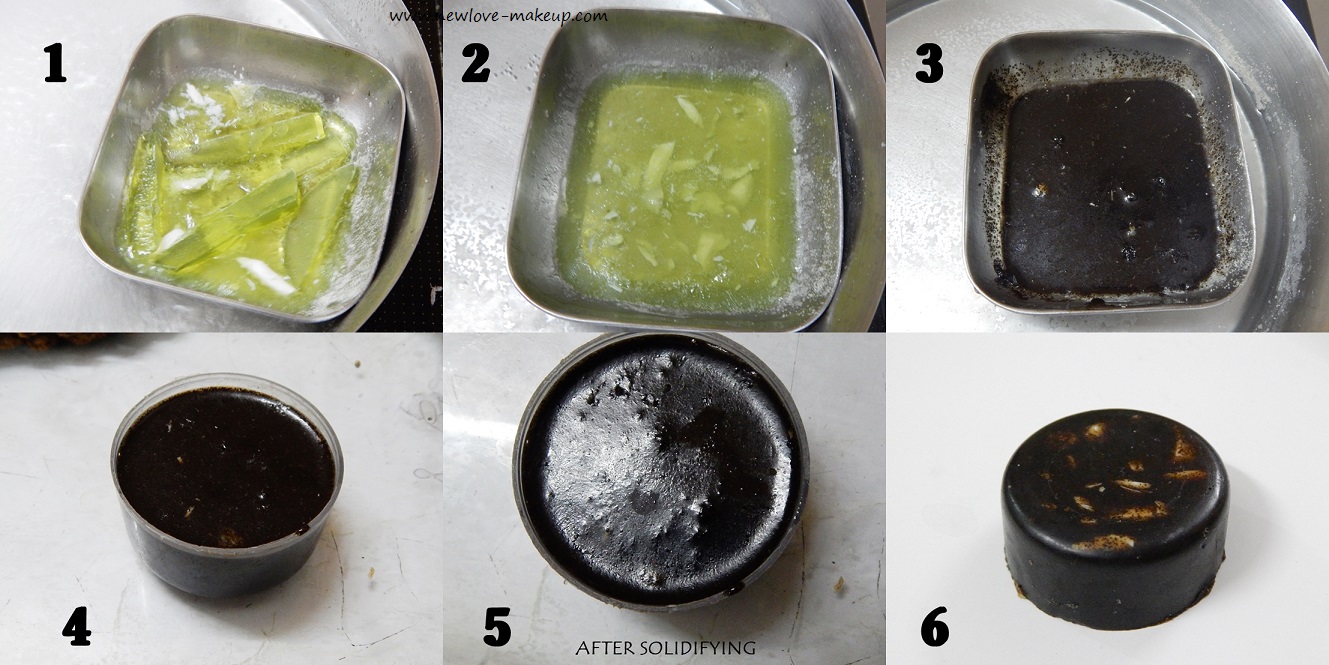
Things you need:
Crushed soap bar. (a gel based one works better and easier to deal with)
Olive oil.
Glycerin.
Ground coffee. (not the instant one which blends in but the grounded beans for filter)
Empty container.
Steps:
Step 1
1. In a double boiler or on top of a boiling water, place the cut out pieces of the soap. Do not put it directly under the flames which would lead to burning.
Step 2
2. Once the soap melts in heat, simmer it down and add 2 tbsp. of olive oil and glycerin each. Then, mix it well with the liquid soap.
Step 3
3. Now add the coffee in it and again use a spoon to mix it well.
Step 4
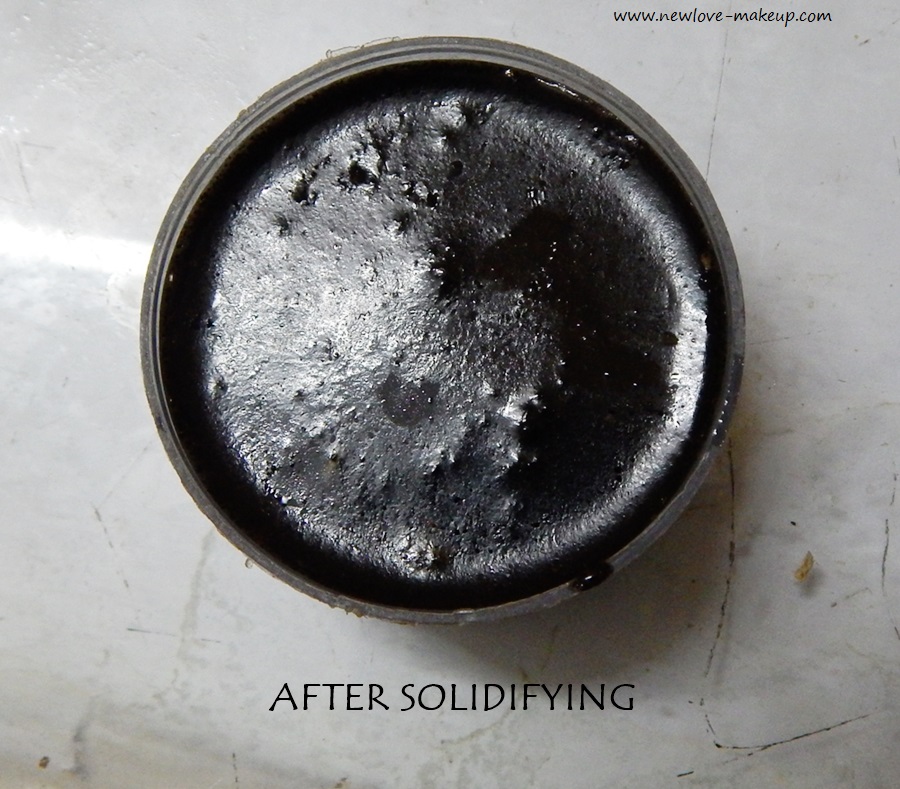
4. Remove the mixture from the heat and pour in it the container. Now, this has to be done very quickly as the soap has the tendency to get sticky.
Step 5
5. Keep it in the refrigerator for 1-2hours. It also depends upon the soap on how much time it requires to solidify. Mine was done in 1hour.
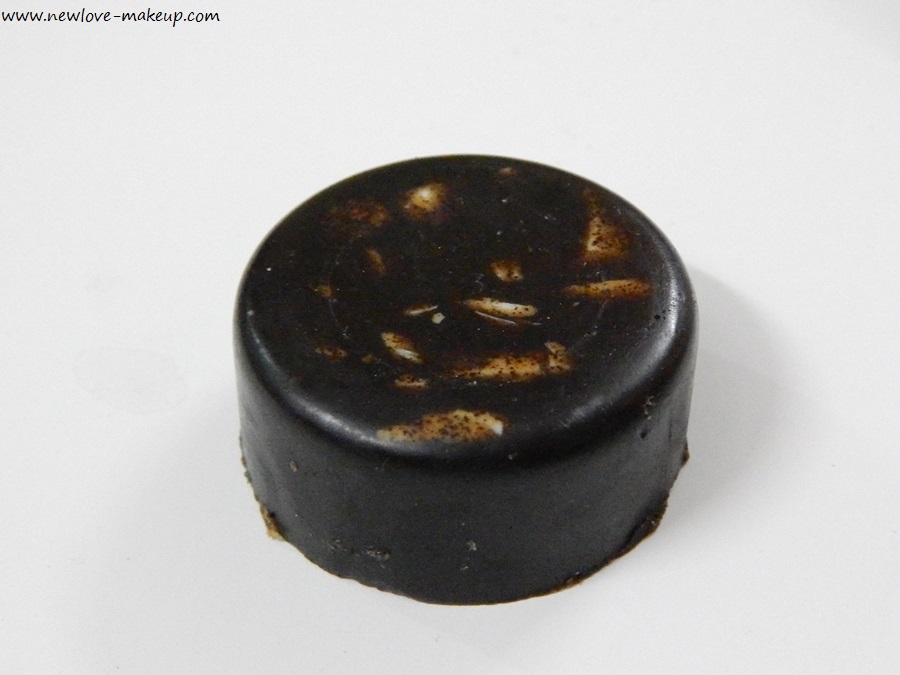
Final
6. And you homemade scrub bar is ready to use!
P.S: You can also add big granules of sugar to exfoliate. Sugar is slightly coarser when solidified and hence I generally feel it is too rough for my normal skin but if you have dry skin, you can incorporate that. Also, you can make a separate scrub bar with sugar and walnut particles for feet as well.
As we all know, soaps are excellent in washing the dirt and therefore I added it to cleanse the skin. Olive oil and glycerin is extremely hydrating and hence, while scrubbing you will get the desired moisture to be restored. Lastly, the coffee particles are coarse and semi-fine milled which helps in exfoliation- gently and effectively. It stimulates the blood flow while scrubbing and tighten the skin thereby reduces cellulite and great for anti-ageing.
Overall, this has been a lifesaver for me. I imply invest less time for skin care yet get the best of it. Do let me how you liked my DIY.
Editor’s Note: This sounds amazing Sanchita and I love the coffee smell, definitely trying it out.
Have you tried making something like before? A DIY Scrub Bar? Will you try this? It’s easy peasy.
Lifestyles today are more stressful than comfortable, despite the luxuries that we can indulge in. Computers, mobiles, and all the electronic gadgets that we have involved to make our lives simpler have further disturbed our working schedules, that too on the cost of the health of our body. More work, less sleep; and the direct results are clearly visible in the puffiness and dark shadows around our eyes.
Raccoon eyes, under-eye bags, dark circles, shadows, panda eyes; all these are names of the same problem. So what basically causes our eyes to develop such conditions?
Read below to know more.
Causes
Whether you may know it or not, the skin which appears to be bluish black under our eyes is because of the skin in that area being too thin, thus making the blood vessels visible all the more. No, your blood vessels are not exactly blue; but only the wavelengths of blue and purple colors are allowed to be reflected by your under-eye skin, thus giving an impression of bluish-black under eye bags.
1. Genetics
One of the major causes of recurring or prominent dark circles is genetics. If your parents have thin skin around the eyes, or more than average blood vessels, it is almost certain that you will be passed on with the unfortunate trait.
2. Age and Gender
Dark circles under the eyes can begin to be dominantly visible in your 20’s, both in males and females alike; but they are most daunting in the old age. In old age, our skins loose elasticity and do not have the ability to regenerate the skin cells at a steady pace, thus the predominance of raccoon eyes.
3. Fatigue and sleeplessness
In case of fatigue, skin produces a chemical named cortisol, to give your body dynamism when it is working on low levels of energy. It increases the volume of blood in the body, thereby enlarging the blood vessels by creating more pressure in them. As the skin is thin around your delicate eyes, the engorged blood vessels are more prominently visible.
4. Ruptured blood vessels
At times, blood vessels under the eyes can get ruptured and the blood leaking from them starts oxidizing; leading to dim shadows on the lean membrane underneath the eyes. However this is nothing to be much apprehensive about, as in the company of the right type of treatments; this hitch can be easily rectified.
5. Excess of sleep and other lifestyle reasons
Dark under eye circles can even be caused by high sodium intake; which helps in retaining more fluids in body, leading to puffiness; which in turns makes dark circles more visible. Sleeping on your stomach for prolonged periods of time, leads to the accumulation of fluids in the facial area, especially around the eyes, causing freaky dark circles. Or say, when you have been crying uncontrollably, for any reason whatsoever, the salinity of your tears leads to puffiness around your eyes. So forget what happened and just smile 🙂
Remedies
If you are one of those few unlucky ones who have to bear with the problem of dark under eye circles, no matter what, and you do not want to spend on swanky under eye creams or laser surgeries; these home remedies await you.
a) Cucumber apart from acting as a cooling agent, also works as a lightening instrument and an astringent for your skin. Placing cucumber slices on your eyes, or gently rubbing cotton balls dipped in fresh cucumber juice can help to reduce the dark circles. Though the cucumber juice works better if you leave it overnight. Don’t worry; your skin will readily absorb it.
b) Potato juice is great to reduce the puffiness around the eyes, and is often used for treating tan spots and blemishes. Grate a raw potato, extract its juice, and apply the freshly squeezed juice to the affected area. Leave it on overnight if possible.
c) For added goodness, mix both cucumber and potato juice, and with a soft cotton pad, dab the juice gently on to the skin. Leave the juice on for about half an hour, and wash the face with cold water.
ADDITIONAL TIP: To keep the eyes moisturized, follow up by gently massaging olive, coconut or almond oil around the eye area. Remember not to put too much pressure around the eyes.
2. Frozen metal spoons
For instant relief from under eye circles caused by lack of sleep, or sleeping in the wrong posture for prolonged periods of time; all you need is two frozen metal spoons. Make it a habit to keep two metal spoons in your freezer so that you can utilize them any time you want. Just place the rounded edges of the spoon on the eye area and let it rest till the temp of the spoon becomes normal. The cooling effect will help stimulate blood circulation and also decrease the quantity of fluid accumulation around the peepers.
3. Chilled Green tea bags
Green tea is chock full of anti-oxidants, and anti-oxidants are good for your skin. Period. Dip two green tea bags in boiling water, and let them stay immersed for about 3-4 minutes. Take out the tea bags and place them in the freezer, letting them stay till they are chilled. (In the meanwhile, enjoy the goodness of your green tea.) Once the tea bags are chilled enough, place them onto your under eye areas, one bag on each eye, and let them rest for 15-20 minutes. You will notice the results for yourself.
4. The goodness of rose water
Pure Rose water is one product which is the answer of almost all skin care problems. Yes it is that good. Dab a pair of cotton balls in cold rose water, and apply it to the eyes. Let the cotton balls stay on the eyes for as long as possible and wash your face off. Do not forget to follow up with a rich moisturizer.
5. The Wonderful Tomato juice
Most of the treatments for dark under eye circles lie in our own kitchen. Tomatoes comprise of lycopene, which is a great anti-oxidant and has the ability to lighten your skin. Squeeze the juice of one ripe tomato, or mash the pulp and mix in a teaspoon of fresh lemon juice. Lemon juice again acts as a bleaching agent and has anti-inflammatory properties which reduce puffiness. Apply this mixture under the eyes and let it stay for about 15 minutes and wash it off with cold water for better results.
6. Crushed mint leaves
Mint has amazing cooling properties which helps in instantly soothing the skin and reducing the appearance of dark discoloration around the eyes. Crush a few mint leaves using a mortar and pestle and apply the leaves as it is under the eyes. Wait for about 15 minutes and then remove any residue with a damp cotton swab. You can even mix the goodness of cucumber juice to the crushed leaves for better results.
7. Cold compress or ice pack
Cold compress works on the same principal as that of the metal spoons. The chilling effect will help stimulate blood circulation, thereby diminishing puffiness and rectifying the temporary pigmentation under the eyes. Either use a gel based cold compress, or take a few ice cubes wrapped in a thin cloth, and place them under your eyes till the ice melts off completely. Goodbye, raccoon eyes. 😉
8. The efficient milk and fenugreek seed paste
This DIY under eye face mask can work wonders to rectify dark circles. Take a few fenugreek (methi) seeds and soak them overnight. The next day, grind the seeds to form a fine paste. To this paste add a tablespoon of milk and a pinch of turmeric. Mix well, and apply the paste under the eyes.
9. White bread and milk
Milk has both fats and proteins, making it the best moisturizer for our skin. Mix this elixir of goodness with a slice of white bread, mixing it into a fine paste. Apply this paste daily on your under eye area for smoother and even toned under eye skin.
10. Say goodbye to bad habits
Smoking, drinking and stressing a tad bit too much are the main causes which can lead to hyper pigmentation around the eyes and leads to fluid accumulation, causing puffiness. For eyes that do not resemble that of a panda, try bidding goobye to these bad habits of yours.
Till when are you going to hide the dark under eye area with corrective concealers and heavy-duty foundations? It is high time you followed one of these easy tips listed above and bid goodbye to these nasty shadows which never allow you to look your best. But remember that all the points listed above are purely natural and you should not expect instantaneous results; patience is the key.
Editor’s Note: Well written post Ishleen, I am going to try some of the tips myself 😀
Do you have dark circles? Use any of the tips mentioned? Also add your own tips in the comments below which work for you.
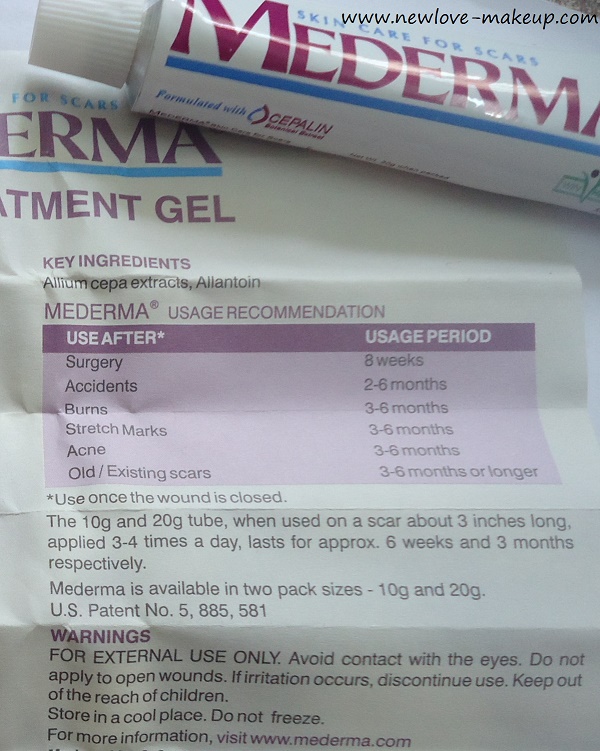
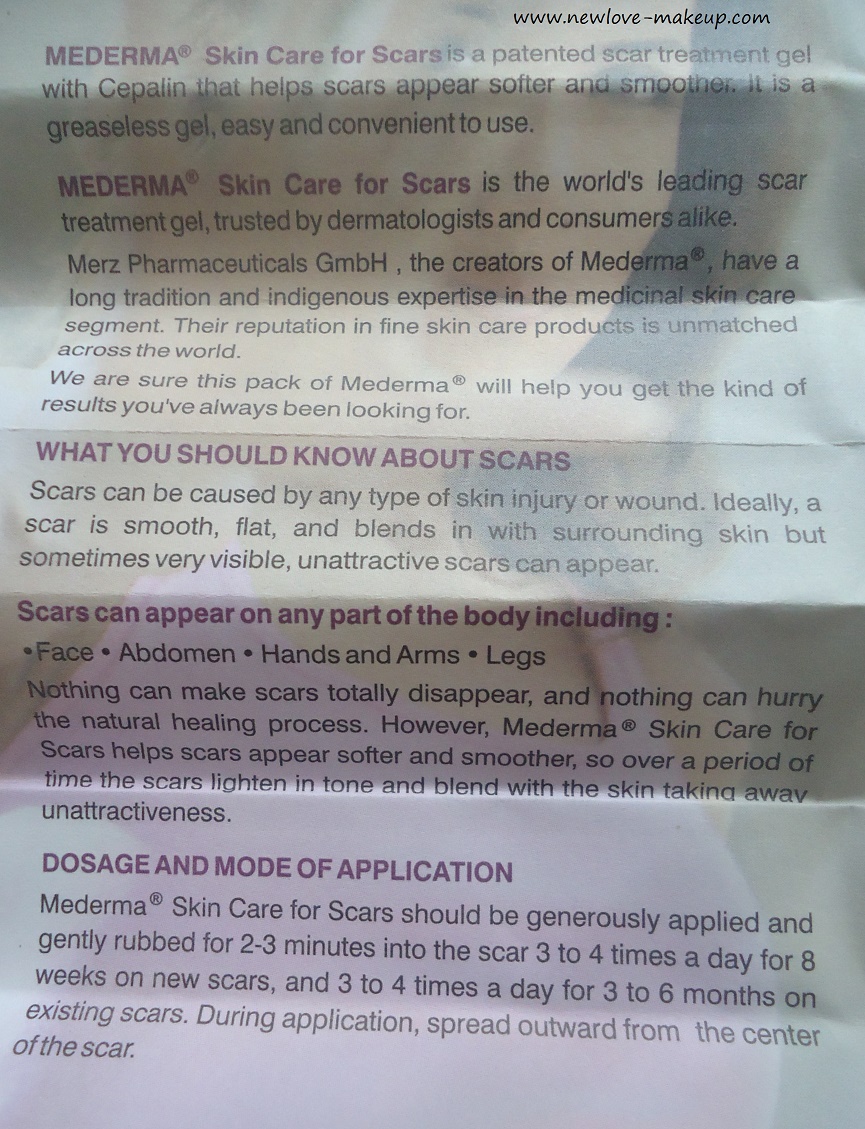
Visibly reduces scars resulting from surgery, injury, burns, acne and stretch marks in 8 weeks (Results depend on the length, skin type, age and location of the scar)
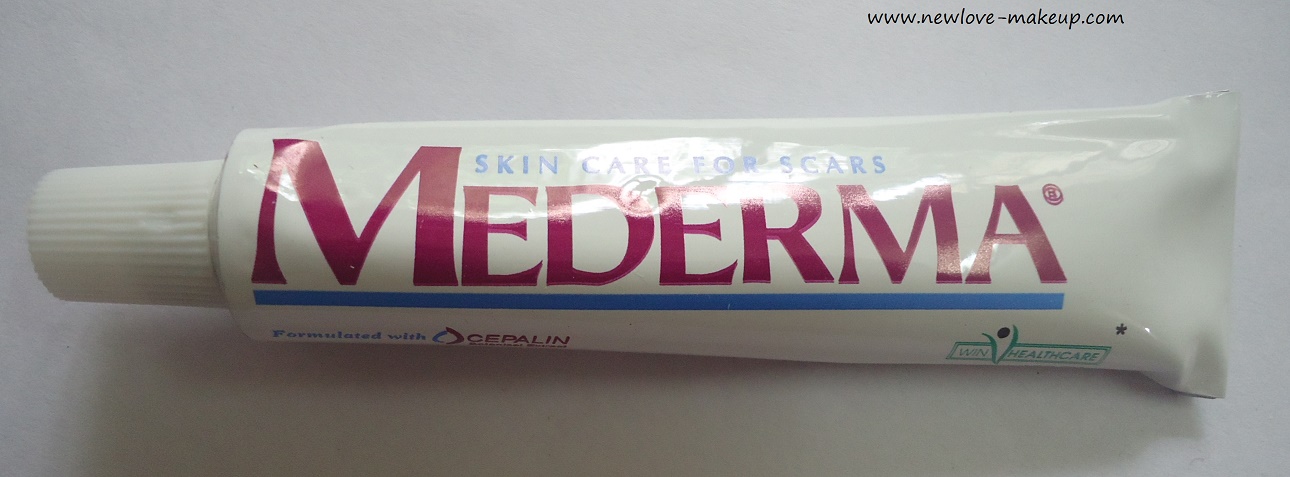
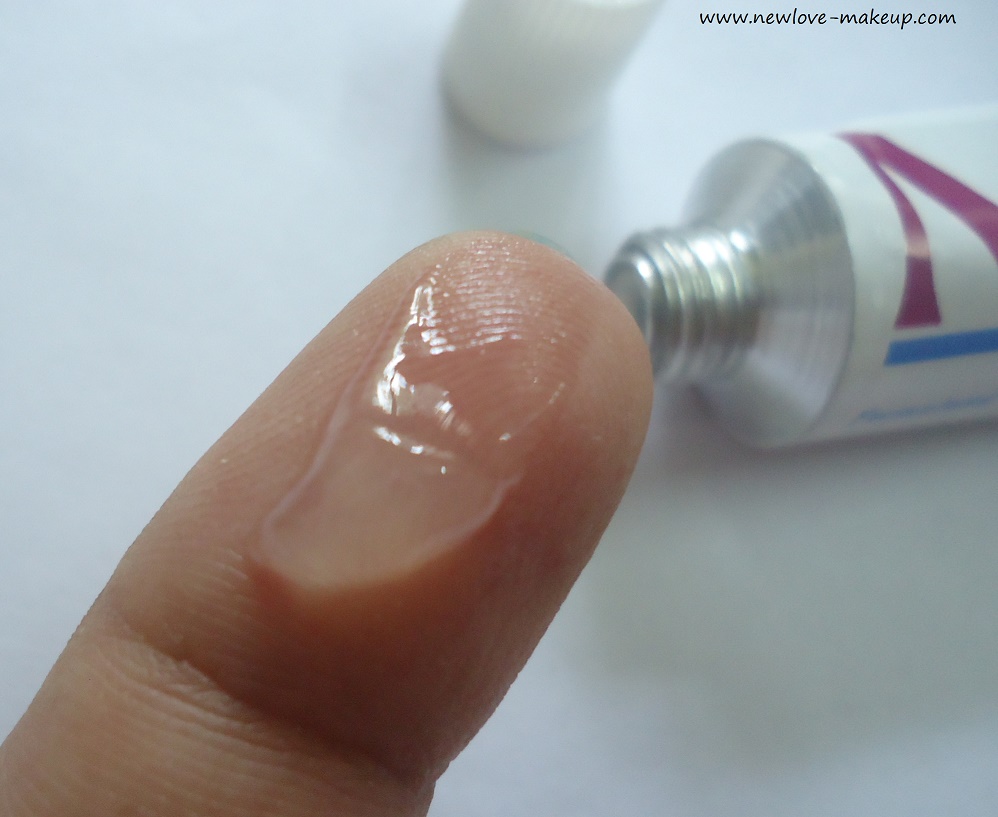
An easy to use, greaseless gel that helps scars appear softer and smoother.
Formulated with Cepalin and Allantoin (a proprietary botanical extract that restores your skin’s wellness).
Mederma® is the No.1 Doctor recommended product in USA for scars.
MRP: Rs.385/- for 10g, Rs.700/- for 20g (Buy HERE)
As you guys know, I met with an accident in January and had surgery stitch marks on both my legs, on the right knee and left ankle predominantly. Usually the senior surgeons do the main internal surgery and the stitching is left to juniors and interns and the stapling or stitching if not done well, the skin forms a mount there. Now at that moment, nobody cares about the skin, as the main internal surgery is very, very crucial especially the surgeons are least bothered about the skin or scars.
Also the skin on my left arm was completely bruised and even though it was not a stitch mark, the mark was even darker and deeper.
There was this main big cut on my knee and two smaller ones at the left side of the bigger cut. The skin there had formed a mount and as per what I read online, fresh scars are easier to fade when treated immediately. I ordered Bio Oil and was using it ever since my stapled were removed, twice a day on all of my scars. It kept the skin moisturised and that helps coz otherwise if your skin feels stretched, you kind of feel like itching on the area.
I used Bio Oil for a little more than a month, but did not see any visible results or improvements. Bio Oil has Vitamin E and I also read that sometimes Vitamin E Then I read about Mederma and I thought why not try this too, as I was trying all possible ways for the scars to lighten.
Now the Mederma pack mentioned for fresh scars, it has to be used twice a day for 8 weeks to see results. I used it for more than 2 months, and I did see results.
My surgery stitch marks went from black to light brown and the mount on the skin (called ‘keloids’) on the biggest cut is almost gone, now there are two smaller cuts which I am hoping settle down soon too. (I am not saying it is only coz of Mederma coz with time, they were anyway going to lighten) I met a dermat at an event and I asked her about it, she told me cortison injections need to be injected on keloids and I freaked out. I did not want any injections, as I have already suffered a lot and everything freaks me out now :/
I was surprised how by only using Mederma, the biggest cut had subsided a lot and almost faded too. Now the bruises on my left arm and the two smaller cuts near right knee and the bigger left ankle one are still brown and I hope they lighten too.
I am using this since a long, long time now, though I took a break in between. But, the results are very slow! I would say Mederma Gel definitely works but it takes forever, so one has to be patient.
Also, it is definitely on the expensive side, but when you want to get rid of the scars without going through cosmetic surgery or taking injections, etc, then slow and steady is probably the way to go.
It is a transparent gel, with an unpleasant smell. I would say going easy with the quantity applied, as it is very expensive! It forms a layer on the skin and when you have a bath next, the layer kind of peels off like the dead skin coming out when you rub your skin.
I am not sure how it actually works, like renews the skin cells and layers or what, but if you are looking for something for your acne scars and surgery stitch marks, this will surely help lighten them.
Again, the scars won’t go away completely and also don’t expect overnight magic as it took me about 5-6 months to only lighten the scars. Also, on old scars, it might even take longer.
I am not sure if it works on stretch marks, I can say it works on acne scars, burn marks and stitch marks.
Rating:
Quality: 4/5
Value for money : 3.5/5
Availability: 4/5
Overall rating: 3.5/5
Have you tried using Mederma? Bio Oil did not work for on my surgery marks, what else have you tried for scars which actually worked?
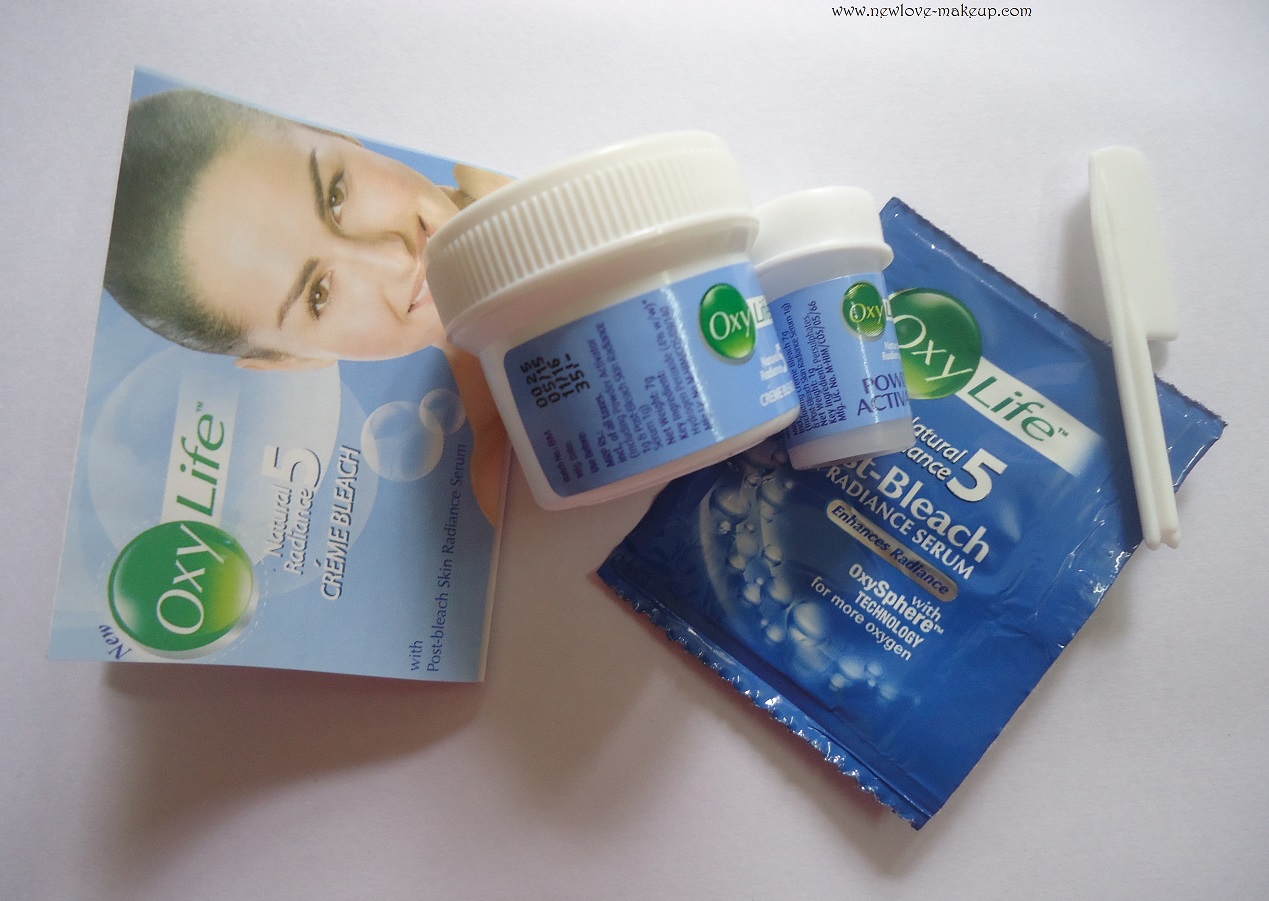
First Impression: OxyLife Natural Radiance Creme Bleach
Hi guys,
There are so many times we feel our skin looks dull and lacks that inner glow. We all need that glow, right 😉 Especially before an important event or a party.
Does your skin lack glow and looks dull and dark? Has uneven skin tone? Often exposed to harsh sunlight,dirt and pollution? Well chances are it lacks oxygen.
With age, your skin loses its ability to retain and utilise oxygen for normal metabolic processes. Oxygen basically nurtures and energizes your skin, making it look hydrated, plumper and younger!
And how can you get oxygen into your skin? This new bleach OxyLife can help.
Powered with the patented OxySphere Technology developed in Germany, OxyLife bleach gives a radiance that a regular facial can never give.
How does OxySphere Technology work?
Enables pure oxygen molecules to be trapped in the product
Oxygen is released from the product at the time of application
Oxygen molecules go inside the skin to give a high boost of pure oxygen
What does OxyLife bleach claim: BECAUSE THAT GLOW ON YOUR FACE IS PRICELESS! Presenting, the original oxygen bleach that makes you look radiant in just 15 minutes – OxyLife. Enriched with active oxygen and post-bleach skin radience serum, OxyLife solves 5 fairness problems like-dark spots, uneven skin tone, dull skin, dead skin cells and sun tan.
What does OxyLife bleach do to your skin?
When OxyLife bleach is applied on the skin, pure oxygen is released.The scientifically formulated bleach has micro structurants which help prevent the released oxygen from escaping into the atmosphere. The oxygen carries active ingredients into your skin, brightens, nourishes, energizes and protects, giving you naturally radiant skin instantly!
How I use:
Wash face with plain water and pat dry.
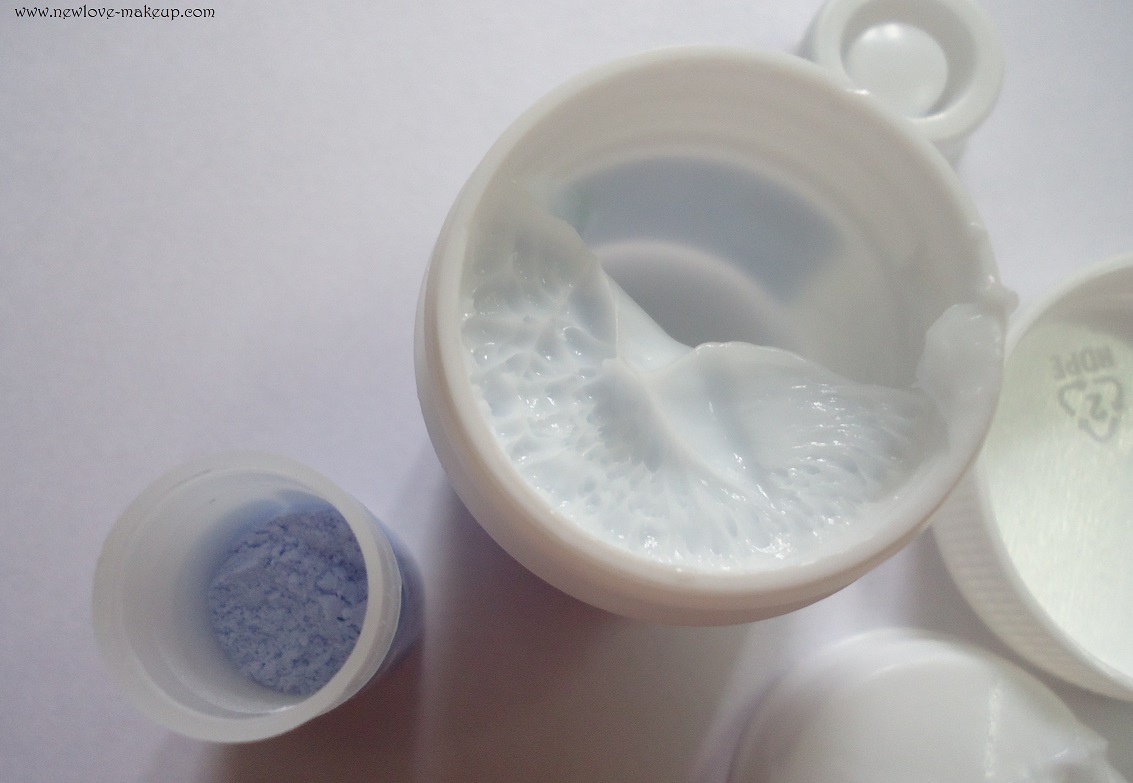
Take crème bleach and powder activator in the ratio of 7:1.
Using the spatula, mix the activator and crème for a good 2 minutes till the powder activator dissolves completely.
Apply the mixture on the area to be bleached. Avoid application on eyebrows and around the eyes.
Allow it to remain for 10-12 minutes
Wash off with cold water.
Apply the post-bleach skin radiance serum on the bleached area
MRP: Rs. 35/- for 7g (1 use), Rs. 80/- for 27g (3 uses)
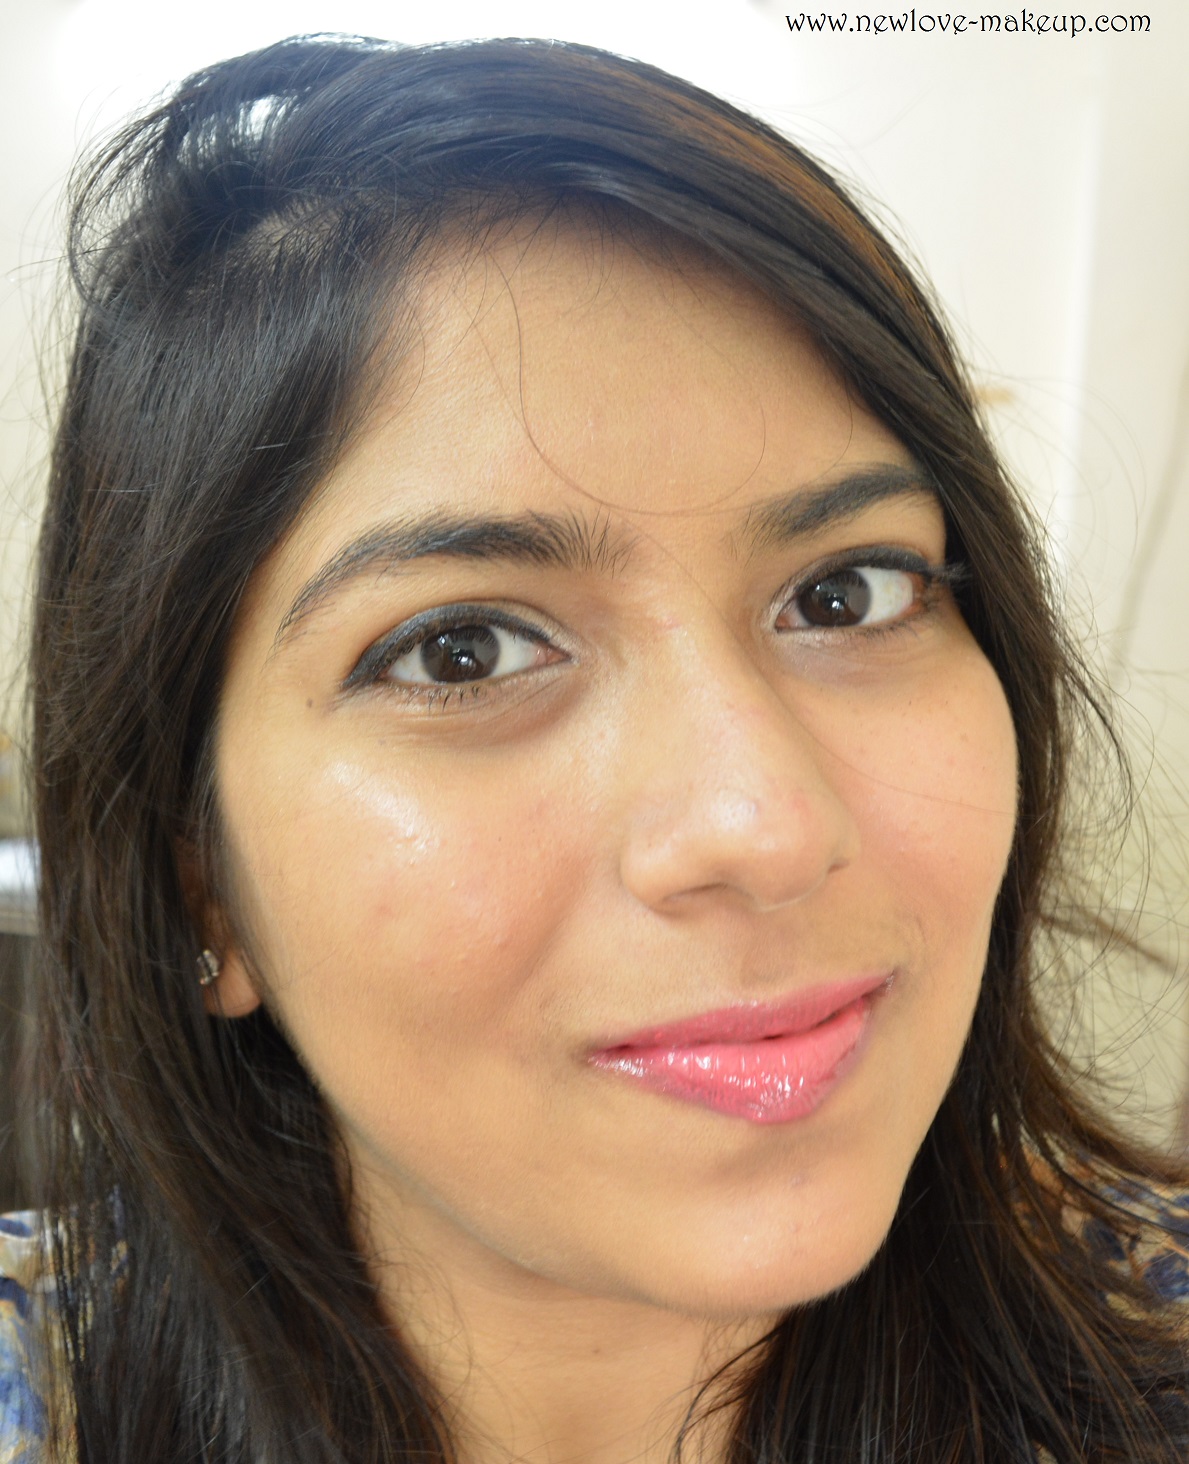
My skin needed that oxygen or that glow, it was starting to look dull of late. So I thought why not give this a try. Also OxyLife Natural Radiance Creme Bleach is ammonia free, that gave me another reason to try it out.
OxyLife Bleach will help get rid of all your dead skin cells, tan and make the frizz on the face lighter in turn giving you a fresh, glowing look.
I tried the single use pack of OxyLife Natural Radiance Creme Bleach, I feel the single use pack is better as it comes pre-measured and there is no risk of too much cream or activator.
The post bleach skin radiance serum is transparent and gel like in texture. It glides on smoothly on the face and gives a dewy finish to the skin.
My skin looked fresh and radiant, I could see a visible difference. I have a bit of fuzz too, so with that being light and the tan and dead cells gone,my skin looked amazing. I believe the effect would easily last for 2-3 weeks.
Absolutely loved the OxyLife Natural Radiance Creme Bleach and recommend it. For people who regularly bleach, you can try this out next and for people who want to get into bleaching, start with something mild like this one.
I am not into regular bleaching but whenever I do, I will prefer OxyLife Bleach, definitely #SayYesToOxygen
Have you tried the OxyLife Natural Radiance Creme Bleach? What do you think of it?
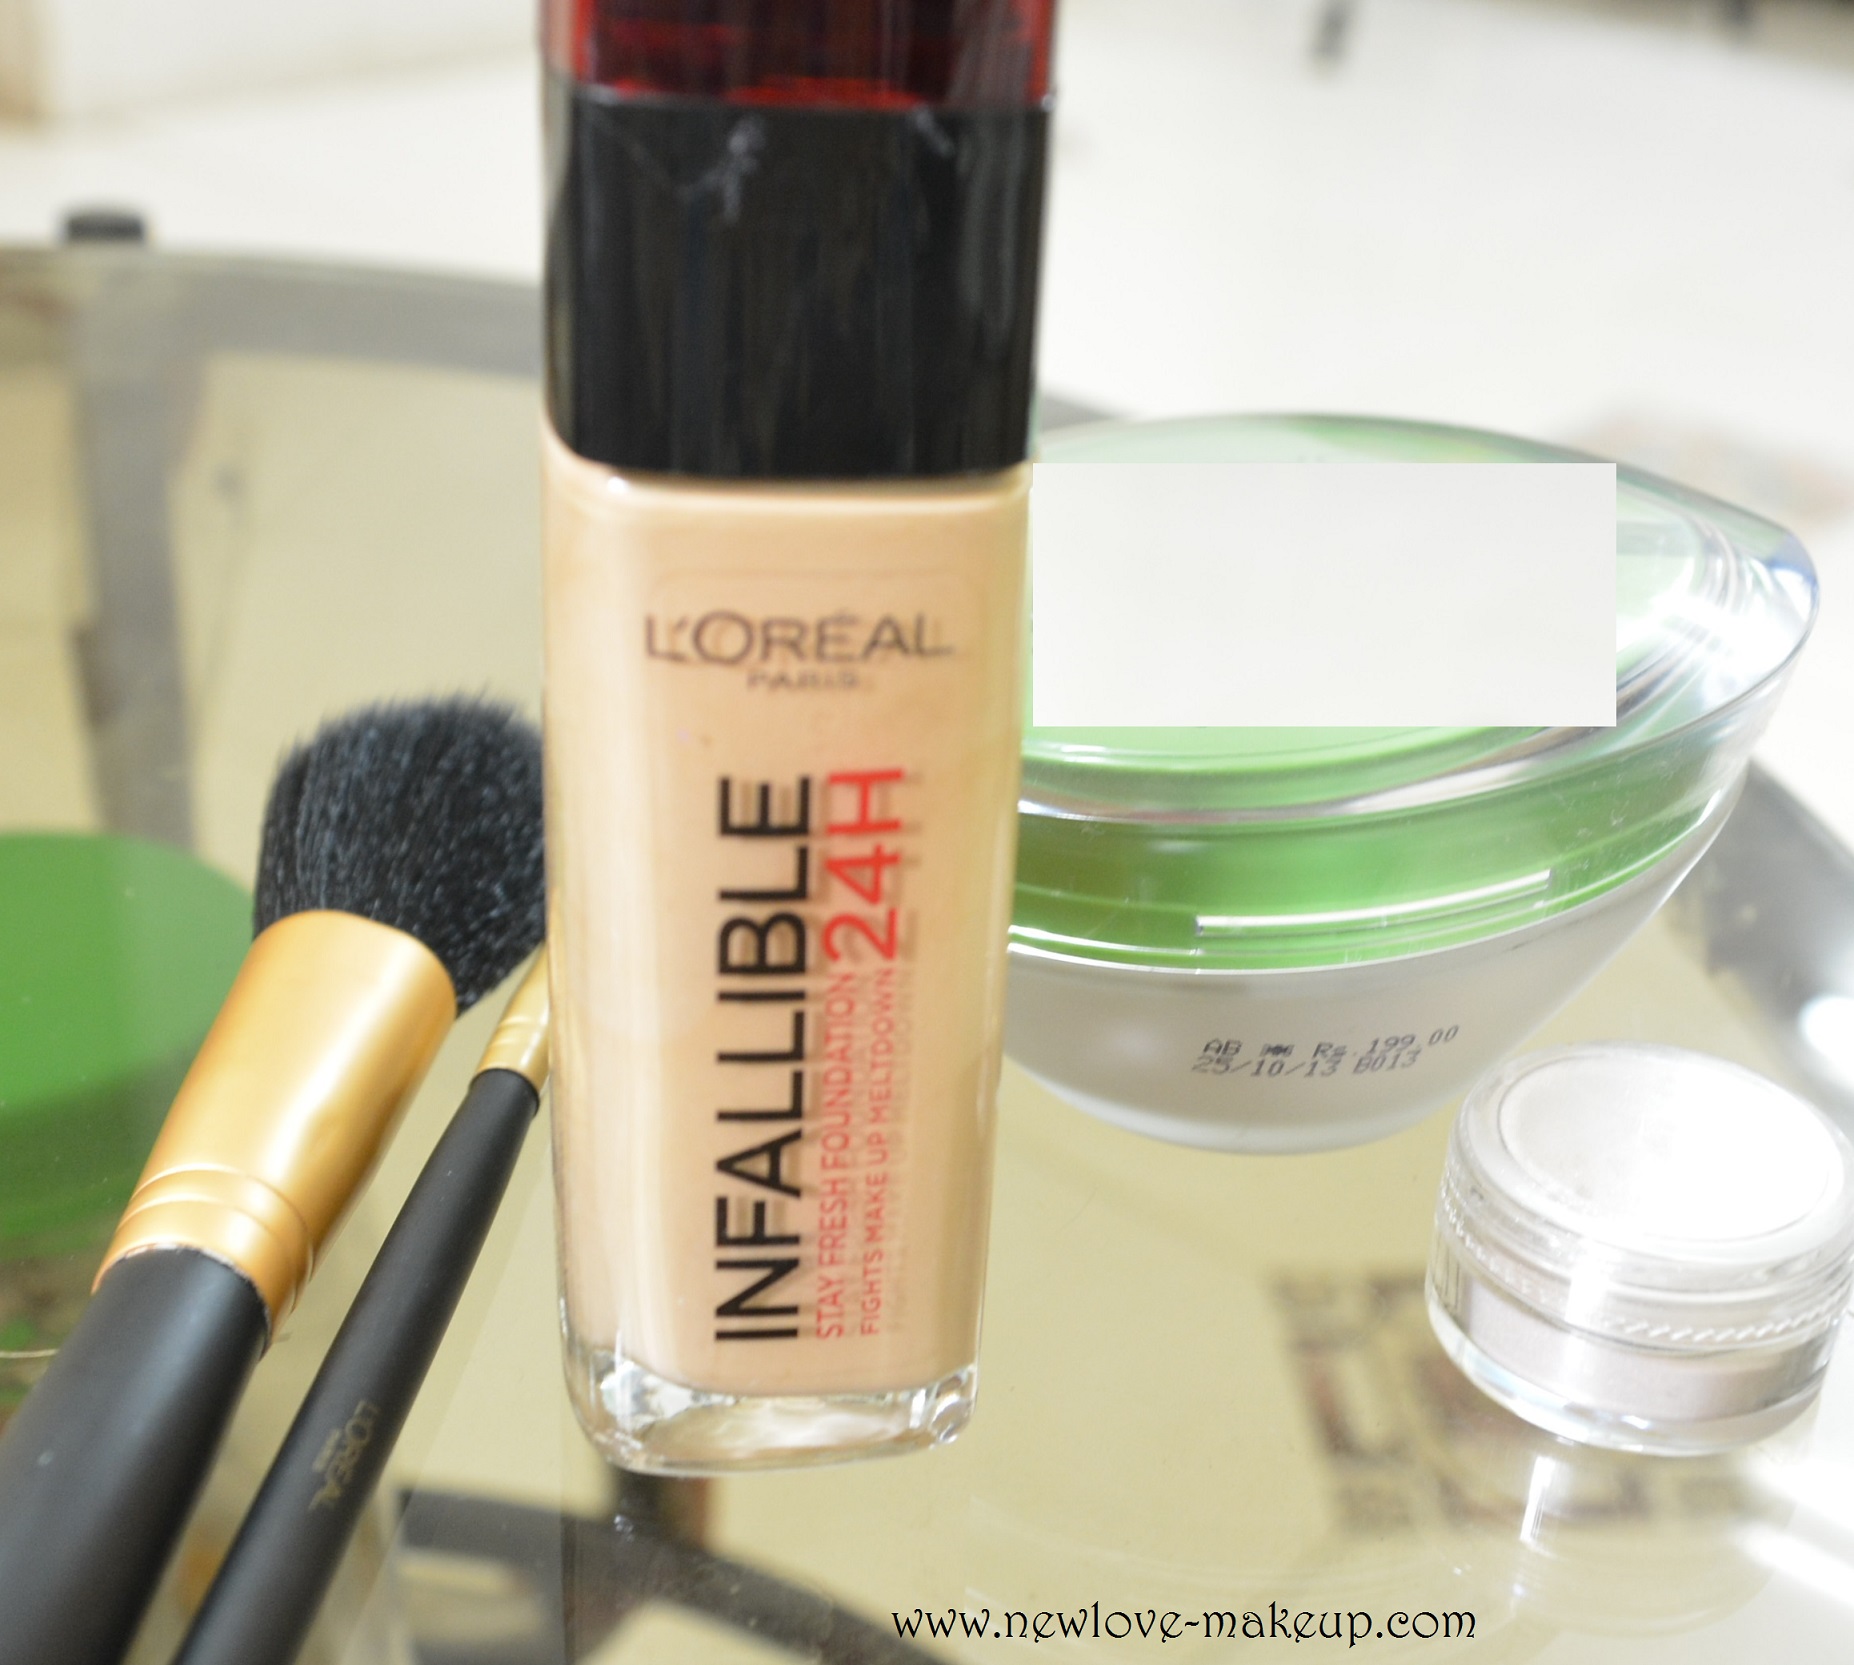
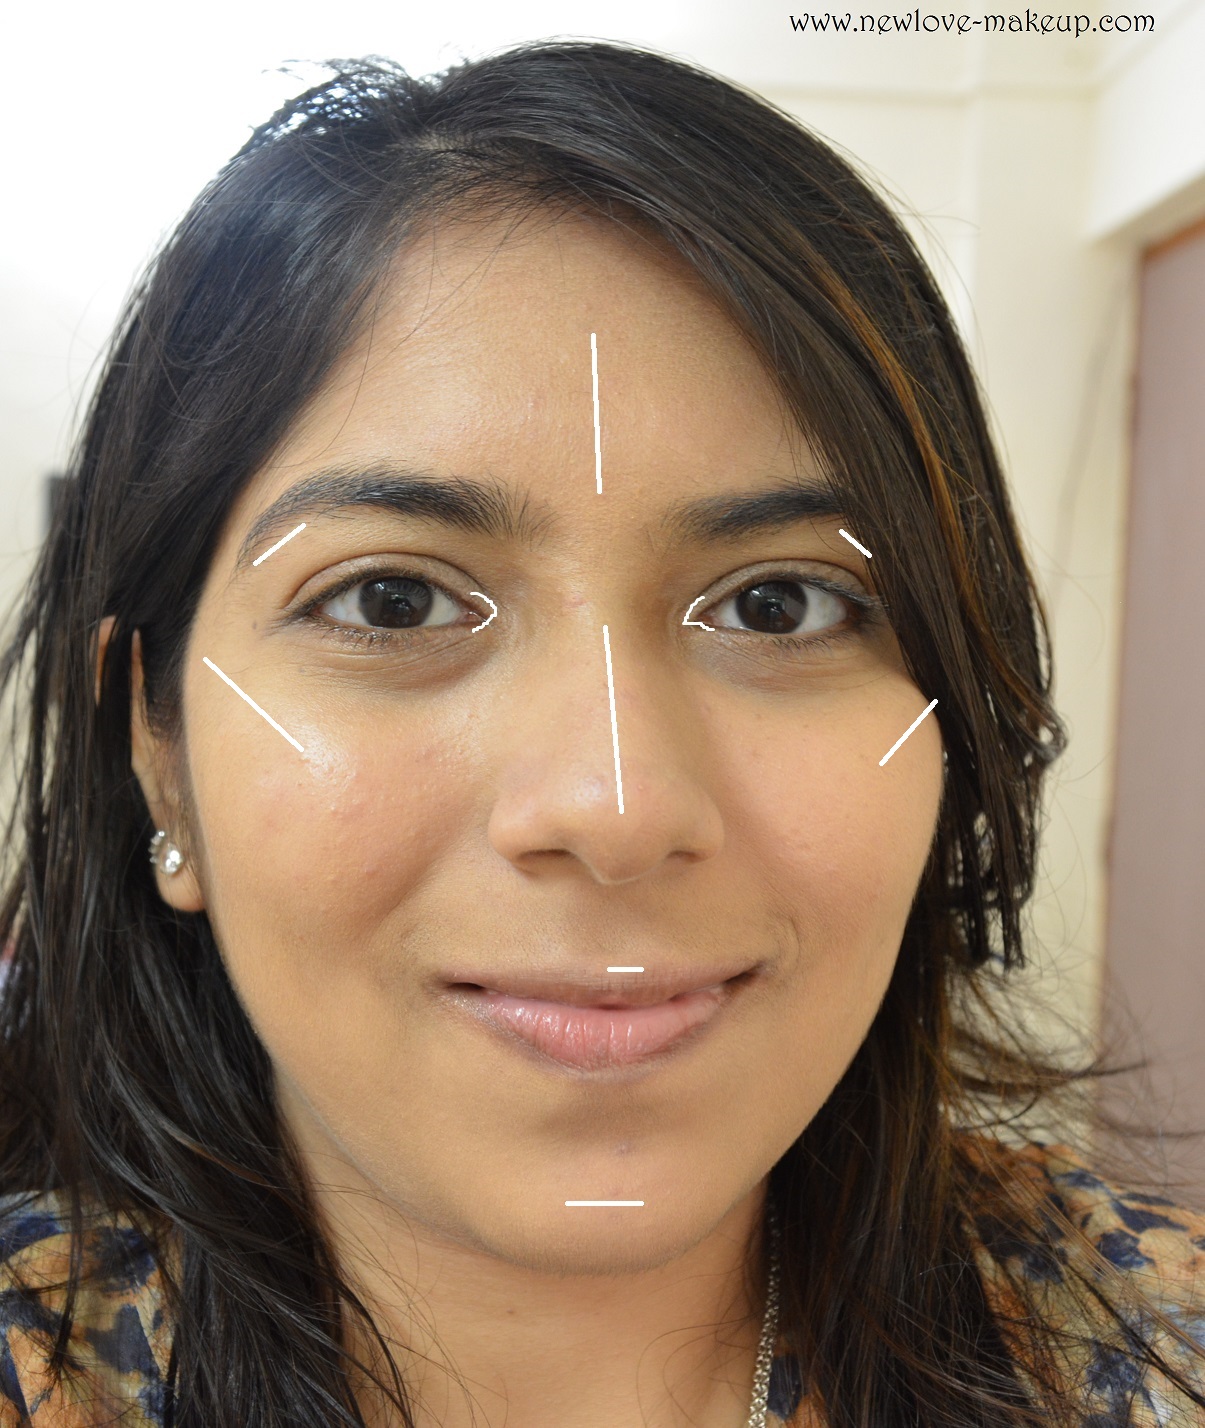
Dewy,Highlighted Makeup Tutorial feat. L’Oreal Paris Infallible Reno Liquid Foundation
Hi guys,
Remember I had reviewed the L’Oreal Paris Infallible Reno Stay Fresh 24H Liquid Foundation HERE, also showed the swatches and demo.
Today I am going to create a soft, dewy makeup look and also show you guys how and where exactly to highlight! Haven’t you heard Strobing is the new contouring! Oh yeah 😉 Well strobing is nothing but a fancy term for highlighting. I have always loved highlighting and I am crazy about highlighters. (I have tons of them from liquid to powder) I was never too much into contouring.
Basically, strobing can be achieved with a few simple tips:
1. Infuse your skincare & makeup i.e mix foundation with your moisturiser for a dewy,soft finish. Add a tiny amount of highlighter too. (liquid or powder)
2. Skip pressed powder except if you have very oily skin. Try using it only on the T-zone
3. Highlight all areas where light naturally hits your face i.e. center of your forehead, brow bone,inner corners of eyes, center of your nose, high planes of cheekbones, cupid’ bow and the chin. See the pic below I have marked the areas. Go easy on the forehead and chin, usually just the residue in the brush.
4. Make sure to blend it all.
Let’s take it step by step:
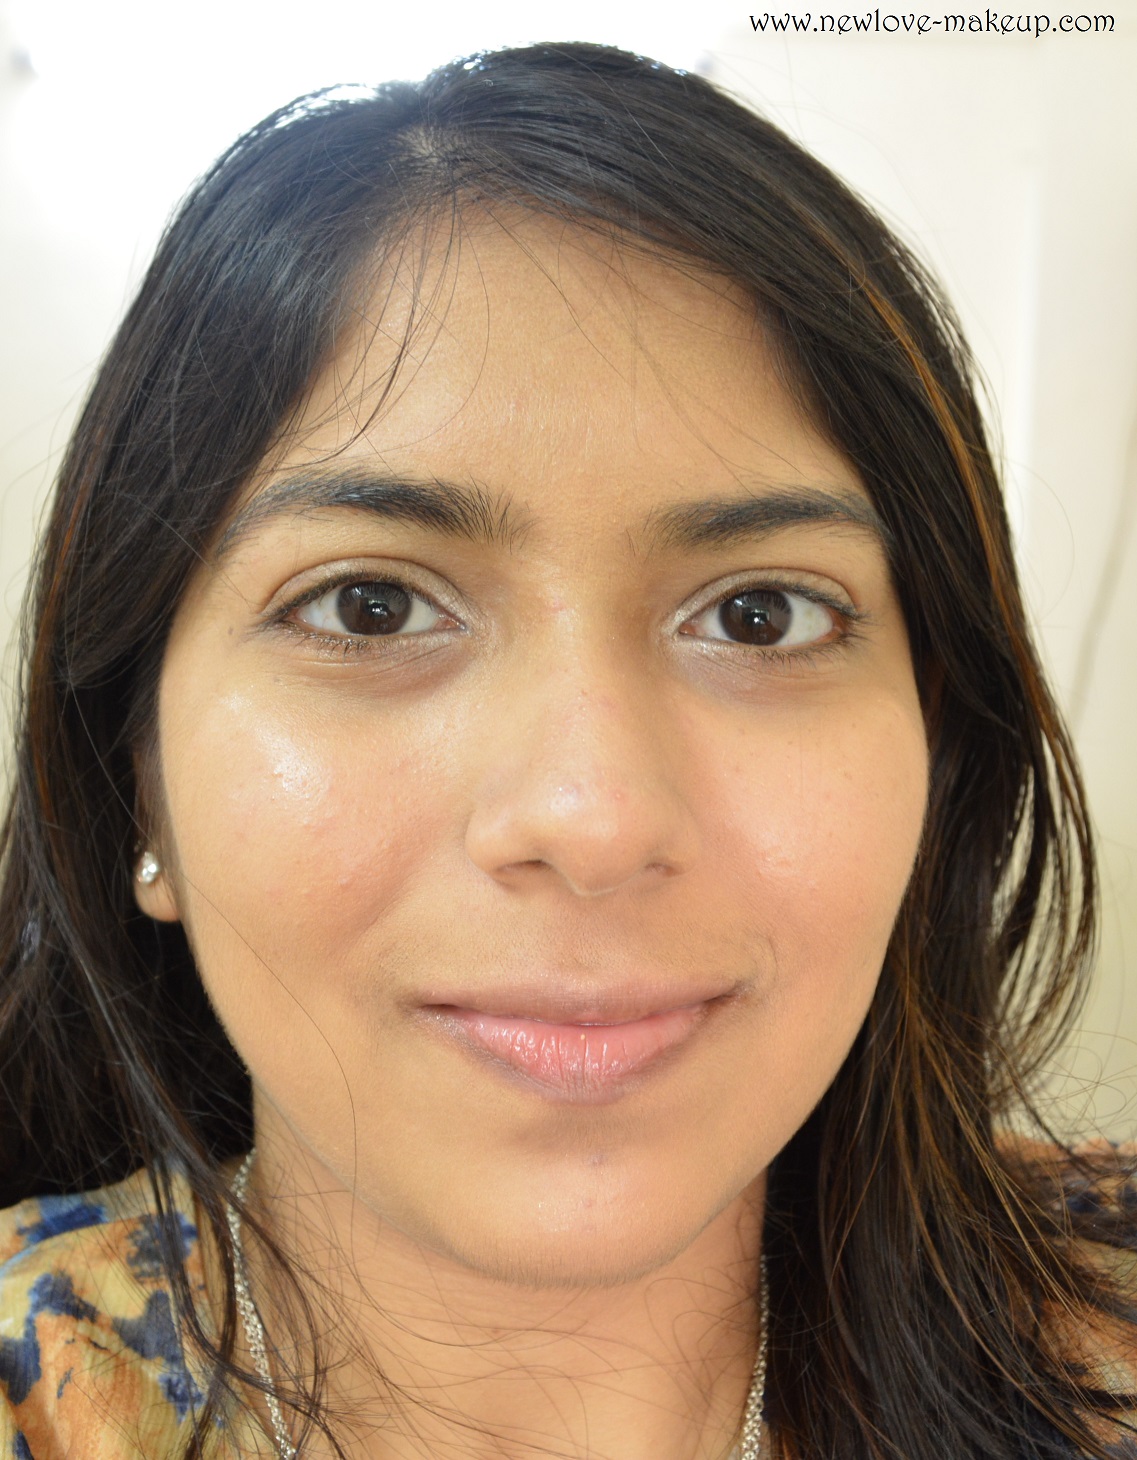
Step 1: A clean canvas. Cleansed face, free of anything. You can use a primer if you want your makeup to last longer.
Step 2: Mix your foundation and moisturiser in equal amount, you won’t need a lot of foundation in this case. Add a tiny bit of highlighter. I am using a powder highlighter here.
Step 3: Dot it all over your face and blend it with a brush or your fingers.
Step 4: Apply a concealer on problem areas or to hide dark circles. I have skipped a concealer here.
Areas to Highlight
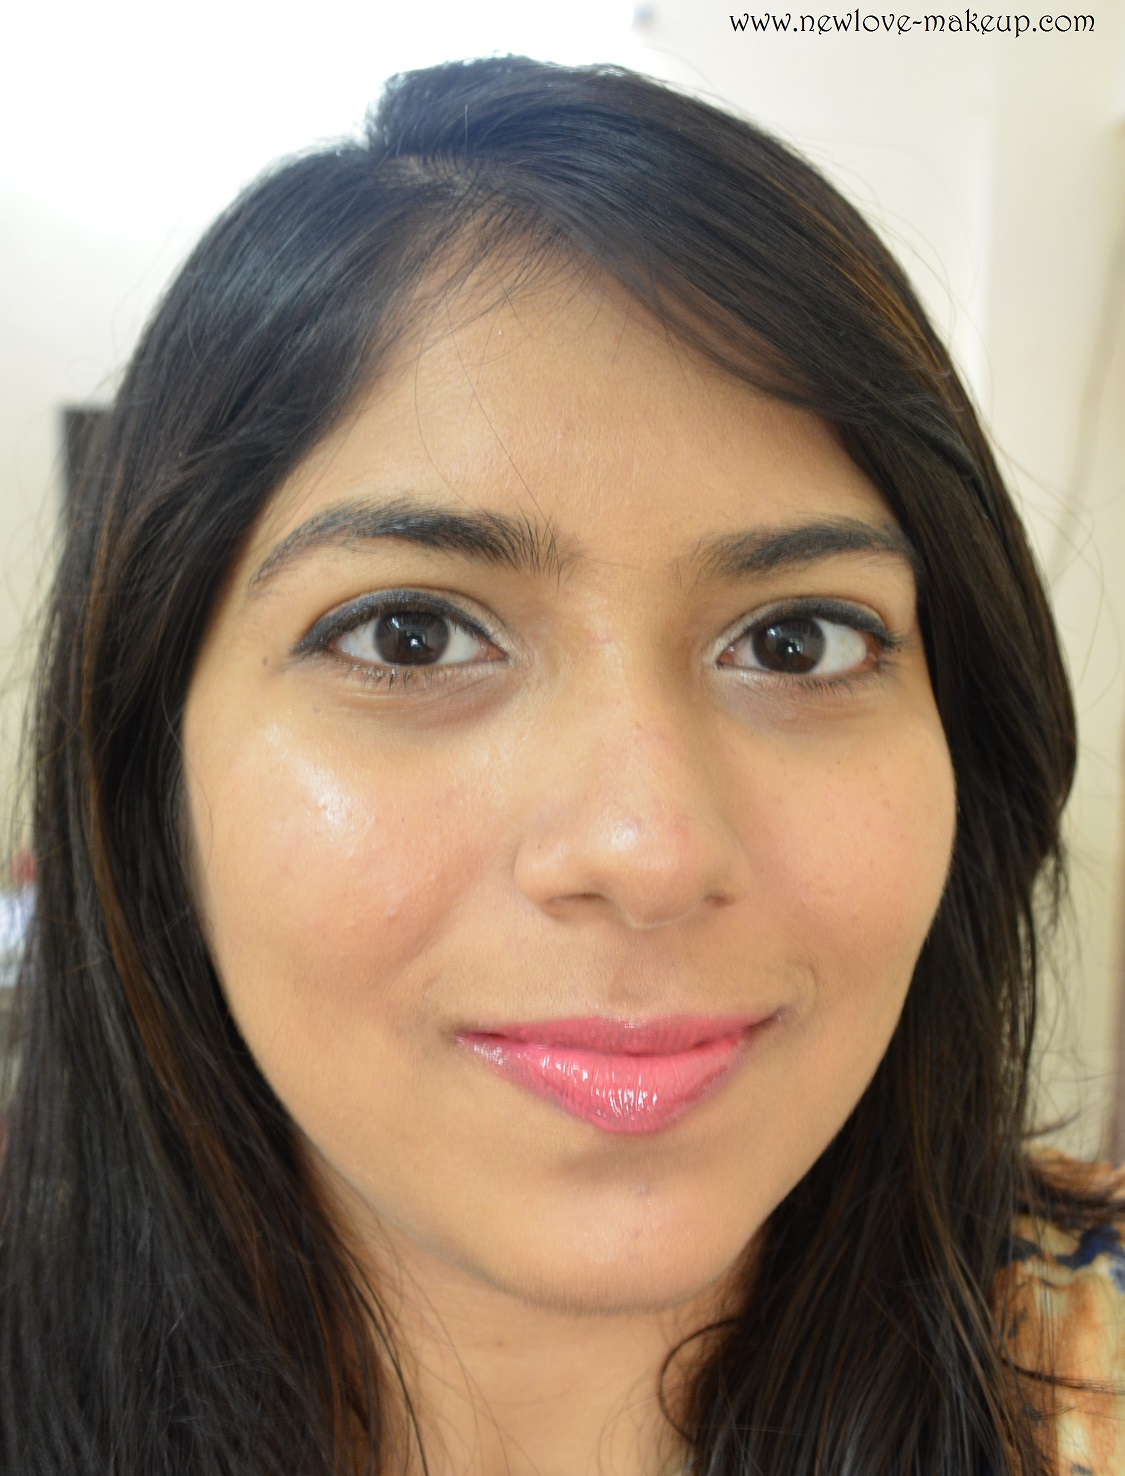
Step 5: Highlight the areas marked here. Take very little highlighter on the brush at a time. Always tap the brush to get rid of excess and go slow as you can always add but not remove. Blend it all.
Step 6: The complete highlighted face 🙂
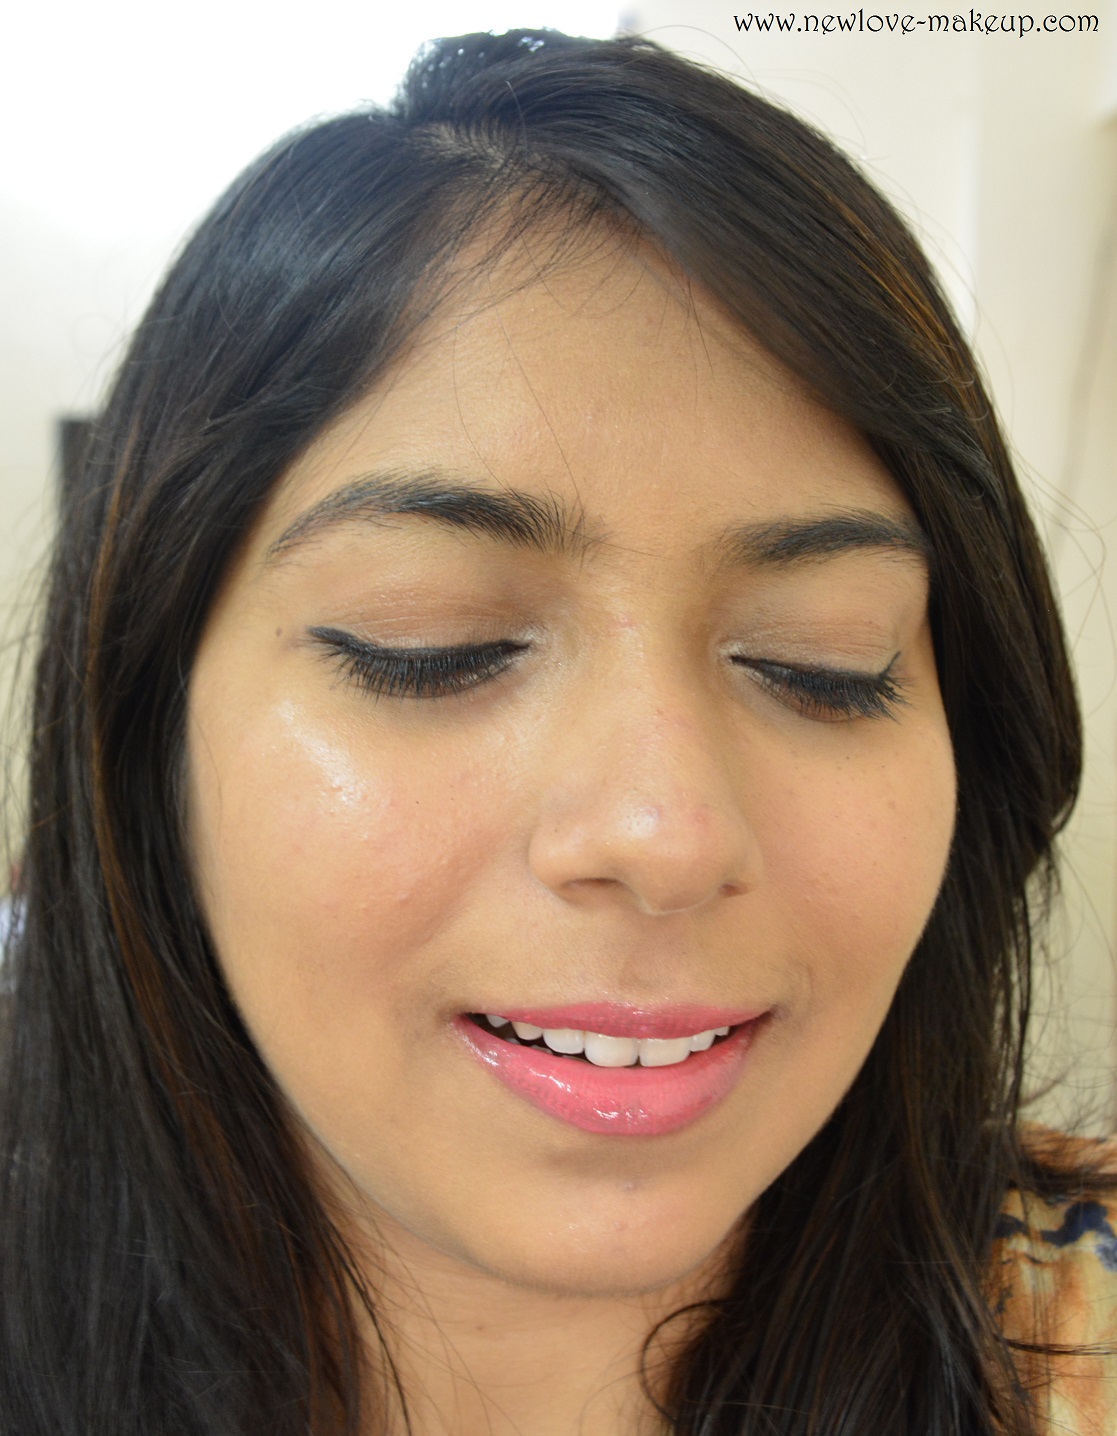
Step 7: Apply rest of your makeup. Eyeliner, lipstick and the usual 🙂 And tadaa..you are done!
Strobing also makes you look younger as the skin looks fresh and dewy. Do you like the final result? Its easy and can be achieved with just a few simple hacks. Let me know if you try it, and also share pics. Tag me on twitter or Instagram @bhumika_t
What do you think of Strobing? Do you like the ‘strobing’ trend?
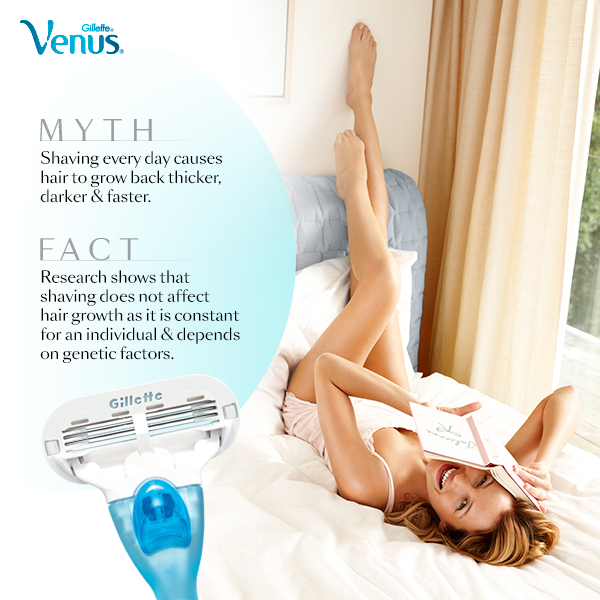
Time for another update of the Gillette Venus #SubscribeToSmooth Challenge. Read more about the event and the challenge HERE and the first update HERE and 2nd update HERE.
Its been almost a little more than a month that I have only shaved my legs and not gone for any other method of hair removal.
In this post I will bust the myths that ‘Shaving causes itchiness’ and ‘Shaving changes hair texture or hair growth’. Well shaving does not at all change the hair texture in any way. As I explained in the first post, it is just the top part of the hair we cut when we shave, so the hair that grows and comes out later is the inside part which is in the roots of the skin,which is a little darker as it has more melanin and hence we feel that the hair is growing thicker and darker. It is just that the hair that was within comes out and we feel it is different when actually it isn’t and it is a part of the same hair. So there is no change in hair texture or color or thickness in anyway due to shaving.
Also I was the one who used to feel very itchy after shaving and that was always my concern, but with the tips I mentioned in the previous post, it has been breeze and I haven’t experienced any itchiness whatsoever. So it is not shaving that caused itchiness, but not following the necessary steps that caused the itchiness.
If compared to other hair removal methods, waxing is something I can’t and won’t prefer doing at home coz of the messiness it involves and always lack the time and patience to visit a salon for the same. I have also tried hair removal creams long back when I was in high school and junior college as doctor had advised me not to wax as my sensitive skin reacted to it then. The biggest disadvantage of hair removal creams is it darkens the skin, I have experienced that personally, with time and regular usage, it did darken the skin slowly. Also, I completely hated the smell of those hair removal creams.
And the biggest advantage of shaving for me currently is,I can do it quickly within a few minutes and anywhere. I just need to carry my small razor with me. What do you guys feel?
You can check out Gillette Venus’ facebook app to know more about shaving or follow them on twitter. You can buy the Gillette Venus Razor HERE, the set of cartridges HERE or the combo pack of all with the Satin Care Gel HERE